
DIY Nature Suncatcher
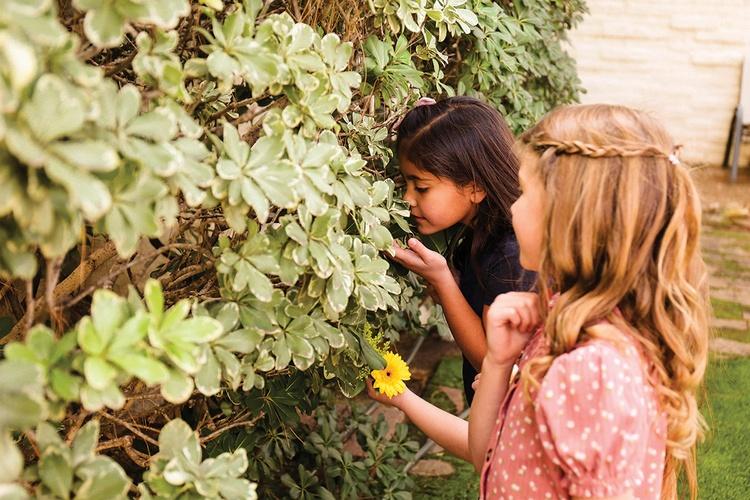
Elinor and her friends are always outside exploring nature. They notice the colors, shapes, and textures of natural items. This craft is a great way to explore nature with your child alone or with a group during a playdate or birthday party.
You can prepare a lot of the supplies ahead of time and just have the kids walk around outside collecting leaves and blossoms to add to their suncatchers. Then, ask your child and their friends how the different natural objects are affected by the sun. Do the colors of the leaves brighten? Do shadows appear on the ground?
Materials
Directions
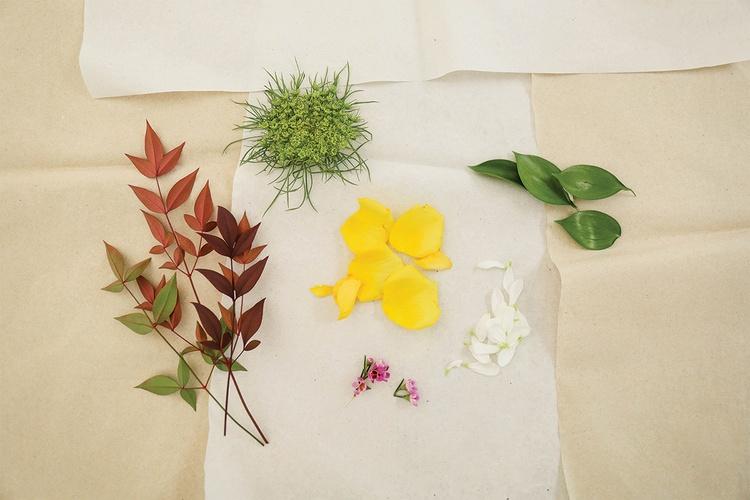
Go on a walk, explore the neighborhood and collect different fallen flowers and leaves on the ground. If you are unable to collect items on a nature walk, you can use greens and flowers from a small bouquet from your local market!
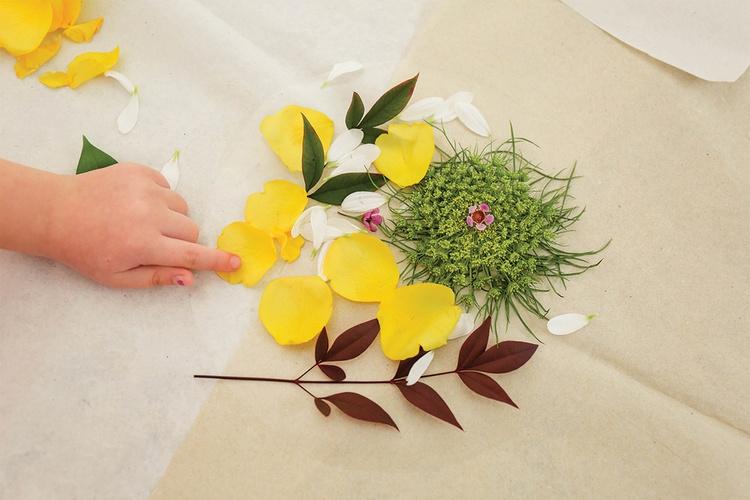
After your walk, organize the items by color or kind.
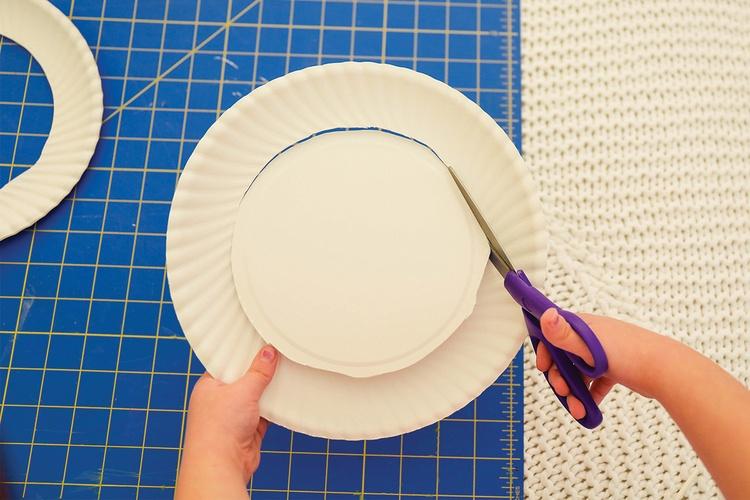
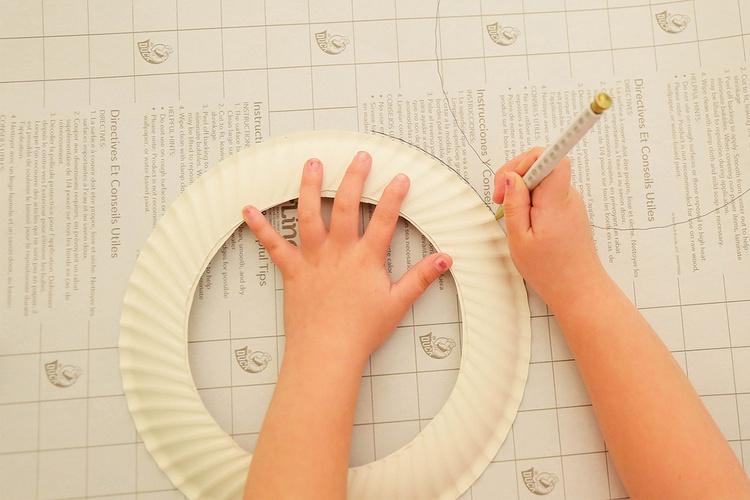
You will need two paper plates for each suncatcher. Cut out the center of each plate.
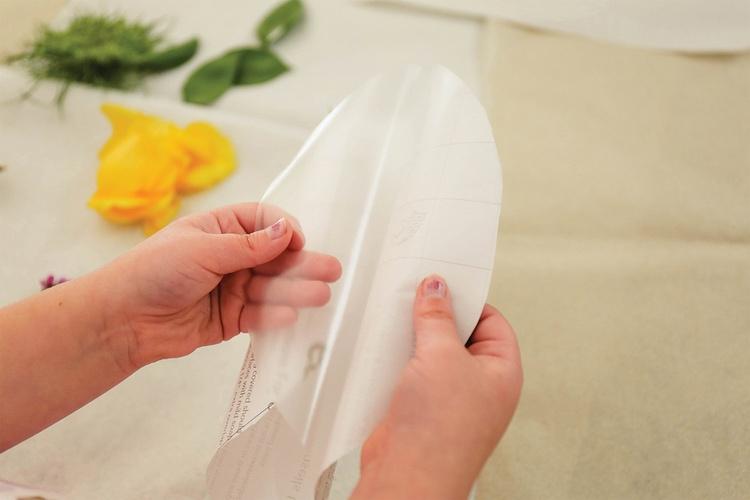
Unroll the contact paper, and place one paper plate on top of the grid side. Trace around the edge of the plate onto the contact paper. Repeat these steps for a second circle.
Cut out both contact paper circles.

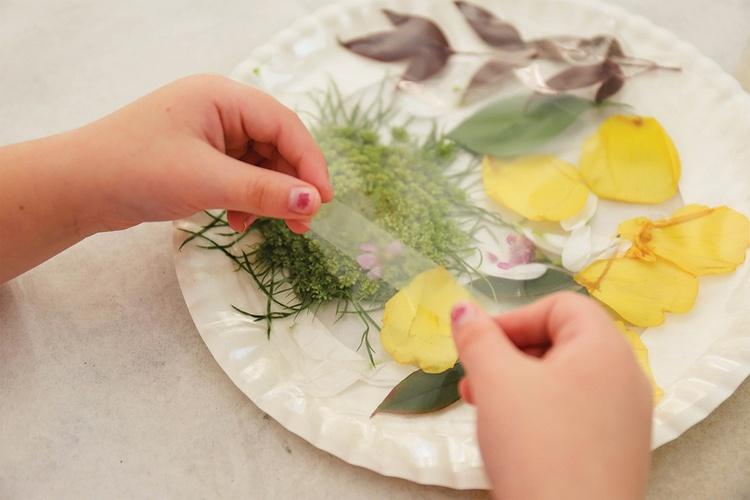
Peel away the grid liner of one piece of contact paper and lay on a flat surface, sticky side up.
Place the flowers and leaves on top of the sticky circle in whatever pattern you like! Have fun with this and really encourage the kids to create their own pattern or place the flowers however they like.
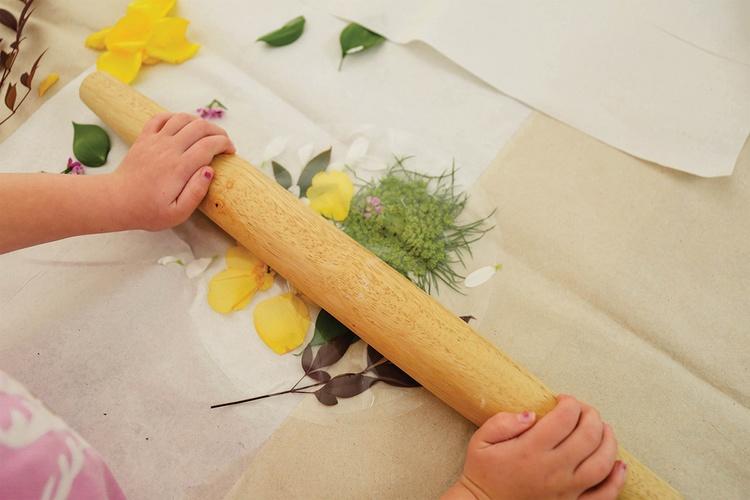
After you have finished with the flowers, place the second circle of contact paper on top. Remove the grid liner and press the sticky side down on top of the flowers and leaves. Press down firmly to flatten as best as you can. If you have a rolling pin, you can use it to gently roll over and press the circle.
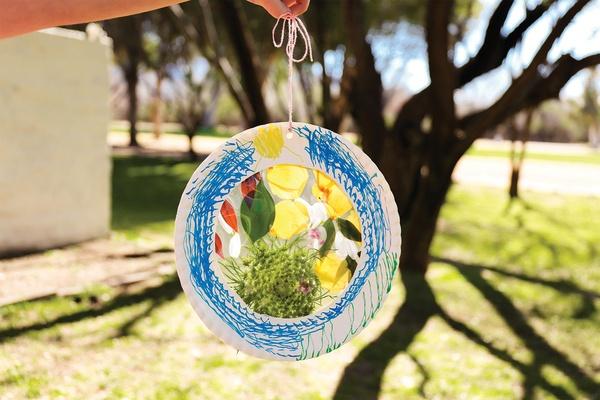
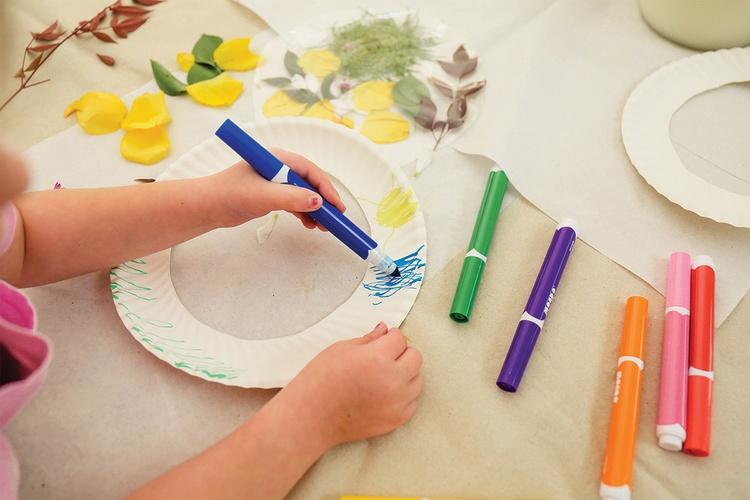
Decorate the rim of one of the paper plates. This will be the front and will create a “frame” for the suncatcher.
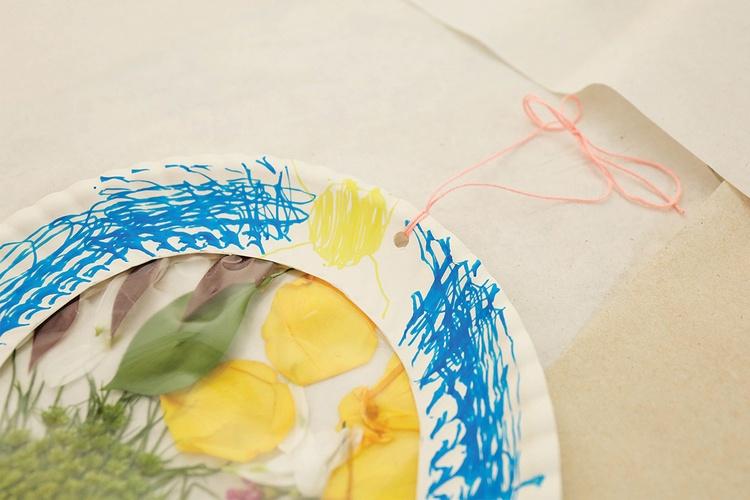
To secure the “flower” circle between the two pieces of paper plates, simply put several pieces of double-sided tape along the edge of the back of the contact paper circle. Lay it down onto the bottom paper plate and press firmly around the edge to secure. Repeat these steps to the top edge of the contact paper and place the decorated paper plate on top.
After all of the layers are together, punch a hole in the top edge and thread a piece of string or yarn through and tie in a loop.
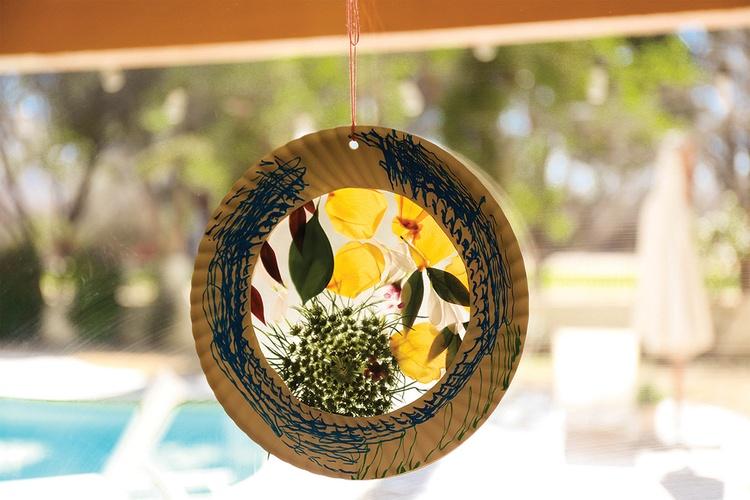
Hang in a window to catch the sun and admire the colors of the flowers and leaves that were used!
Sensory-Friendly Adaptation
The clear contact paper may be too sticky for your child. Have them use small tongs to pick up the pieces of flowers and leaves and place them on the contact paper instead. Use adaptive scissors for children with fine motor challenges. Adding additional string with beads (using the hole punch) around the bottom edges of the suncatcher may provide additional tactile pleasure for your child.
Elinor and her pals would be proud! These suncatchers are a great activity to do at a party and kids will love taking them home and showing off to their families!
Like this activity? Make a butterfly costume to continue the fun!
 Author: