DIY Ornaments Inspired by “Elinor Wonders Why”
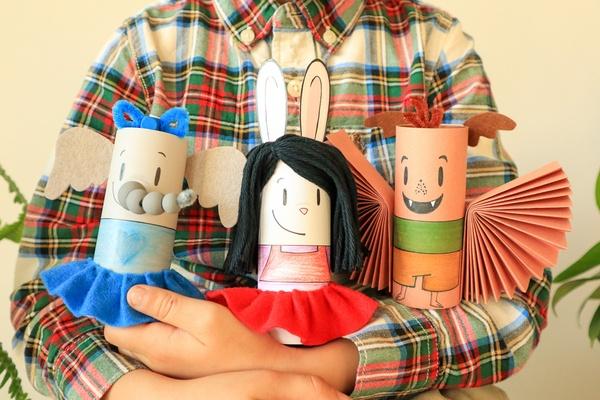
Celebrate the magic of the season with your preschooler by creating DIY ornaments inspired by "Elinor Wonders Why." As they explore Animal Town together, Elinor and her pals Ari and Olive share valuable lessons about respect, diversity, teamwork and taking care of the environment. This DIY project transforms old paper rolls into meaningful treasures for your home, encouraging teamwork and sparking your child's boundless creativity — just like in "Elinor Wonders Why."
In this activity, your child will work on fine motor skills and hand-eye coordination as they string beads, fold paper, and much more! Making these ornaments together is not just about crafting — it's about creating memories that will stay with you both forever. Every year, as you display these unique decorations, your child will remember the good times you had making them together.
Materials
Directions
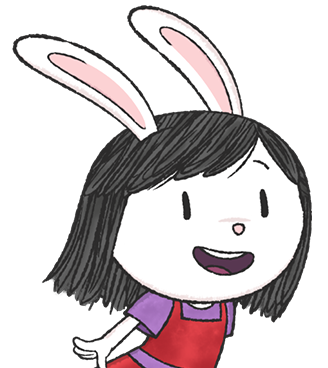
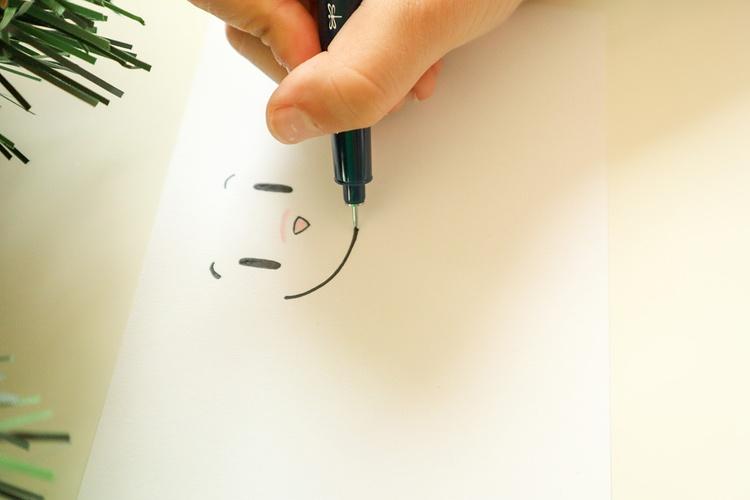
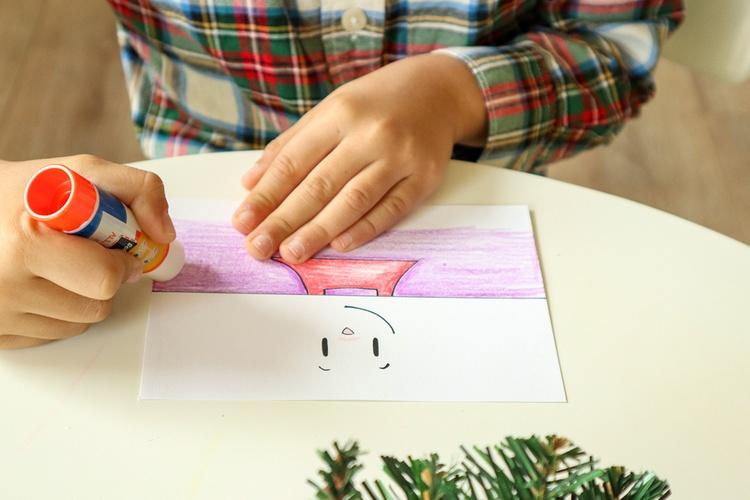
Cut a rectangle out of white construction paper. It should be long and wide enough to wrap around the paper roll (about 4 inches x 6 inches). Next, draw Elinor's face in the center of the paper using a black marker. Begin by drawing two oval shapes for the eyes and two short arches just above them for the eyebrows. Then, draw an upside-down triangle and color it pink. Below the pink nose, sketch a long arch to create Elinor's smile.
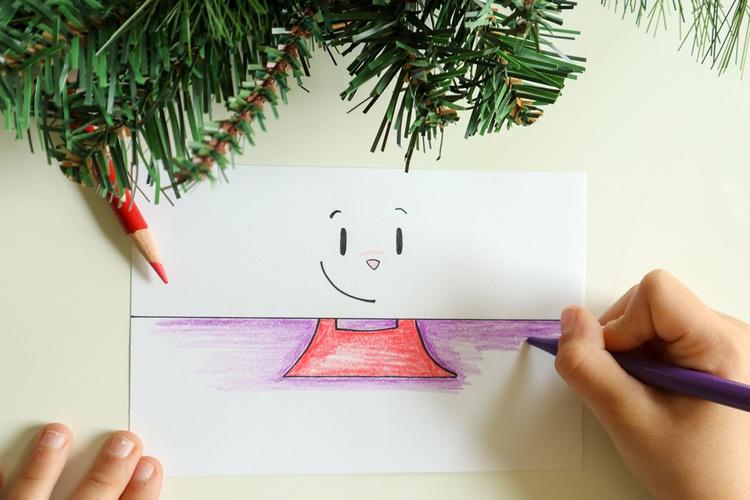
Draw a straight line below the smiley face using a black marker. Create Elinor's T-shirt by drawing lines and curves like in the photograph below. Then, encourage your child to color the top of her dress red and the remaining space (her t-shirt) purple.
Apply glue to the outside edge of the paper and wrap it around the paper roll. Make sure there's a slight overlap of the paper edges. If you want to add more stability, you can use tape along the seam.
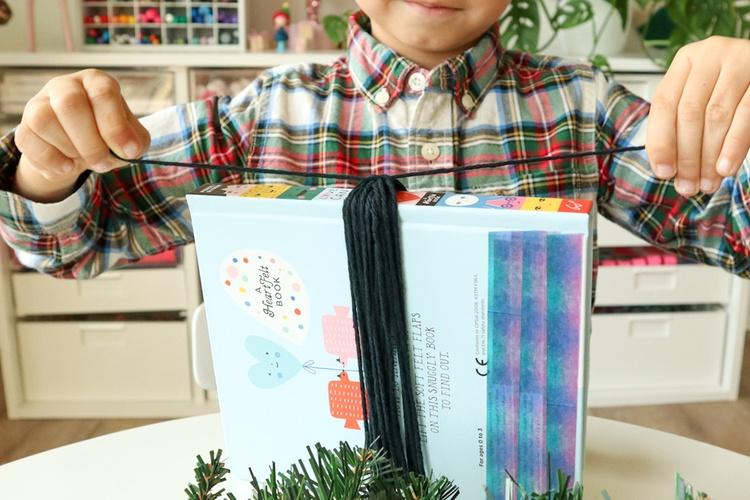
Wrap yarn around a book or a piece of cardboard at least 16 times for an even layer. Use another short length of yarn, slide it under all the strands, and tie a knot on top of the wrapped yarn. Cut the yarn wraps at the opposite edge. Repeat this process twice to achieve a full head of hair for Elinor.
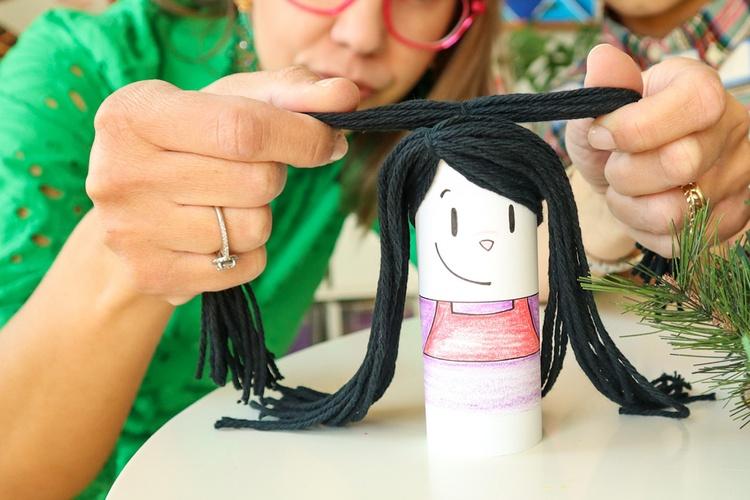
Apply glue to the top edge of the paper roll, then attach the first set of yarn to the roll. Create Elinor's fringe by wrapping a few pieces of yarn around the roll and securing them with glue on the back. Move on to the side edges of the paper roll and attach another set of hair using glue. To finish, apply glue to the top back edge of the paper roll and attach the last set of yarn. Trim the hair to achieve a uniform length. Hot glue works best at keeping everything secure, but only grownups should handle that part!
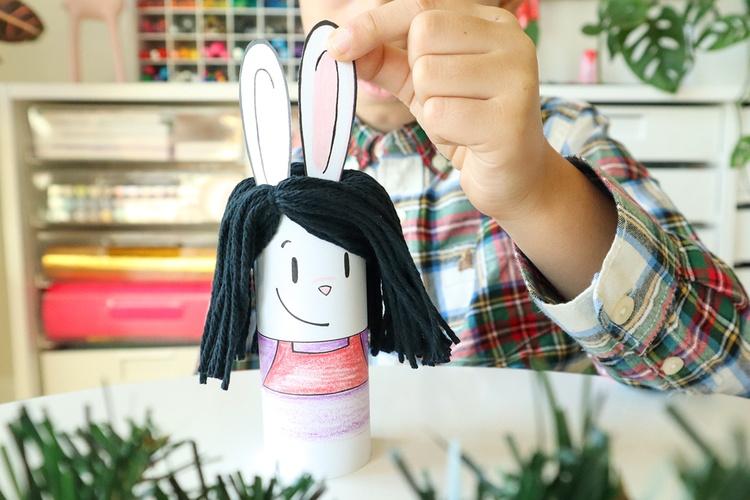
Cut out two identical narrow arches (approximately 2 1/2" long) from the remaining white construction paper for Elinor’s ears. To create the inner ears, draw a smaller oval shape within each ear using a pink pencil. Then, outline the ears with a black marker to complete Elinor's look.

Glue the paper ears to the inside top of the paper roll. Be sure to place the ears between the first and second set of yarn hair to get just the right look!
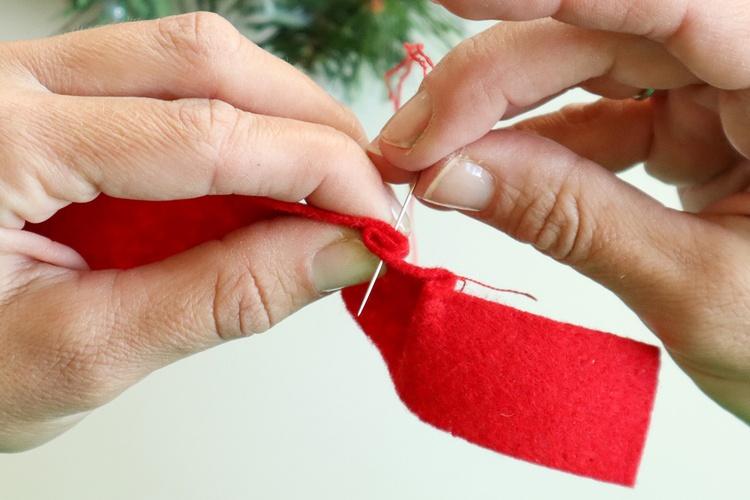
To craft Elinor's charming red skirt, cut a long rectangle from red felt or tulle ribbon, around 1 inch by 10 inches in size. On the top edge of the fabric, create a folded pattern resembling a letter Z when viewed from above. Pinch it together and stitch it in place. Repeat this process at least six more times to form the folded pattern. Leave the beginning and end of the fabric straight, allowing you to wrap it around the paper roll and glue it to the back. Use more glue underneath the skirt to ensure it remains in place.
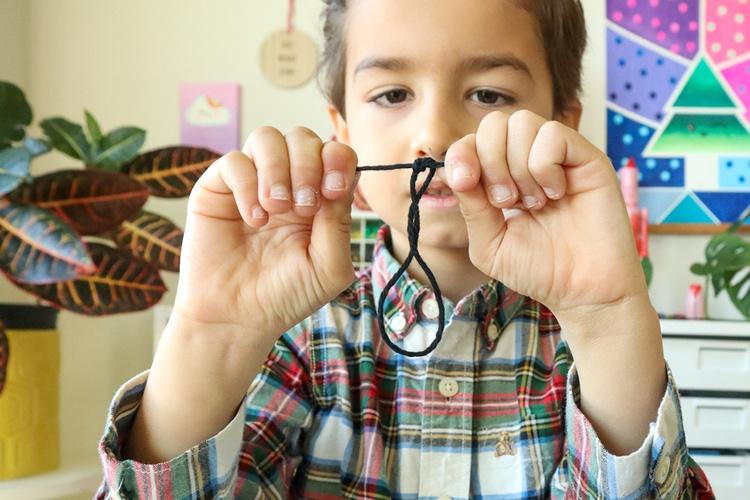
Create a small yarn loop, then attach the knotted end of the loop to the inside of the DIY ornament with glue. To keep the yarn loop in place, cut a small square of felt or paper and attach it to the knotted end of the loop using glue.
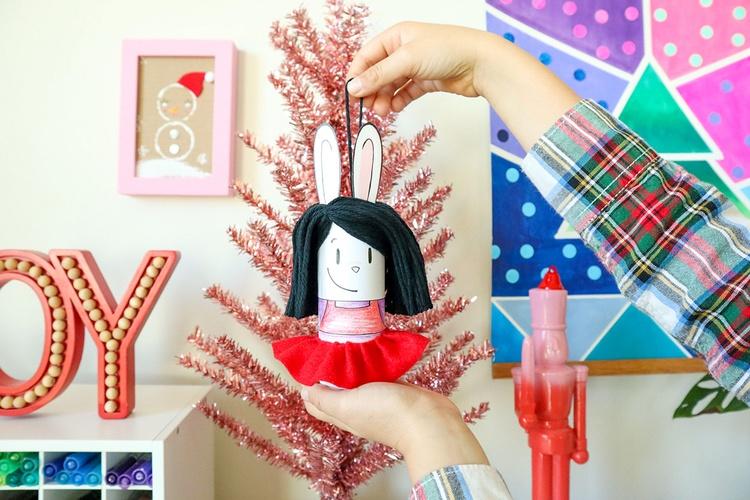
Hang your own handmade ornament with a sense of pride and accomplishment! Inspired by 'Elinor Wonders Why,' where Elinor's adventures inspire curiosity, encourage your child to explore and ask questions like, 'What makes winter holidays, like Christmas, special in different cultures?' or 'How do evergreen trees stay green all year, and why are they used as Christmas trees?'"
Explore Further
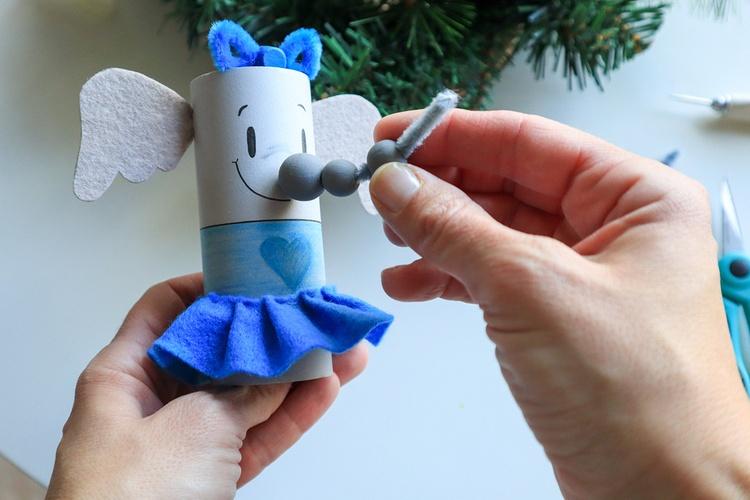
Let's make Olive! Repeat the first three steps from Elinor, but use gray paper and a blue pencil instead. For Olive's trunk, pierce a hole using a needle or a screwdriver and thread a gray pipe cleaner through the hole. Enhance the trunk by adding 3-4 beads to the pipe cleaner. Create a loop by tucking the end of the pipe cleaner inside the last bead. Secure the pipe cleaner by bending the end inside the paper roll.
For Olive's ears, cut out two ears from gray felt or paper and attach them to the back of the paper roll using glue.
To create Olive's charming bow, thread a 4-inch long blue pipe cleaner through a bead. Tuck the ends of the pipe cleaner into the bead and glue it to the paper roll. Remember Olive's skirt! Follow the same steps outlined in step 8 using a blue felt.
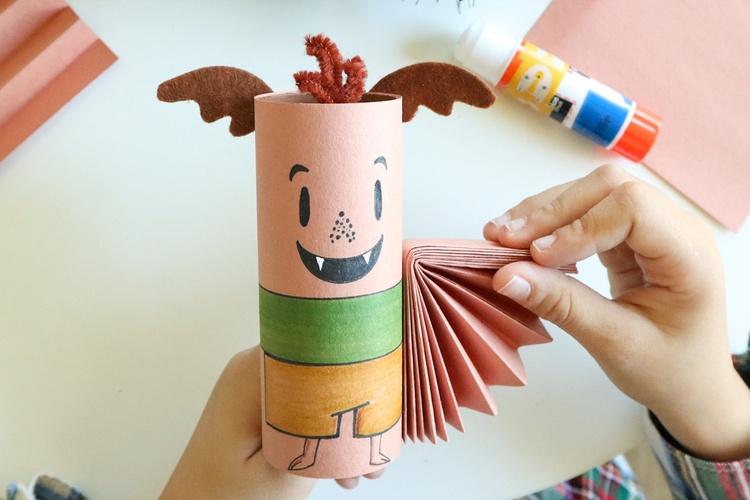
Creating Ari is a breeze! Use brown paper along with green and dark yellow pencils for his clothes. Cut a brown pipe cleaner into three pieces, twist the ends, and use brown felt or paper for ears. Glue the hair inside the top of the paper roll, and stick the felt ears on the back using glue.
For Ari's wings, cut brown paper vertically in half. Make an accordion fold by folding the paper back and forth in a zig-zag pattern. Next, fold it in half and glue the inner sides together to form an accordion arch. Lastly, glue the wings to the paper roll's sides.
 Author: