
Let's Go Luna! Ornament
Sep 16, 2019
Share
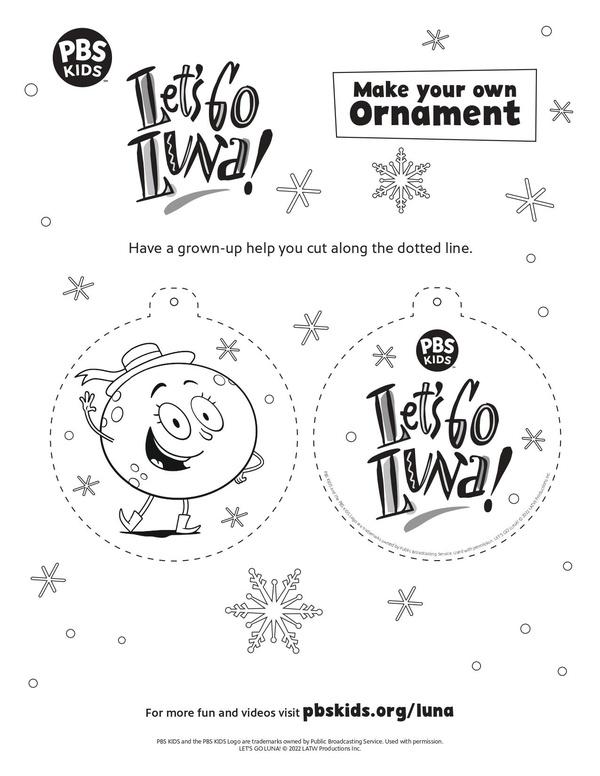
Celebrate the holidays with this DIY Let's Go Luna! ornament.
Supplies
Directions
1
Have your child color the front and back of the ornament.
2
When he has finished coloring the ornament, cut out the front and the back along the dotted lines.
3
If you'd like to make the ornament a bit sturdier:
- Create a third layer for the ornament by tracing around either the front or the back image on a piece of cardboard or card stock to transfer the shape to the cardboard or card stock.
- Cut out the shape you've traced on the cardboard or card stock.
- Glue the cardboard or card stock shape to the back of the front image of the ornament so that the colored side faces out.
4
Glue the front image to the back image so that the colored sides face outward and the features match up.
5
Let the glue on your ornament dry.
6
Once the glue has dried, punch out the hole at the top of the ornament.
7
Cut a piece of string or yarn at least 6'' in length.
8
Thread the string through the hole at the top of the ornament.
9
Tie the two ends of the string together to create a loop.
10
Hang your ornament!
- Activity Type
- Craft