
Make a Reusable Bag From a T-shirt
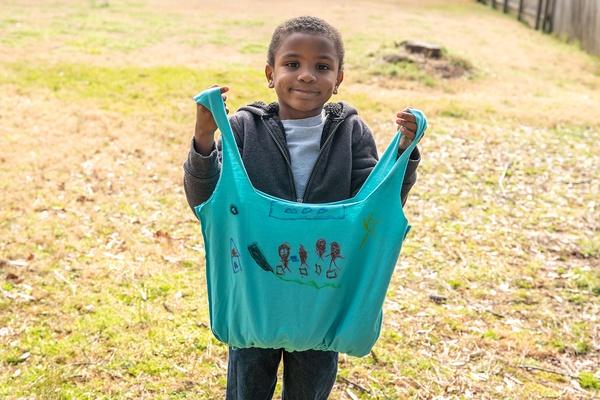
Make this reusable cloth bag out of a t-shirt to bring on your next shopping trip — or use it to collect treasures on your next nature adventure!
Nature Cat and his friends are surprised by how many plastic bags they find on the ground. They discover that a solution to their plastic bag problem could be using reusable bags instead!
You and your family can help cut down on using single-use plastic that can be harmful to nature! Invite your child to make a reusable cloth bag out of an old t-shirt for your next shopping trip — or to collect treasures on your next nature adventure!
Materials
Directions
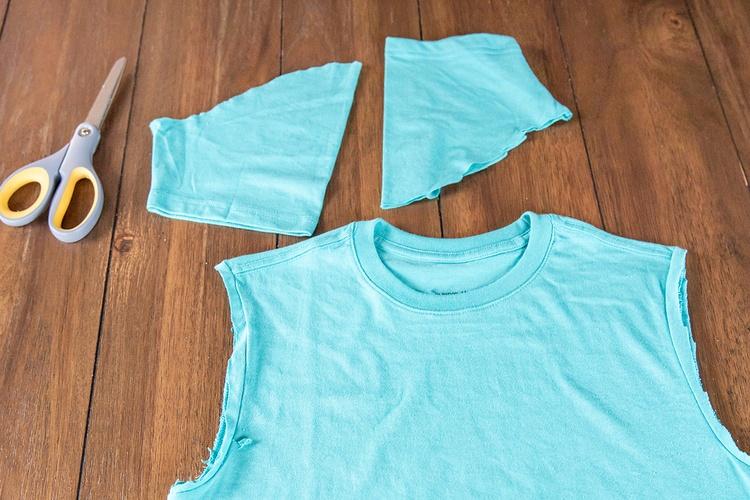
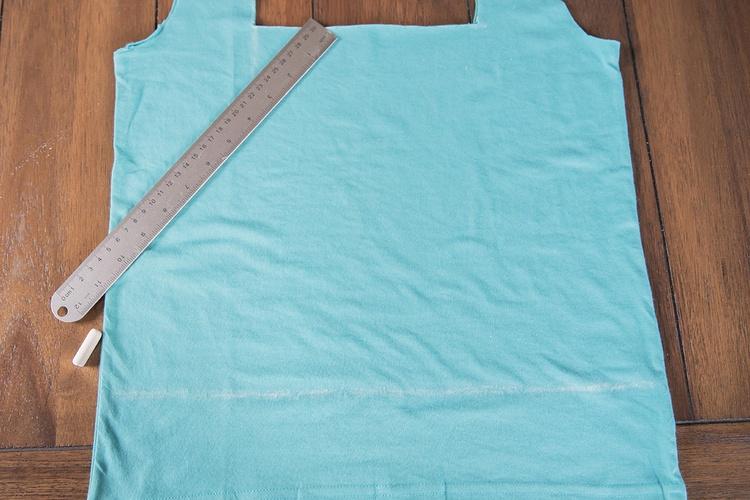
Cut the sleeves off an old t-shirt.
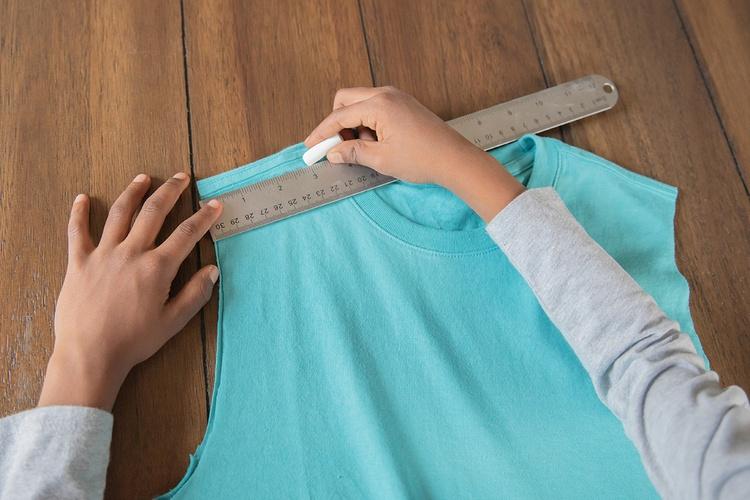
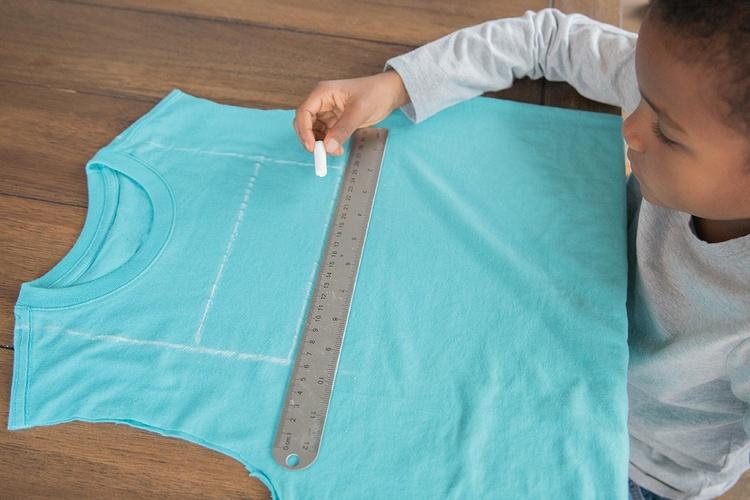
Use chalk (or a fabric pencil) to draw a mark on each shoulder of the shirt, close to the collar, two to three inches from where the sleeve was cut off.
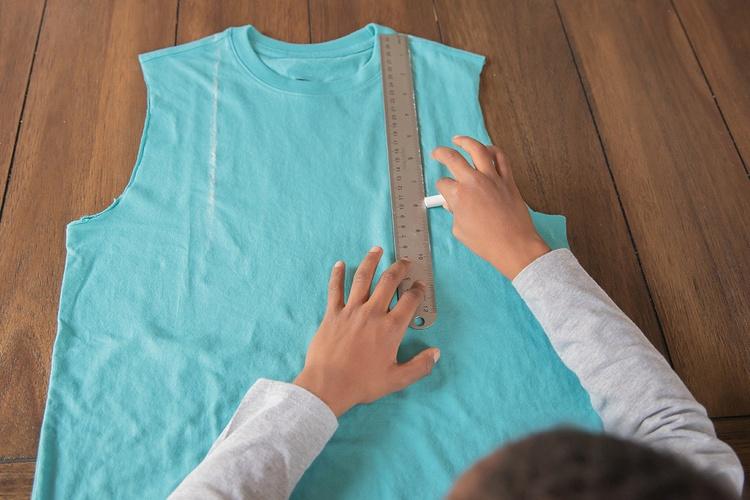
Using a ruler and chalk, draw a line (anywhere from 5 to 8 inches) down from each mark.
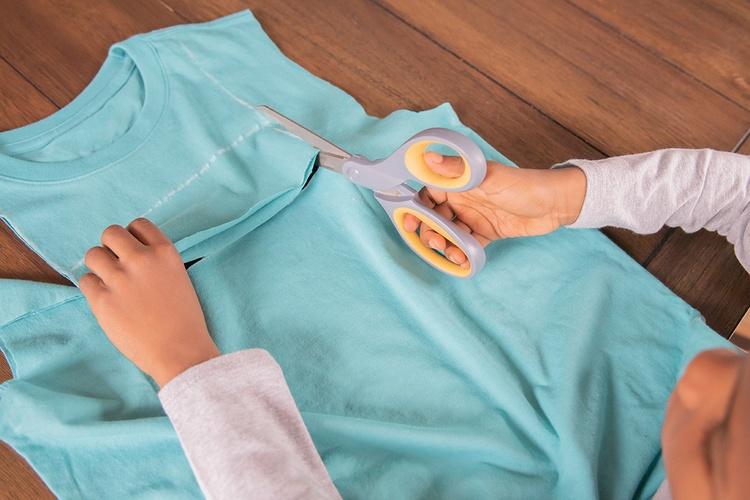
Connect the bottoms of each line to create a line straight across the shirt. This will be the opening of your bag.
Cut along the rectangle, through both sides of the shirt.
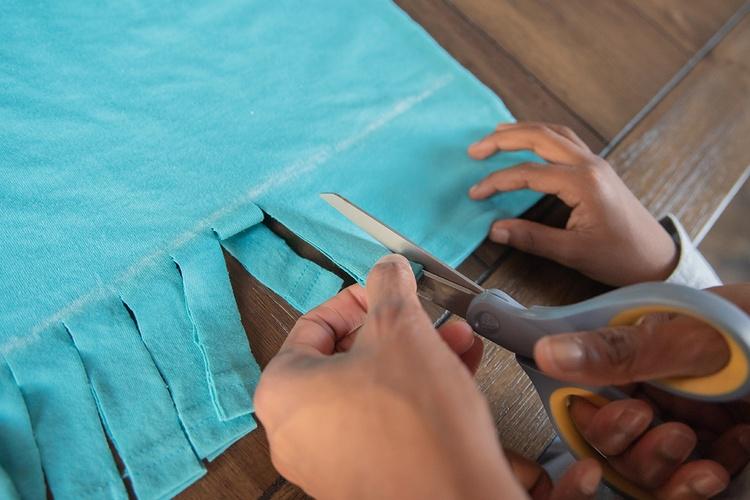
Measure 3 inches from the bottom of the shirt and draw a mark.
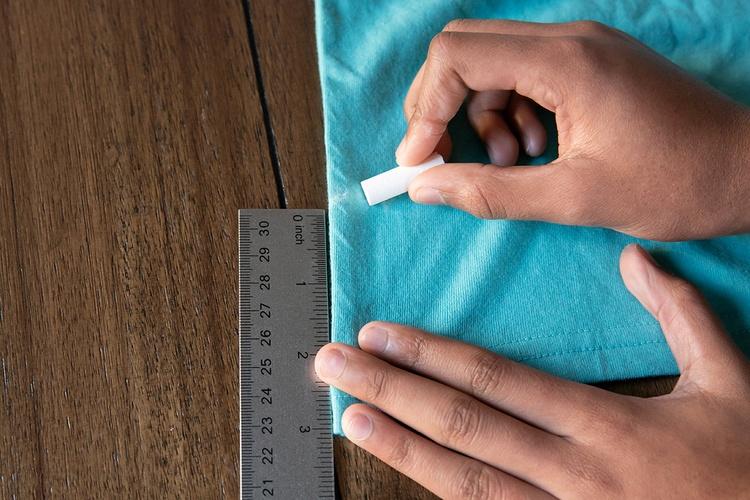
Using your mark as a guide, draw a straight line across the bottom of the shirt. This will be the bottom of the bag.
Cut a line from the bottom, through both sides of the shirt, all the way to the line you just drew. Make several cuts, one inch apart from each other, until the entire bottom of the shirt is strips of connected fabric.
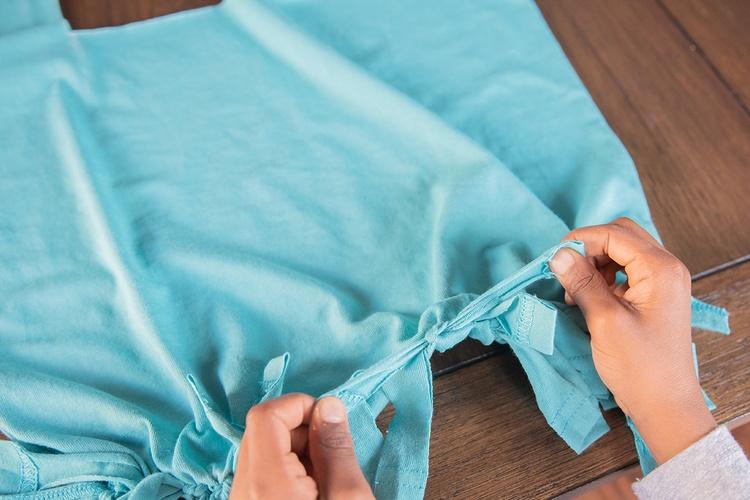
Tie each strand from one side of the shirt to the other side of the shirt in tight double knots to close the bottom of the bag.
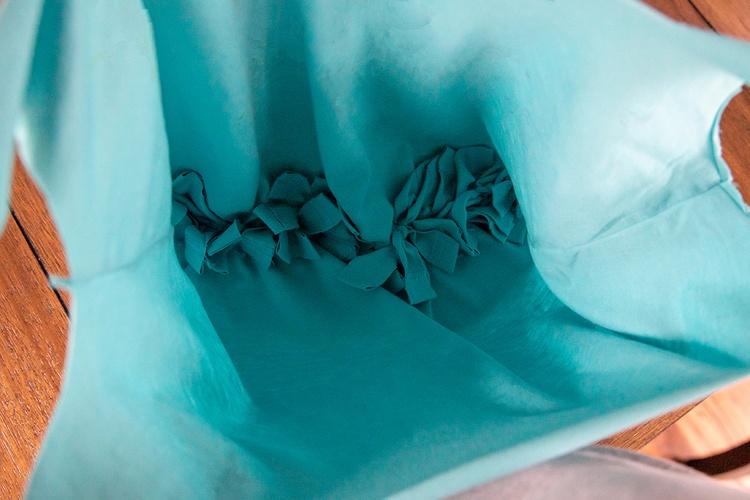
Turn the bag inside out so the knots are on the inside.
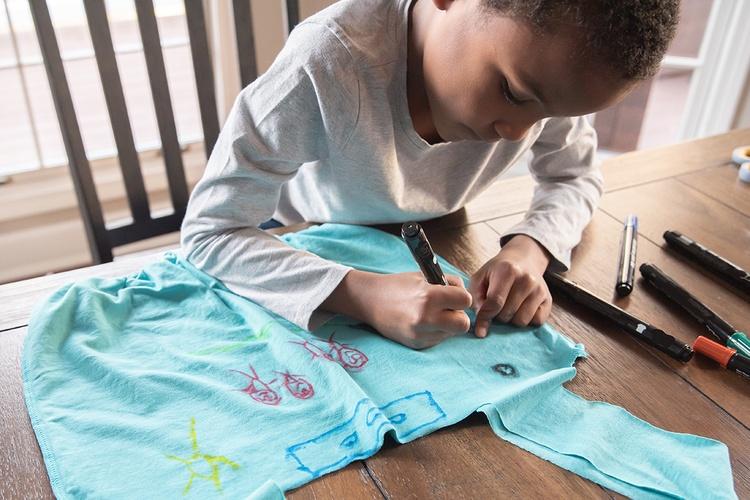
Encourage your child to decorate their bag with fabric markers or however they like.
Optional Iron-On Instructions
If your child would like to decorate the bag with a Nature Cat character, check out Steps 13-17 from the Nature Cat Cloth Bag printable.
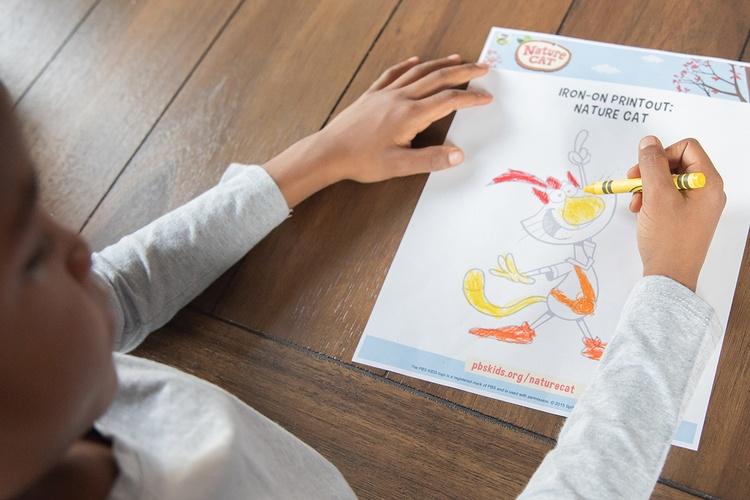
1. Print out the character your child would like to use.
2. Have them use wax crayons to trace the outline of the character directly on top of the printout. Make sure to press hard while tracing!
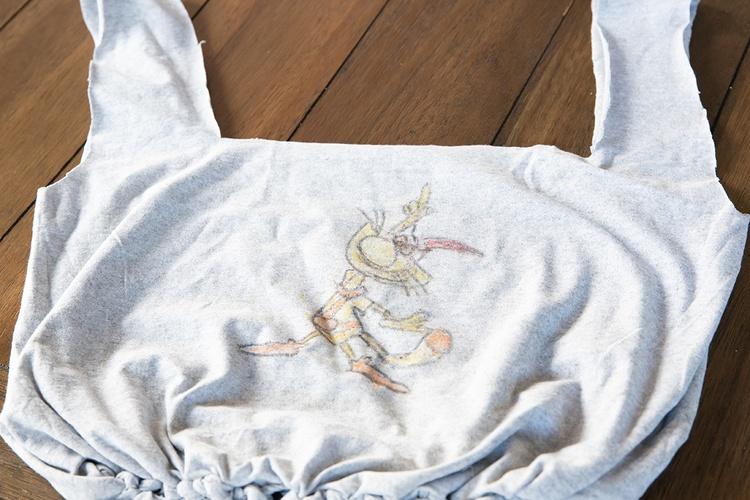
3. Lay newspaper on your ironing board and place plain paper on top of it. Place the printout, crayon-colored side down, onto the bag and cover it with another sheet of plain paper to protect the iron. Make sure the bag is as flat as possible.
4. Iron for about 30 seconds. The iron-on should be ready. Slowly peel off the paper back to check that the image has transferred.
5. If the image isn't as dark or colorful as your child would like, your child can color directly on the fabric and repeat steps 13 through 15. Now their awesome reusable shopping bag is ready to go!
Photographs by Nikki Brooks.