Make a Wild Bee Hotel
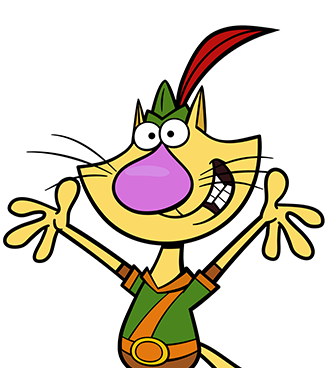
Nature Cat and his friends, Squeaks, Hal, and Daisy are excited for green bean day — the day they get to pick the green beans that Daisy grew in her garden! As they pick and taste the delicious green beans, Daisy gets a call from her friend Petunia. Petunia lives in the city, and she has a big problem. Petunia was growing green beans, too. Her plants grew big and strong, but there were no green beans. Nature Cat and his buddies went off to help, and Daisy figured out the problem. Petunia’s garden needed bees! But how were they going to attract bees?
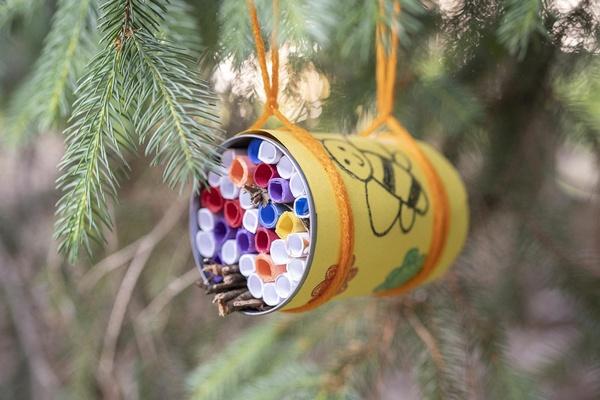
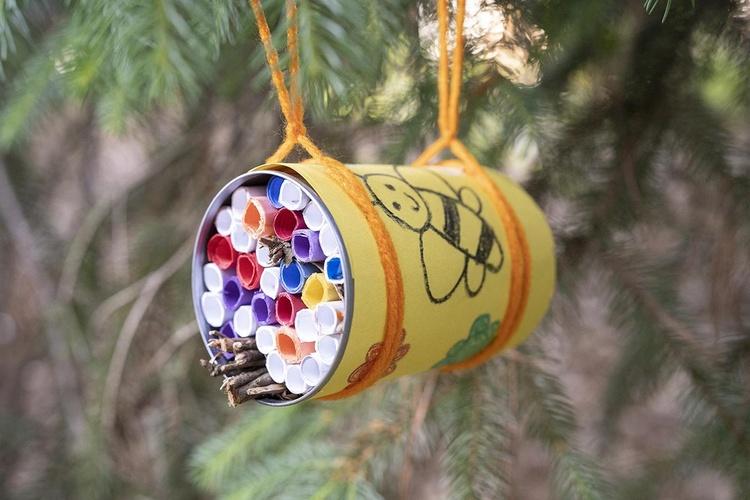
Encourage your child to make a shelter for mason bees. Using items you have on hand, such as tin cans, paper, and glue, you and your child can make a safe, snug shelter for buzzy little bees while learning more about the role these important insects play in our environment.
Before You Play
Many plants and animals depend on each other for the things they need. Bees drink nectar from flowering plants. Many plants rely on bees for pollination so they can produce fruit, which contain the seeds of the next generation. Here’s how it works. A bee flies from flower to flower, drinking the nectar. As the bee feeds, it is also moving pollen from one flower to another. Pollen is the yellow, powdery stuff that helps plants reproduce. The bee is fed, and the plant is helped, too! Talk with your child about the ways other living things are connected to each other to meet their needs. For example, some kinds of woodpeckers use dead-standing trees for shelter, and a blanket of fallen leaves offers protection to hibernating wood frogs.
Materials
Directions
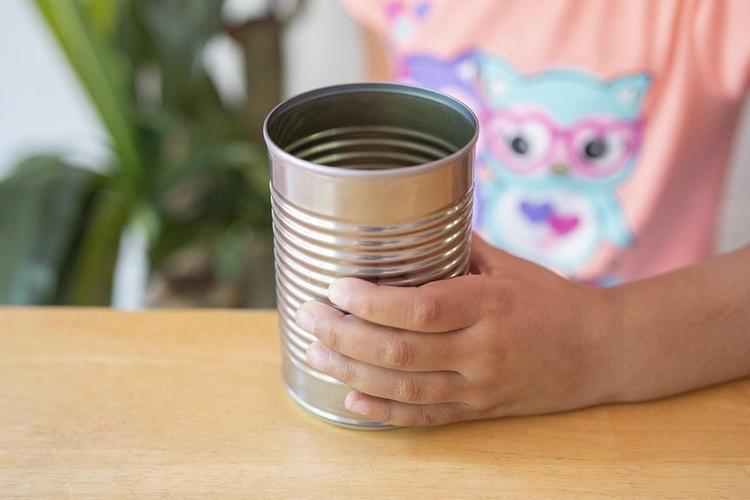
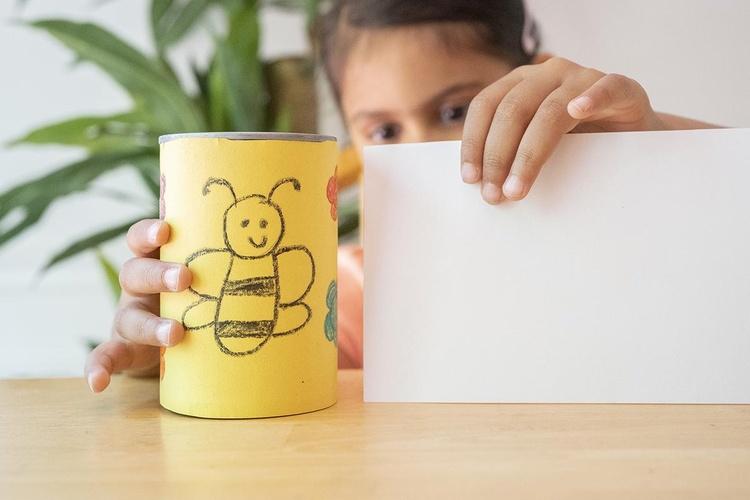
Carefully cut the top off of a used tin can and clean and completely dry the can.
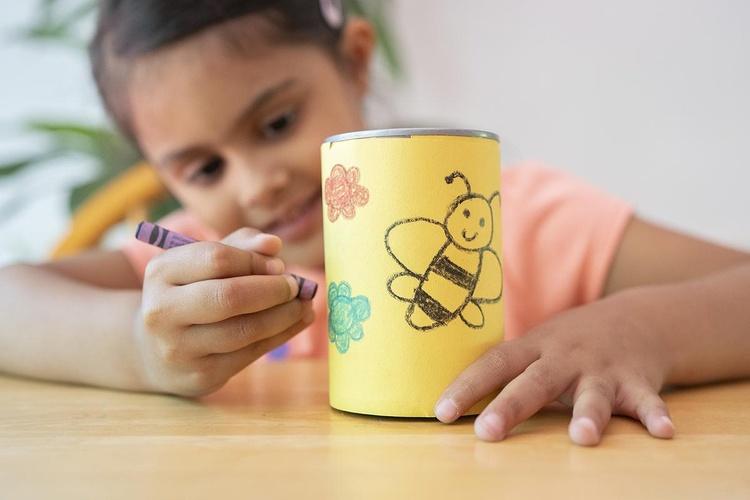
Decorate the can with items you have at home. You might choose stickers, paint, construction paper, or colorful tape.
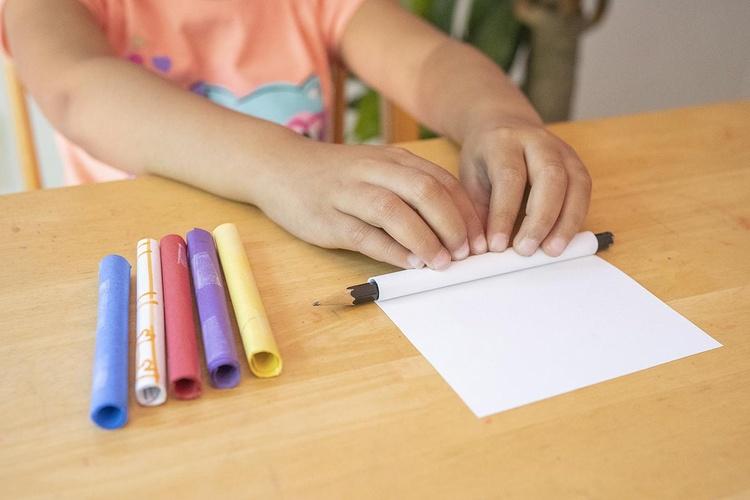
Cut each piece of scrap paper in half. Make sure each piece is a bit shorter than the tin can when you hold them up horizontally.
Use the pencil to roll a piece of scrap paper. Make sure to roll it five or six times so the tube you’re creating is a little thick. Once you’re done rolling the paper, tape it and wiggle it gently off the pencil. Repeat this until you have about 30 rolls. It’s OK if some rolls are a bit longer or shorter than others as long as they are all at least six inches long.
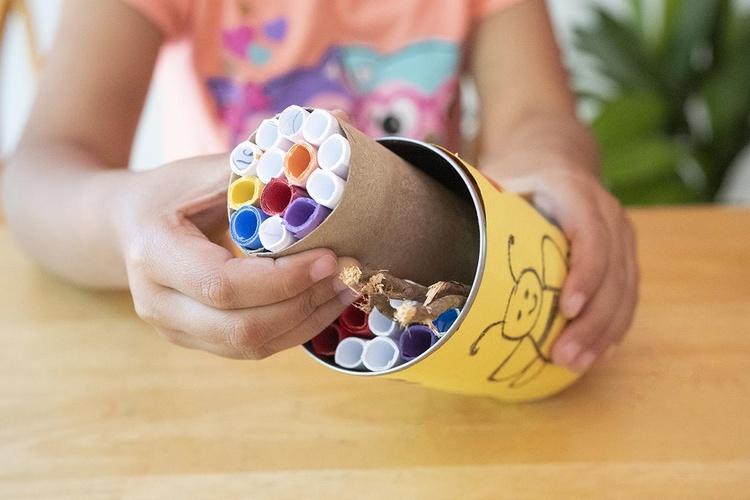
Cover the bottom of the can with glue and stick the toilet paper roll in the can. The roll will help keep the thinner tubes you made stay snug in the can. Once the toilet paper roll is in, place the thinner tubes in the roll. Make sure the tubes don’t get squished, otherwise the bees won’t be able to fit inside! Place your twigs In the open spaces around the toilet paper roll. You can break the twigs so they don’t stick out from the can.
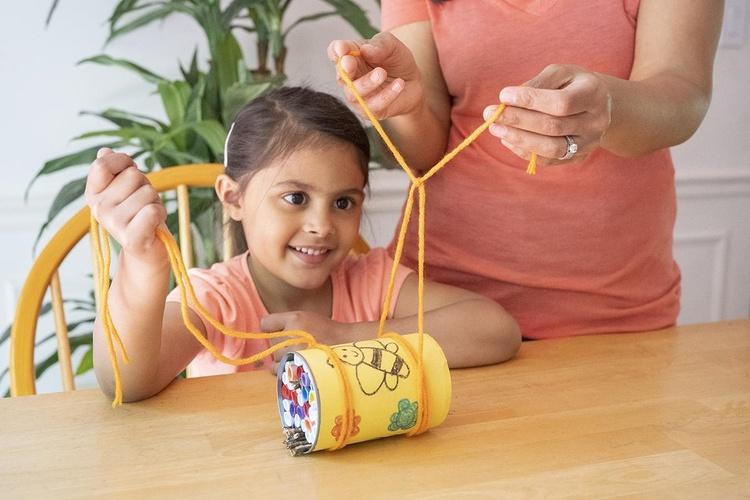
Once your rolls and twigs are in the can, carefully tie two pieces of string around the can: one near the top and one near the bottom. Each piece of string should be long enough to wrap around the can twice with enough left over to allow the can to hang about 8 to 12 inches from a tree branch.
Now it’s time to hang the new bee home! Take your child outside and choose a tree in a sunny location from which you can hang your shelter. Help your child tie the bee home to a branch. Mention to your child that it may take a little while for the bees to find the shelter. By sharing this information, they won’t be disappointed if bees don’t arrive right away. Make a plan to check the bee home a few times a week to see if anyone has moved in!
Want more “Nature Cat” activities? Check out the Create a Natural Toolbox activity and the Make Leaf and Bark Rubbings craft to continue the fun!
 Author: