Make Matching “Thinking of You” Bracelets
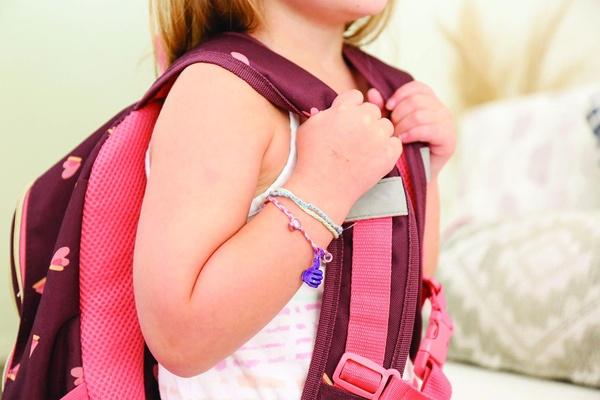
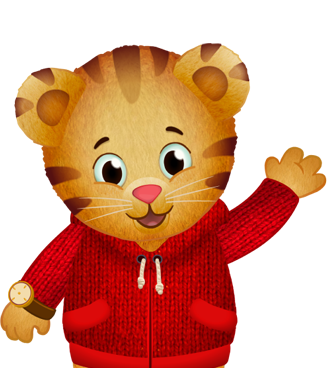
Miss Elaina wears her special locket and looks at it any time she misses her family. Make matching bracelets with your little one to help them feel reassured when you are apart — like going to a new school, a playdate, or another new place. Whenever you both look at the bracelets, you’ll be reminded of each other and the bracelets can help your child find a little extra bravery when things feel challenging. This is a way to help your child learn to self-soothe and work on finding a way to feel better whenever they’re upset.
Making matching “Thinking Of You” bracelets can be a fun and quick activity to do with your child. Using easy techniques like twisting and braiding, these bracelets come together in minutes. Wear them regularly or on days where you know you’ll be apart, and you’ll be reminded of each other whenever you look at them! Make it extra fun by letting your child choose the thread colors or beads you use for your bracelets! Spend some time talking with your child about being brave during new experiences. Let them know that it’s okay to miss your family, and encourage them to look at their bracelets whenever they’re sad to help them be brave while you’re apart!
Materials
Directions
Take the thread, yarn, or rope you will be using and trim it to three pieces each measuring 12-15” long. For simple braided bracelets, you will need three pieces per bracelet.
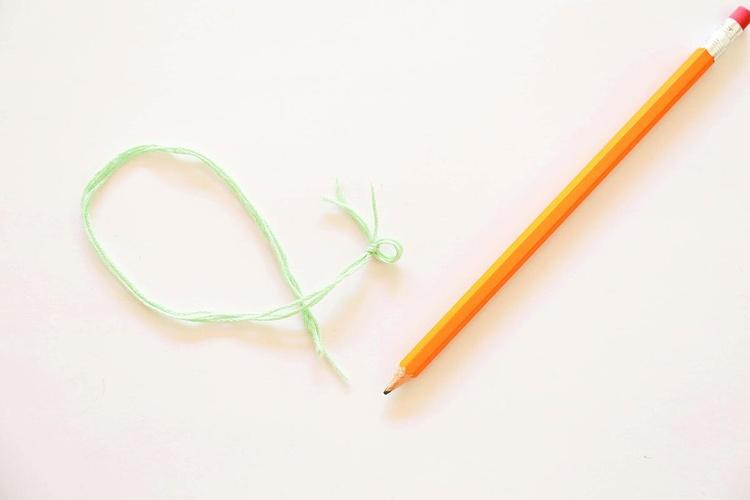
Bring the three strands together and wrap one end around the pencil and tie a knot. Gently slip this end off of the pencil revealing the loop that was just made. This will be used to secure the ends after you’ve finished braiding. Trim the excess tail of thread.
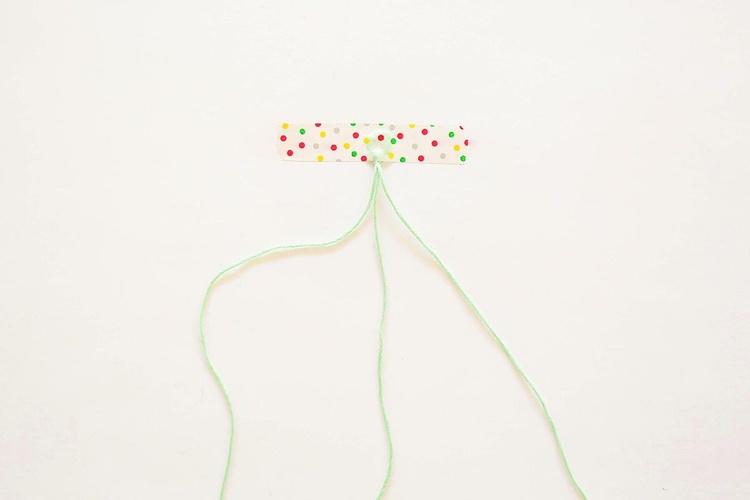
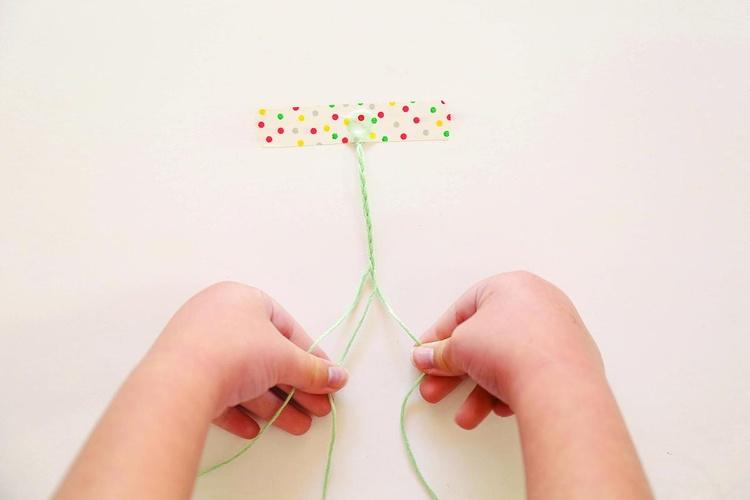
Using a piece of tape, cover the looped end and press securely to a flat surface like your counter or dining table. Now it’s time to start braiding!
This is a great time to teach your child how to braid or twist the strands. For a simple braid, the technique works best when moving the side strands over the middle strand in alternating fashion. Continue braiding until you are almost 1 or 2” from the end of the strands.
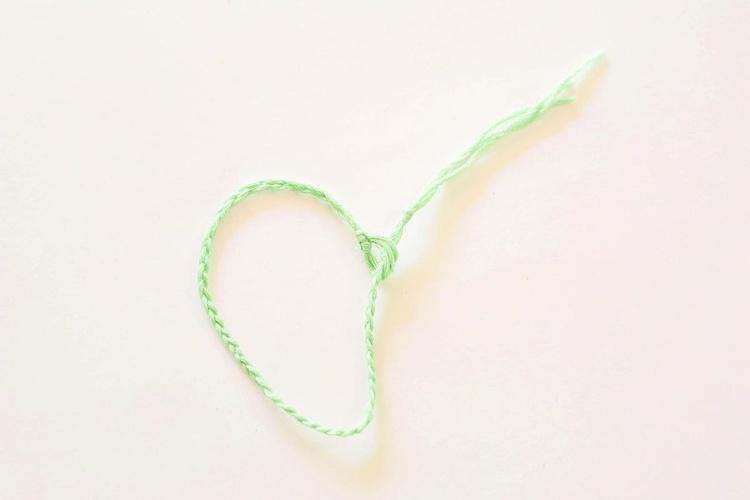
Take the tape off the strand. Measure it around the wearer’s wrist and trim to size. Tie the loose end into a knot.
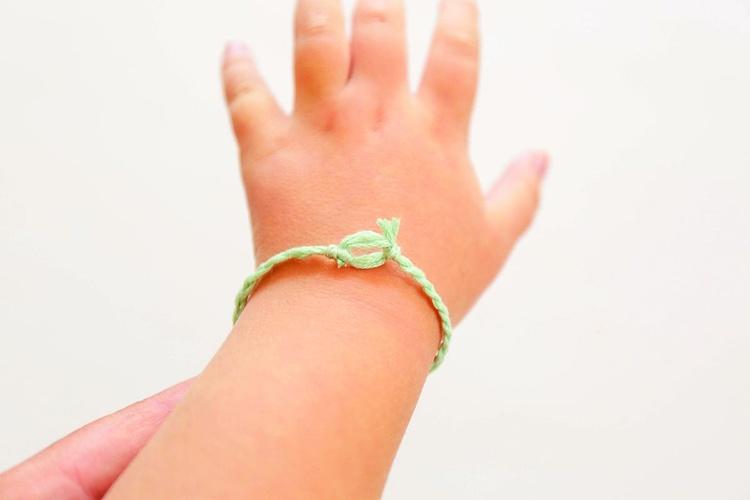
After you’ve trimmed the bracelet to size, wrap it around your wrist. Pull the finished end through the loop, and tie in a knot. Trim excess thread.
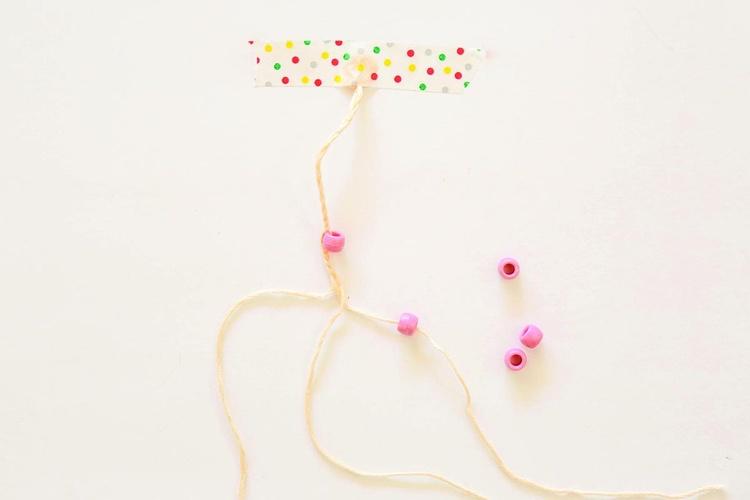
Add a little pizzazz with beads! Keep things simple by adding a bead to the same strand every time you braid. For example, add a bead to every new strand that is farthest on the right. Or let your child have fun with it and add beads however they like! Adding beads is completely optional and should be done with supervision for younger children.
Explore Further
Your child may experience separation anxiety if they are starting their first year of school, or perhaps they’re a little emotional after a difficult dropoff. Remind your child how special your bracelets are and that every time you look at them, you’ll be reminded of each other. They can look at their bracelet whenever they miss you and find comfort knowing that you’ll be reunited very soon. These bracelets are a simple and fun accessory to encourage bravery when you’re not around or when they’re trying new things!
Want more “Daniel Tiger’s Neighborhood” activities? Check out the Make a Silly Folded Picture craft and the Practice SUPER Morning and Bedtime Routines activity to continue the fun!
 Author:
 - Activity Type
- Craft
- Topics