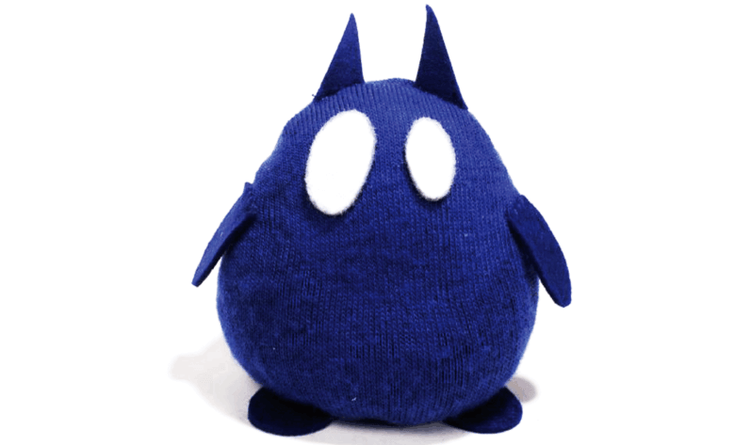
Make Your Own Cat Plushy
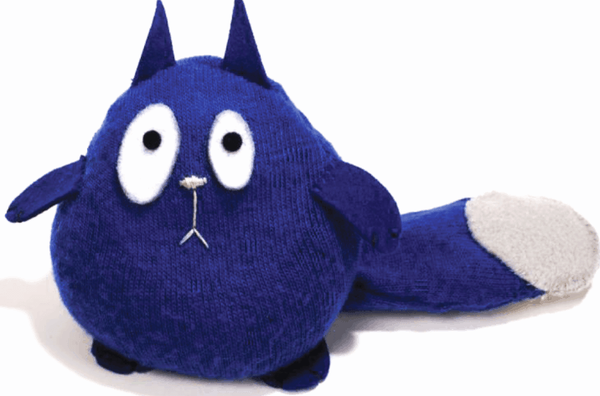
Even if your sewing skills aren’t great, this cat beanie is purr-fect for pretend play!
Materials
Directions
Print out the Cat pattern. You’ll need white felt for the eyes; black felt for the pupils; blue felt for the arms, legs, and ears; and gray felt for the tail.
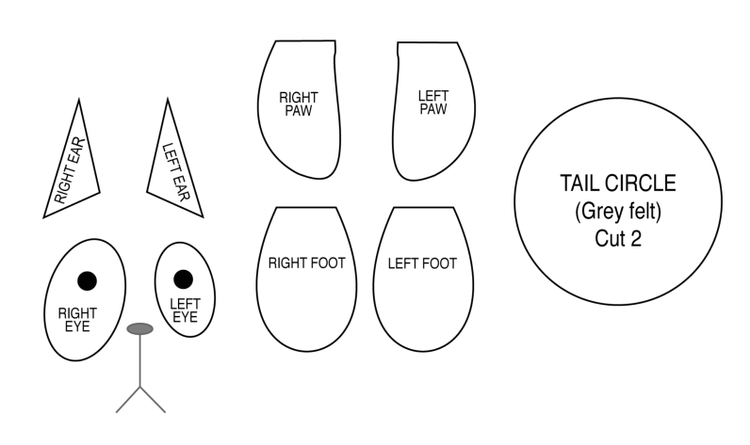
Cut out all the pattern pieces and put them aside until needed.
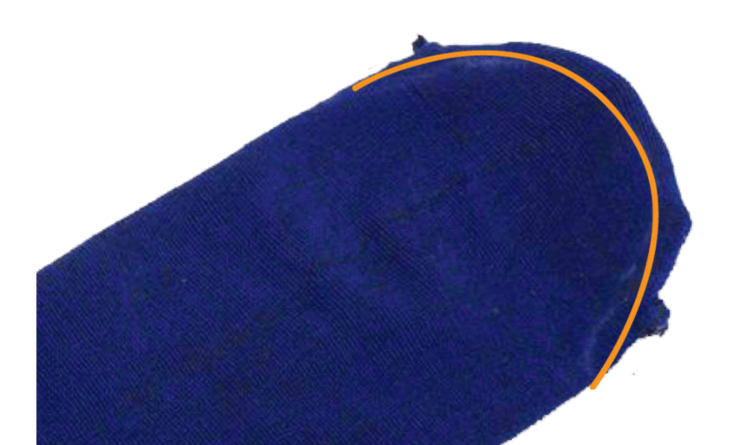
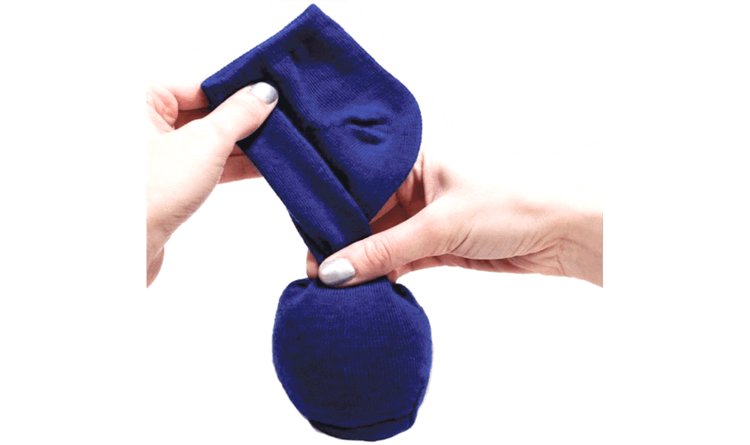
Turn your sock inside out and lay it flat with the heel facing up.
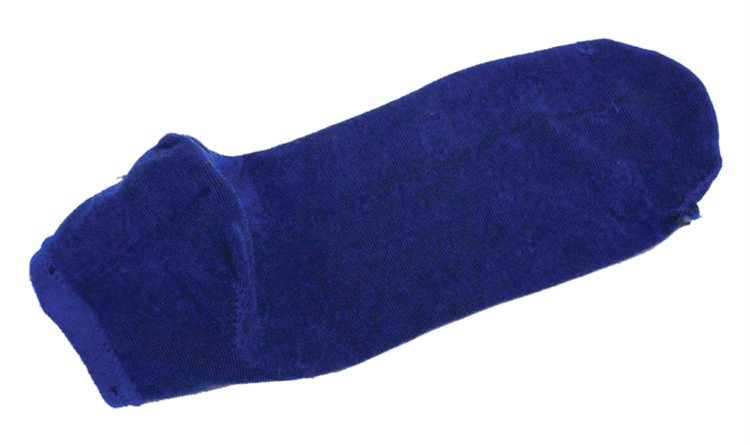
Round off the toe of the sock to make it look more like Cat’s head. Do this by using a marker or pencil and drawing a half-circle on the toe. You can trace the bottom of a can or a jar if you want the perfect curve.
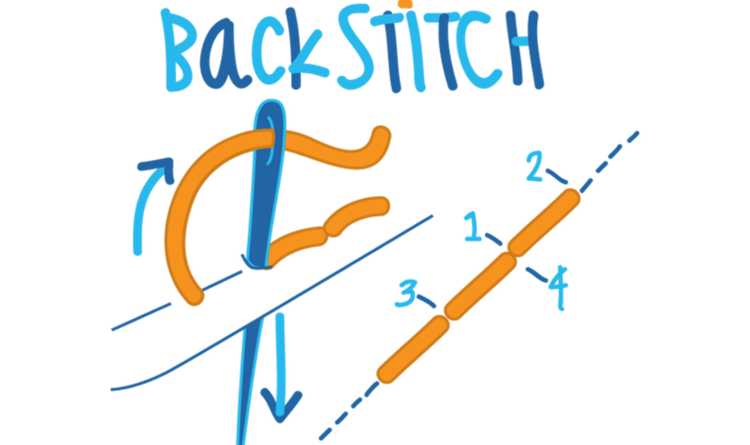
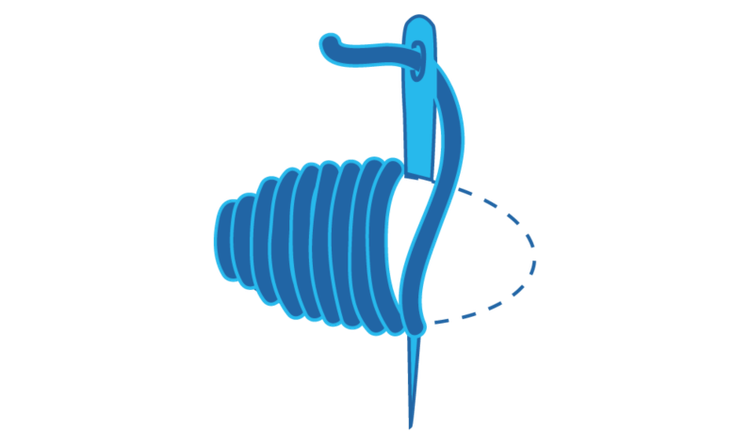
Using your blue thread, stitch along the line using a backstitch. If this is too tricky, a simple straight stitch is fine. (See stitch diagram below.) If you'd like it to be fancier, cut along the dotted line. Place the two ear pieces with the tip facing in and then stitch.

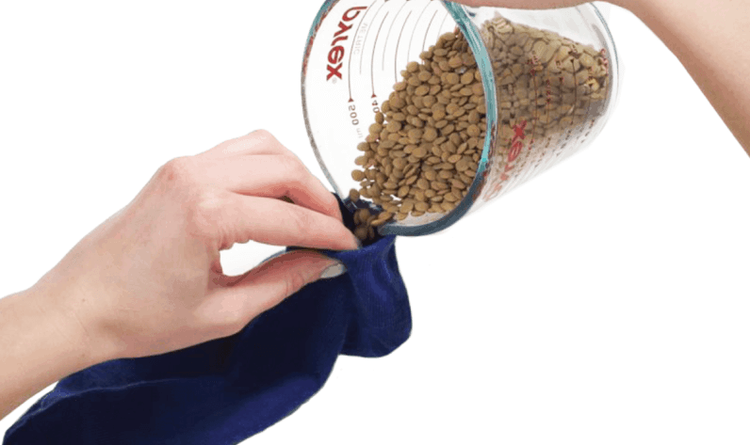
Turn the sock right side out and pour in the beans, lentils or rice.
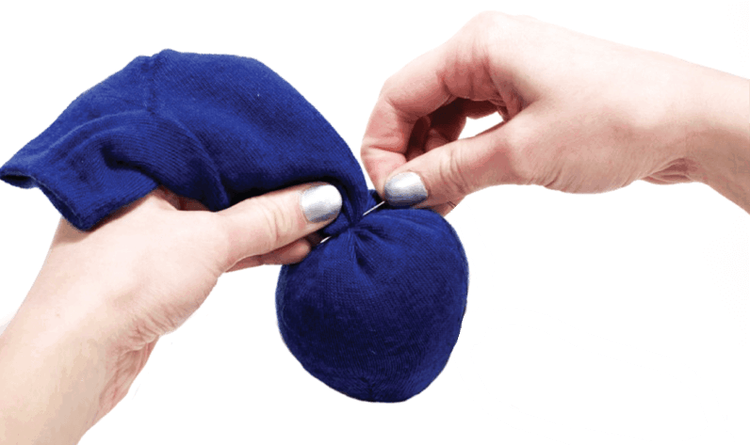
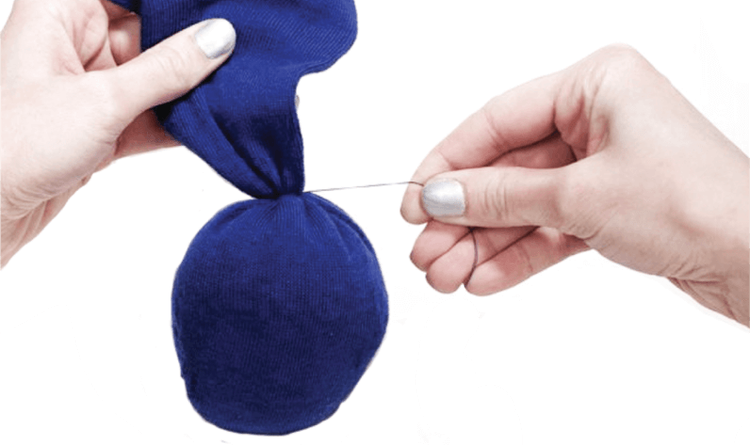
Pinch just above where the beans stop. Using a needle and blue thread, sew through the part you were pinching and wrap the thread around the outside. Repeat the sew and wrap process a few more times until it feels as though the beans can’t escape.
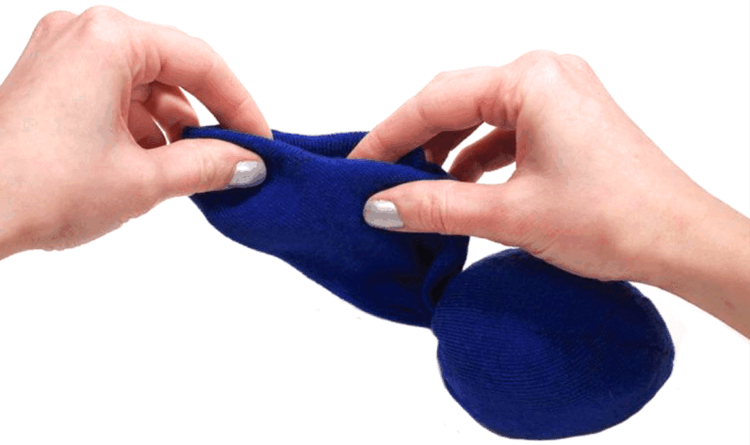
The empty tube that remains will become Cat’s tail. Fold the edge of the cuff into itself. Then fold the tube in half. You might need to smoosh the extra fabric in a bit, but don’t worry; the edge will be covered later. You can adjust this shape until you feel it looks like a tail.

Using the blue thread, stitch along the open edge to close it. A whip stitch works best.


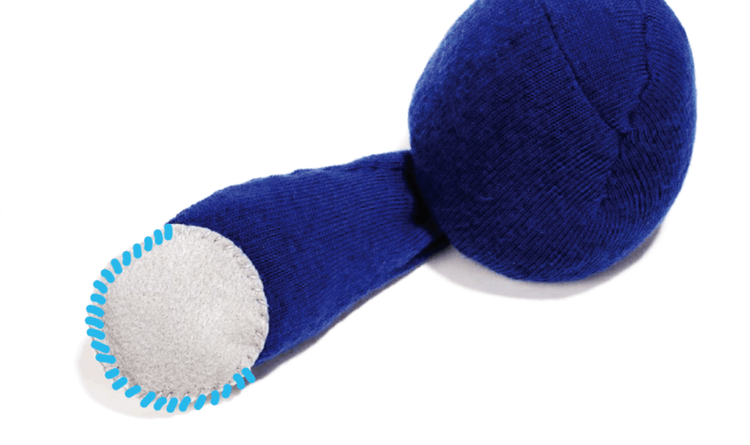
Grab the tail circles you cut from the pattern. Place the circles on the end of Cat’s tail, one on each side. To hold them in place, you can either pin them or put a bit of glue on the tail. Now, using grey thread, whipstitch the circles onto the end of Cat’s tail.
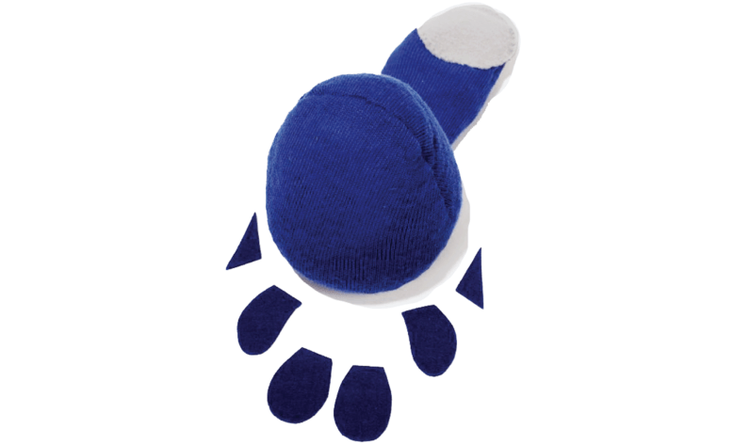
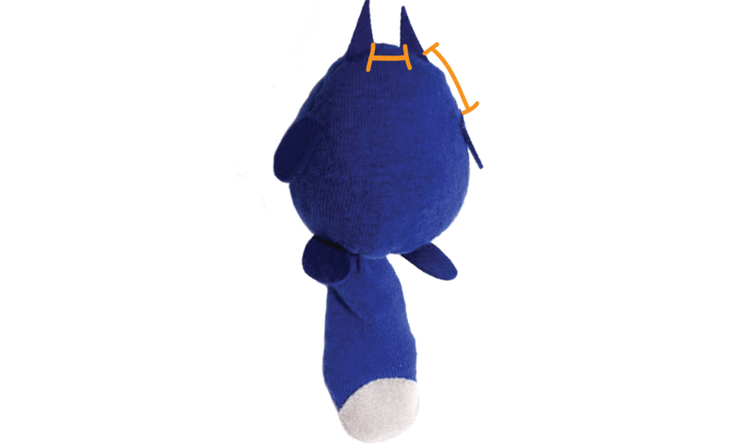
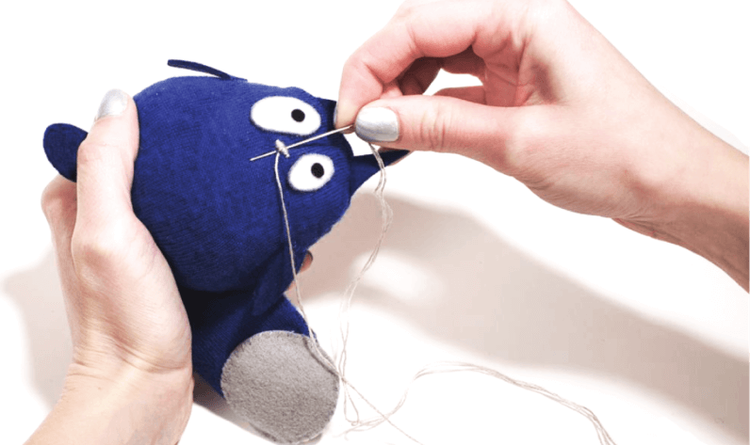
Now grab all of Cat’s other parts that you cut out of the pattern. Stitch the ears a finger’s width apart on top of the head using a whipstitch. Stitch the legs onto Cat’s bottom on either side of his tail. Stitch the arms about 2 fingers down from where you stitched Cat’s ears. (See whipstitch diagram in step 8.)
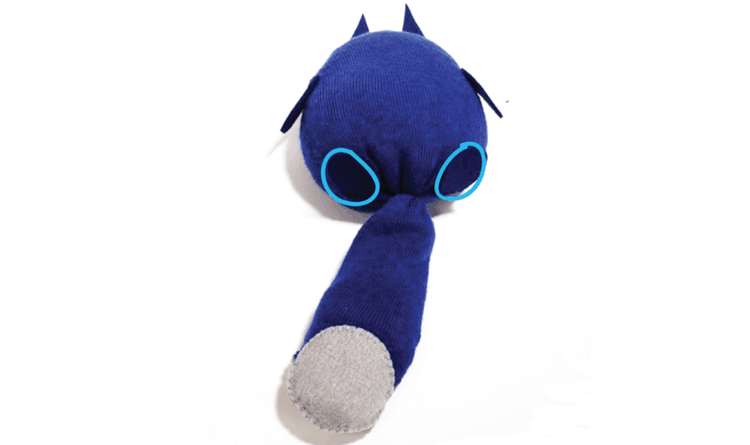
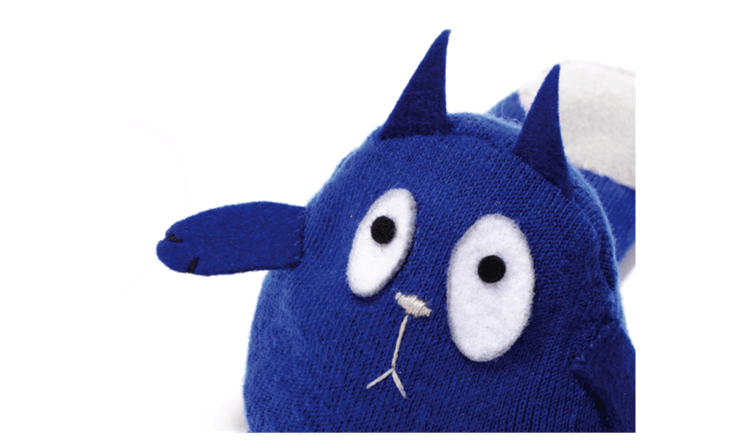
Grab the eyes you cut from the pattern and glue them onto the sock using your fabric glue. Then, carefully glue the tiny black pupils onto the eyes.
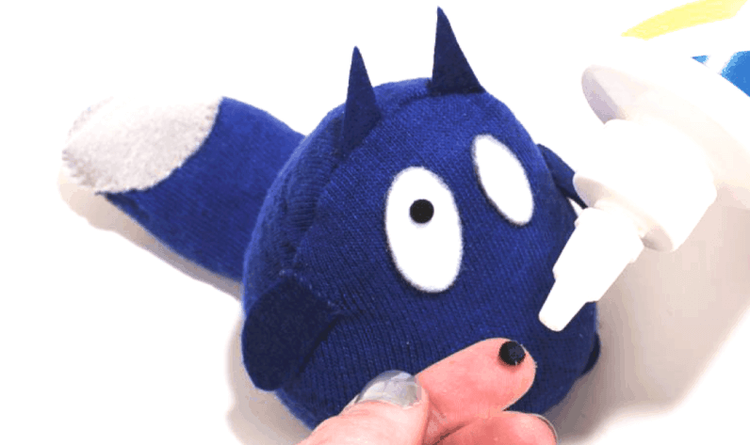
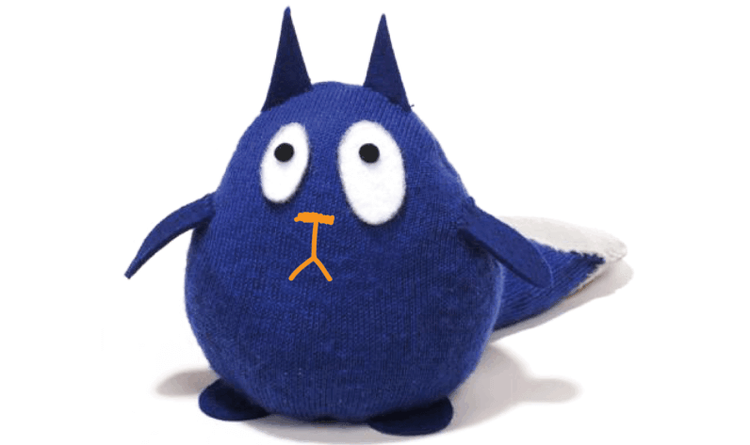
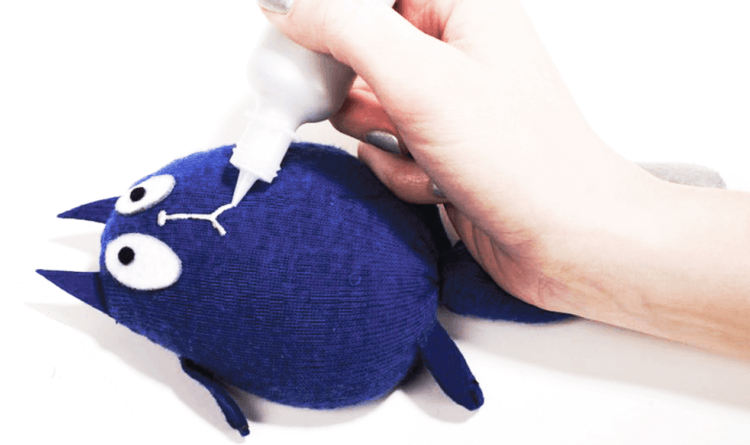
Now it’s time to embroider Cat’s nose and smile. Or, you can simply paint it on with puffy paint using your light colored marker or pencil. Mark where you want the nose and mouth to be.
To embroider the nose, use a gray embroidery floss to satin stitch the nose shape. If it doesn’t look much like a nose, don’t worry. Satin stitch is very forgiving, and you can go over it as many times as you need to. (See satin stitch diagram below.) Then using a regular straight stitch, make an upside down “Y” shape to make the mouth.
To paint the nose, use gray puffy paint and make a horizontal oval for the nose. Then make an upside down “Y” shape for the mouth.
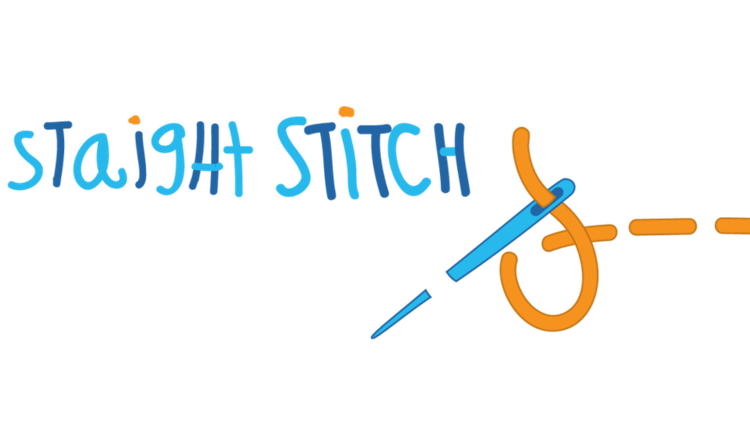
Give Cat his paws. Using black thread, sew one long straight stitch for each line, 2 lines on each paw. (See straight stitch diagram in step 4.) You’re done! Show Cat to your child and ask, “How does Cat feel?” As she squeezes Cat, ask your child to guess what is inside of Cat. Then, encourage your child to “introduce” Cat to some of her other toys or stuffed animals. Let the pretend play begin!