The Suspension Bridge Engineering Project
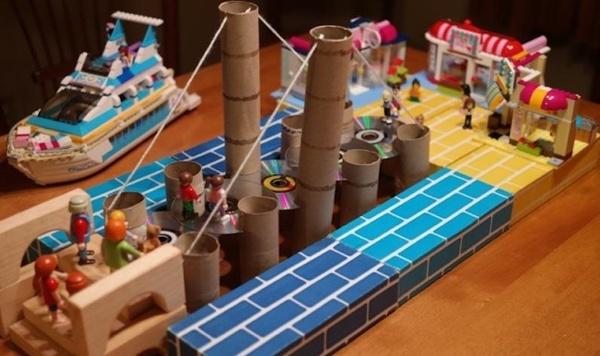
This creative, simple, upcycled suspension bridge will help your child learn about engineering — and give your child’s tiny figurines an easy way to move from one neighborhood to the next!
Materials
Directions
Cut horizontal slits about an inch from the top of the 8 toilet paper rolls. Be sure to only cut halfway around — this is where the CDs will slide in and make the pathway of the bridge.
Cut similar slits into the two paper towel rolls. Note: These slices will be toward the bottom of the paper towel rolls. When you stand the paper towel rolls and the toilet paper rolls side-by-side, the slits should be at the same height.
Insert the CDs into the slits, making sure each is snug and secure before overlapping them to form the main structure of the bridge.
Make a vertical slice — no more than 1/4-inch long — into the top of each paper towel roll on the side facing the ends of the bridge. In addition, make tiny vertical slices on the tops of the toilet paper rolls at either end of the bridge, on the part of the circle where the bridge begins. This is where the yarn will connect to give your upcycled design that classes suspension bridge look!