Letter or Number Cake
Making your own colorful cake is easier than you may think, and can be made up to a few days in advance. We decided on a letter cake, but a number-shaped cake works just as great!
Ingredients and Materials
Directions
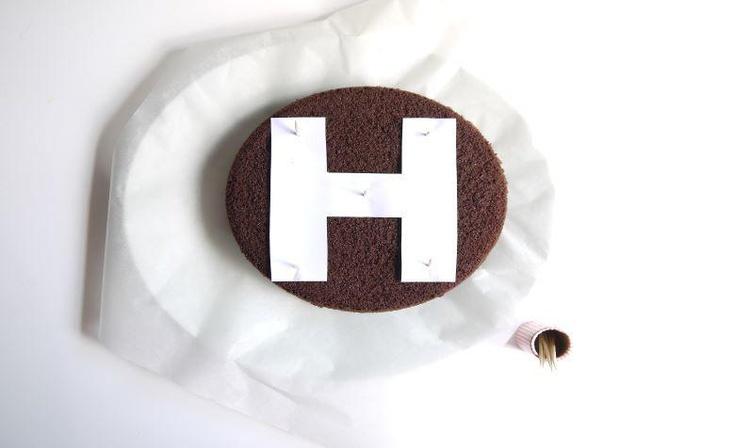
Start by printing and cutting a large letter or number template to fit your cake size. We used Arial font to draw a large H letter in a word processing software. You could use a number also (see photos).

Pin your template onto the cake smoother side using tooth picks to keep the template in place.
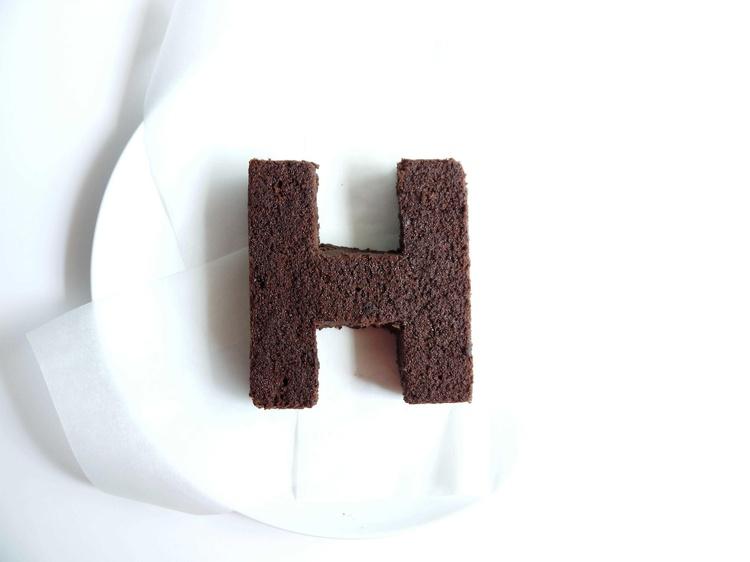
Using the knife, cut around your template. Do not discard the cut-off pieces of cake! They freeze really well and can be used to make yummy cake pops.

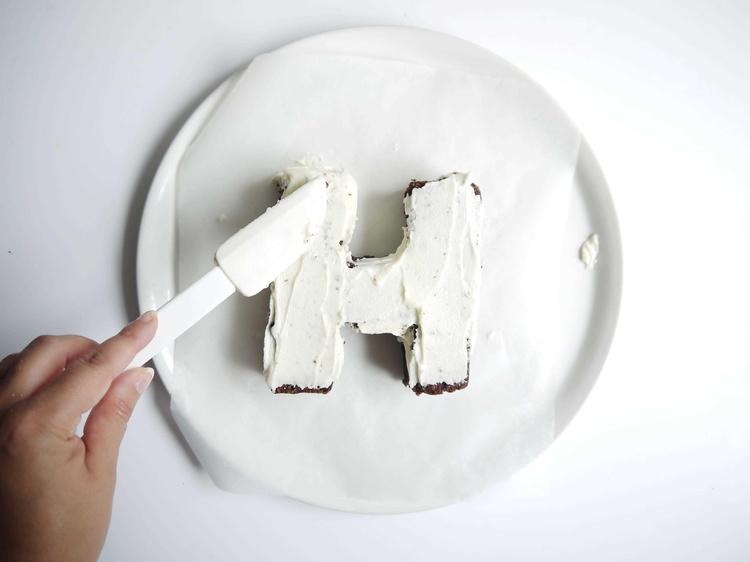
Clean up the crumbs from the cake plate, and place cake in the freezer for about 10 minutes before decorating to firm up.
Cover entire cake with a thick layer of white frosting. Return cake to freezer for 5 minutes while you prepare the icing bags.
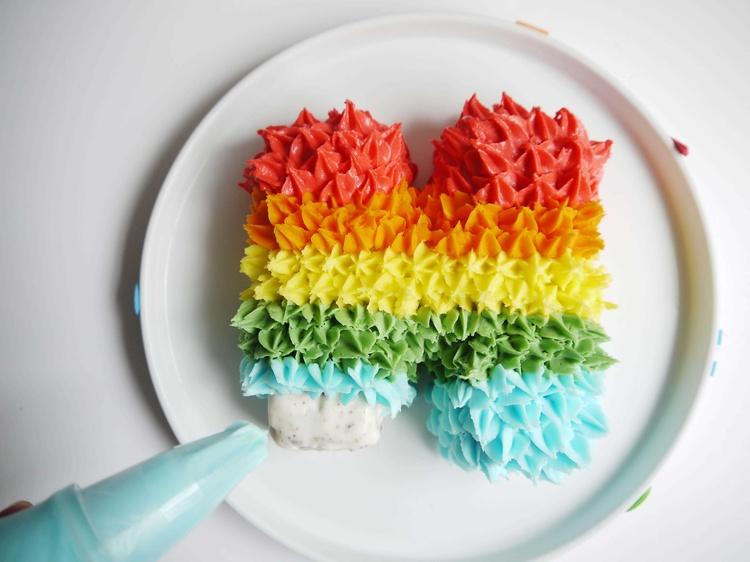
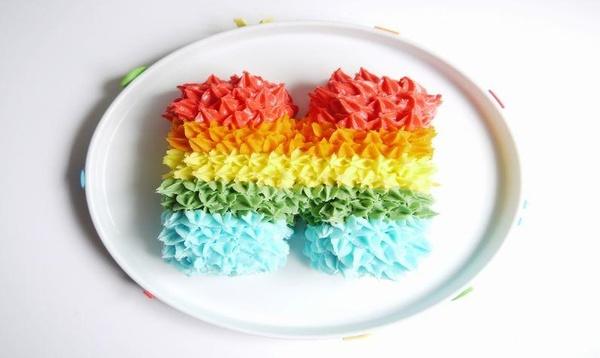
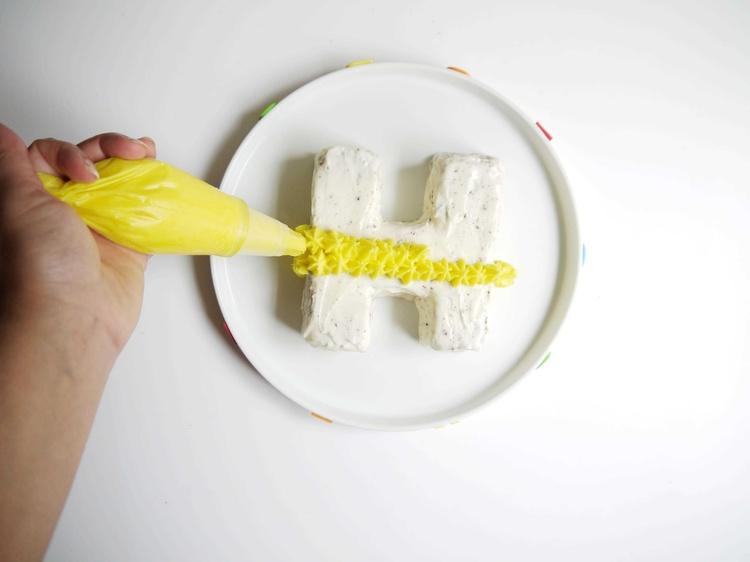
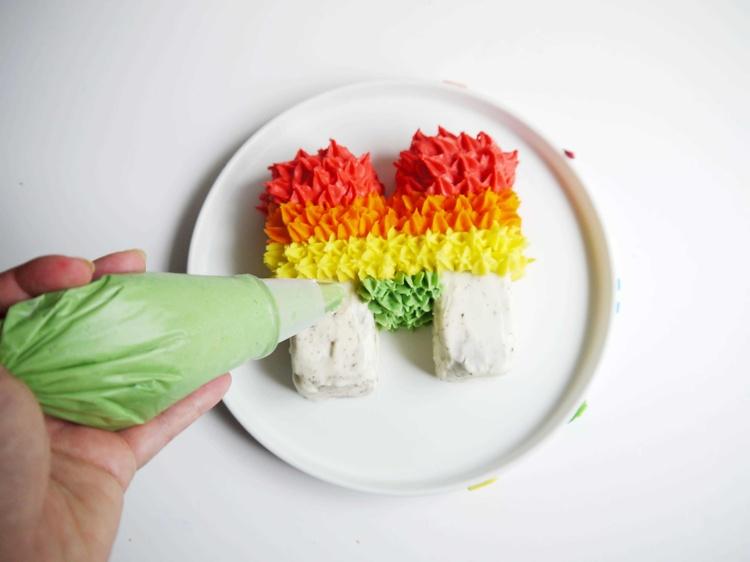
Transfer your cake to the serving platter. Starting with the middle of the letter (because that's the trickiest part to ice) – Fill a piping bag with yellow icing and pipe across all 3 sides of the cake. Return cake to freezer for about 5 minutes.
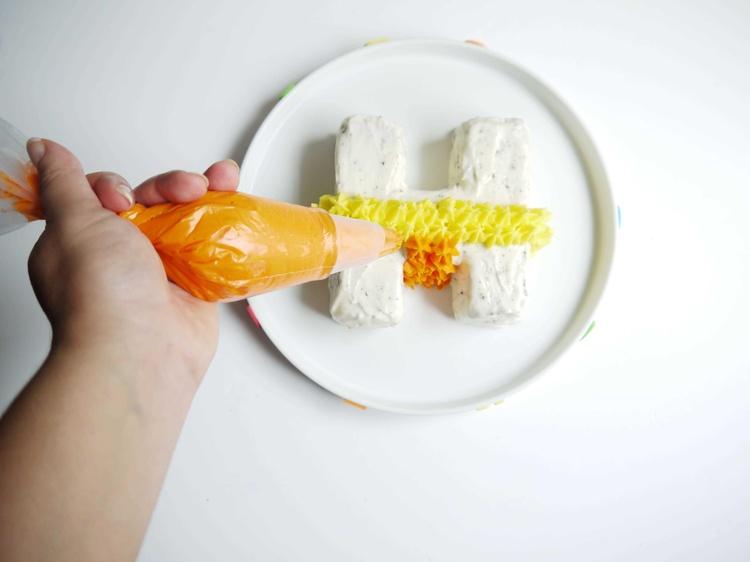
Proceed in the same fashion with the orange icing, covering the smallest/hardest to reach parts of the cake first. Return cake to freezer for about 5 minutes.
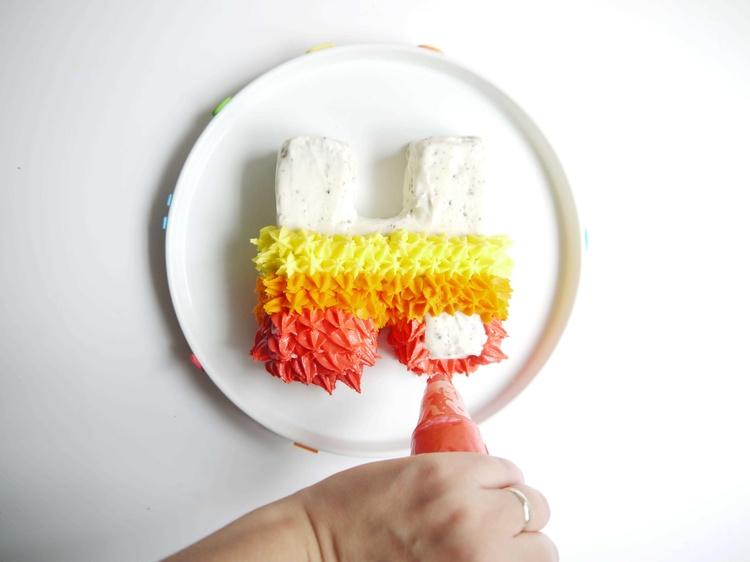
Finish bottom of letter with red icing. Return cake to freezer for about 5 minutes.
Turn cake around and pipe the green icing on. Return cake to freezer for about 5 minutes.
Finish with blue icing. Keep cake refrigerated up to 5 days.