
Related Show: Alma's Way
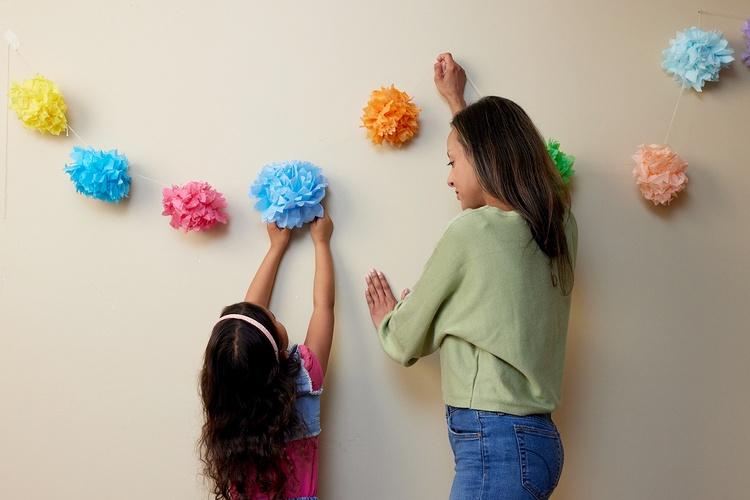
Make a Tissue Paper Pom Pom Garland
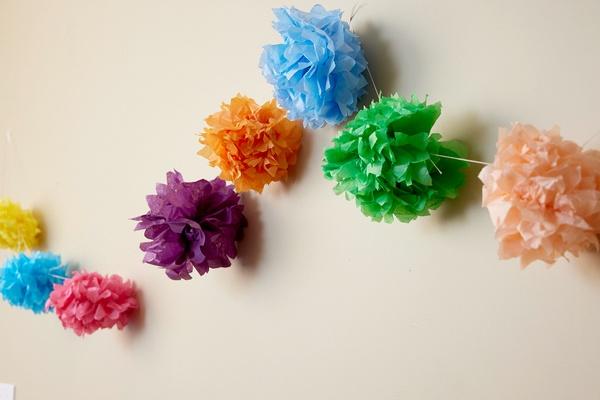
If your family has a birthday or a celebration approaching, try this way, way, way festive DIY decoration idea. Creating a tissue paper pom pom garland is a perfect way to add some color, texture, and fun to your celebration. It’s also a great craft to try with your older children as you work together to make a vibrant garland.
These bright decorations can be used for an “Alma’s Way” birthday party or other celebrations, whether you’re at home, in a park, at school, or at a friend’s house. You can choose your favorite colors, or use the favorite colors of the person you’re celebrating. Customize your garland so it’s just how you like it!
Materials
Directions
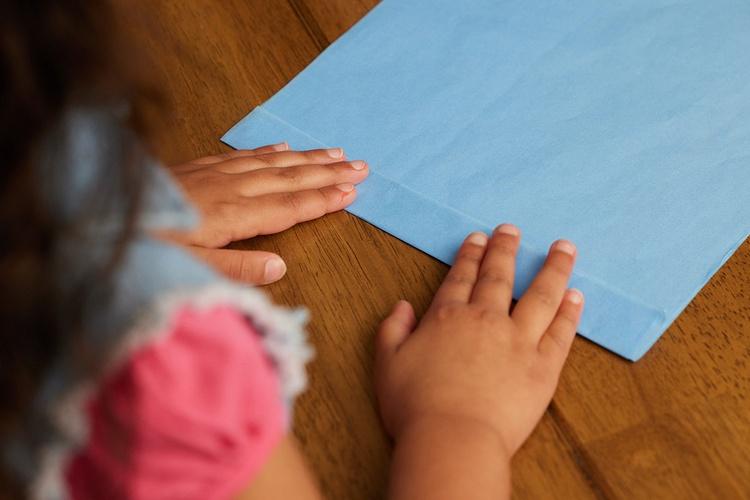
Start by stacking eight sheets of tissue paper (you can also stack four and fold them over once so that it creates eight layers). Cut these stacked sheets so that they are 8” wide and 12” long.
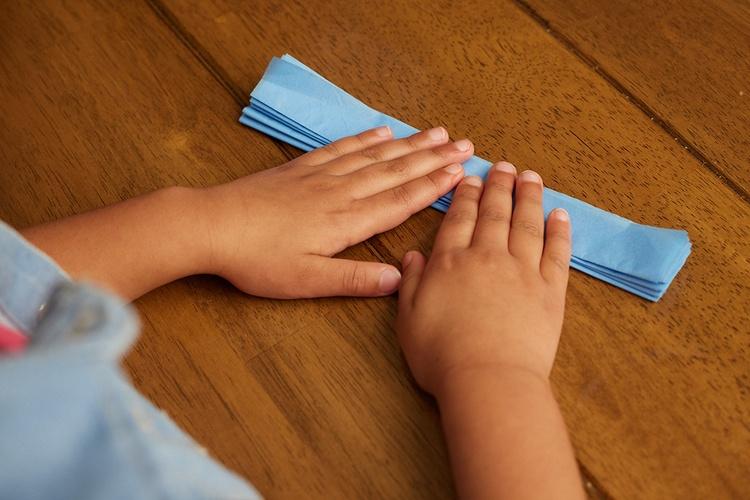
Next, fold one of the 8” ends over so that it creates a one-inch fold. This will be the start of an accordion fold. Now flip the stack over and fold that end backwards. Flip again and fold again, so that an accordion fold starts to occur. This is a great chance to include older children as they hone their crafting skills.
Continue folding until you reach the end of the tissue paper and crease the edges so that they’re nice and flat.
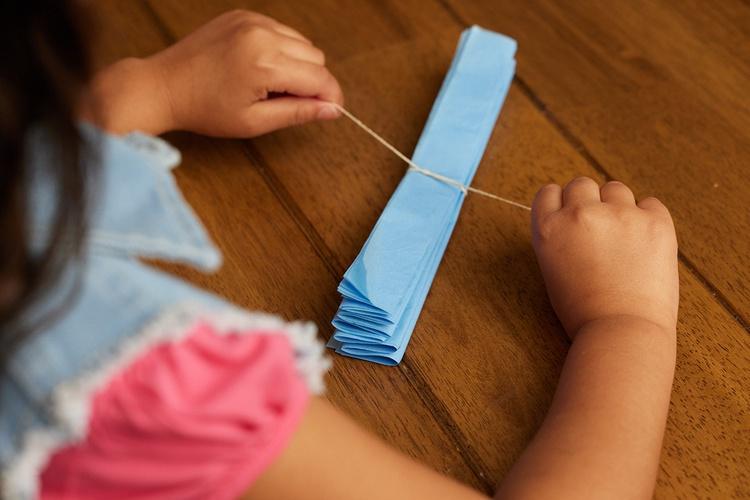
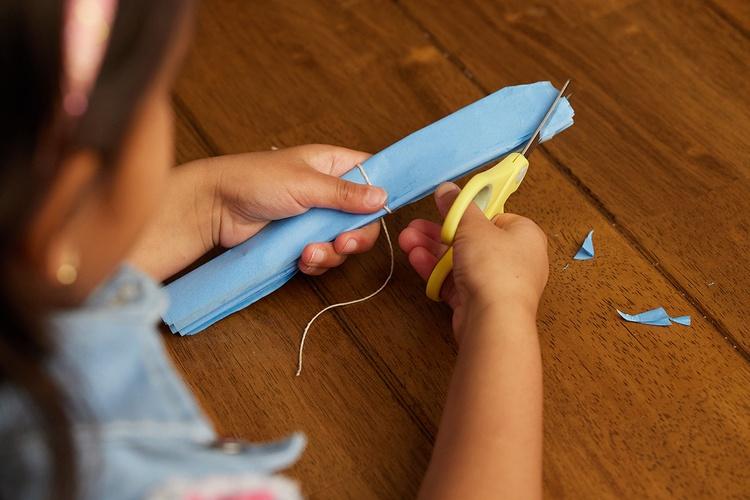
Tie a 10” piece of twine or string around the center of the folded tissue papers. Leave the ends of the twine long for now.
Use scissors to cut both ends of the folded tissue paper into points.
Now, begin to unfold the paper on one side of the string. You’ll open up the accordion and separate the eight layers of tissue so that the paper begins to form a pom pom.
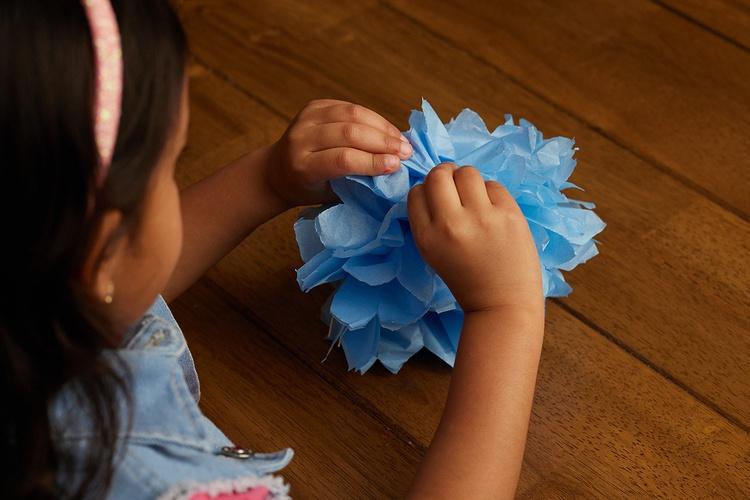
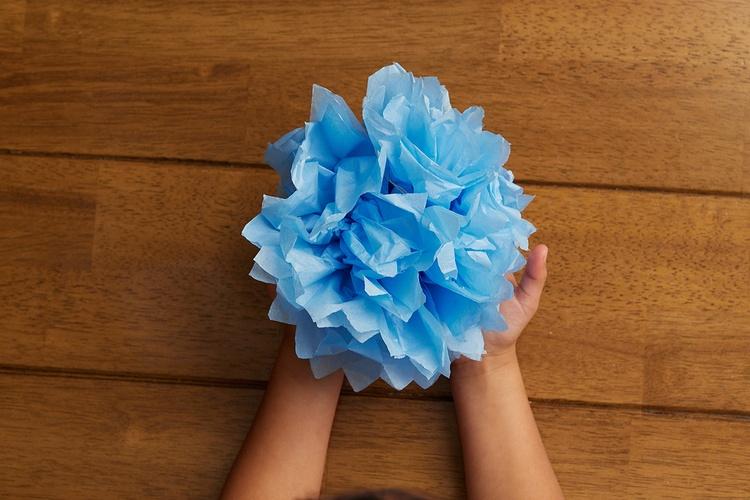
Repeat the process from Step 6 on the other side of the tissue paper, unfolding and separating the layers to create a full, fluffy pom pom. Repeat Steps 1-7 until you have your desired number of pom poms.
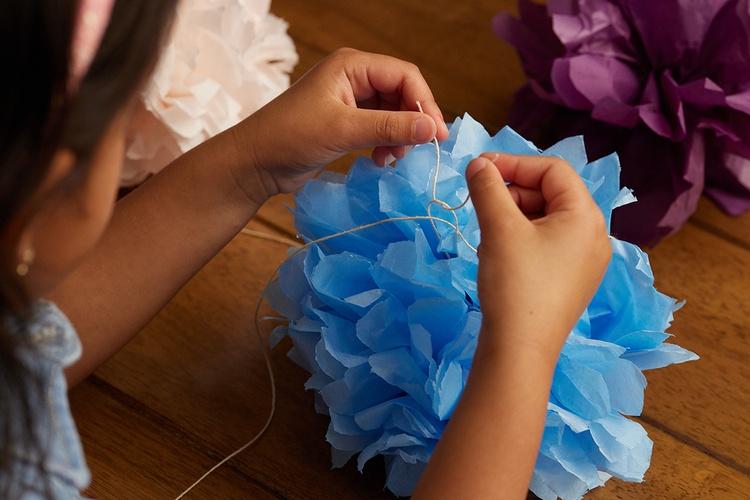
Decide how long you’d like your garland to be and cut a piece of twine to that length. Then, use the remaining ends of twine that you used to tie each pom pom to secure the pom poms to the garland. Just tie the pom poms onto the garland with a double knot. Repeat until all of your pom poms are attached.
Once your garland is created, use tape to hang on your wall!
After your celebration, your tissue paper pom pom garland can be tucked away in storage and used again and again! Just put it in a cardboard box or plastic tub and bring it out when you need some extra party decor. You may need to fluff up the pom poms a bit each time. Have fun!
Sensory-Friendly Adaptation
This activity can be adapted for children with sensory processing challenges. Those with fine motor challenges may need to have the tissue paper pre-folded in the accordion or use adaptive scissors to cut the paper. For more open-ended play, a child might ball up smaller pieces of tissue paper and glue them to a piece of paper, creating a smaller pom pom effect.
Want more “Alma’s Way” activities? Play pin the coqui frog on the leaf game and Alma’s musical chairs party game to continue the fun!
 Author: