Buttermilk White Bread and Salsa Quitza with Lora Brody
Season 1 Episode 4 | 24m 6sVideo has Closed Captions
Chef Lora Body shows how to use a bread machine to make a number of recipes.
Chef Lora Body shows how to use a bread machine to make a number of recipes, including dinner rolls and a salsa quitza.
Problems playing video? | Closed Captioning Feedback
Problems playing video? | Closed Captioning Feedback
Buttermilk White Bread and Salsa Quitza with Lora Brody
Season 1 Episode 4 | 24m 6sVideo has Closed Captions
Chef Lora Body shows how to use a bread machine to make a number of recipes, including dinner rolls and a salsa quitza.
Problems playing video? | Closed Captioning Feedback
Where to Watch Baking With Julia
Baking With Julia is available to stream on pbs.org and the PBS app.

Visit the Julia Child Experience
Get recipes, read tributes from celebrity chefs, and more. Bon appetit!Providing Support for PBS.org
Learn Moreabout PBS online sponsorshipBoom!
Hello, I'm Julia Child.
Welcome to my house.
What fun we're going to have baking all kinds of incredible cakes, pies and breads right here in my own kitchen.
How does bread from a bread machine stack up against a handmade loaf?
Lora Brody, our bread machine wizard teaches us how to use this popular appliance to make everything from breadsticks to quitza.
Join us on... A house is not a home without a bread machine nowadays.
And I have with me Lora Brody who is the queen of the machine and she has not only one but two machines.
Let's start in.
To show the versatility of the bread machine, Julia I'm going to make a loaf of white buttermilk bread.
And it's important to measure the ingredients into the bread pan when it 's out of the machine.
You don't want to be sp illing stuff on the coil.
So I'm going to put in th e dry ingredients first starting with the yeast.
And this recipe calls fo r 2½ teaspoons of yeast and I use th e instant yeast.
That is not the same as rapid-rise.
Instant means that it dissolves instantly in the bread mix.
I see.
That you need very much in the machine.
Exactly.
And this is po wdered buttermilk-- which is available in the health food store-- and we're going to use th ree... tablespoons.
ÑÑ Mm-hmm.
And salt... We need a teaspoon of salt.
You know, when you... Back to the yeast fo r a second.
When you measure yeast it's essential to use a clean, dry teaspoon.
And, you know, a lot of men use bread machines and they think a teaspoon is something...
They also think th ey invented baking, right?
Teaspoon is something yo u stir your coffee with.
This is a teaspoon.
Okay, we got the salt.
The next ingredient is the flour which are three cups and I am of the scoop- an d-level method.
Good.
I think that's the most accurate.
Yes, and I am using re gular flour unbleached an d unbromated.
If you want to use br ead machine flour or better-for-bread flour that's fine-- wh atever works.
But you're just using plain all-purpose.
Plain all-purpose.
And we're going to use a table... For the fat element we're going to use a tablespoon of ve ry soft butter.
You can use salt or sweet, as you wish.
And three tablespoons of maple syrup.
Now, if you don't like sweet bread can you omit the sugar?
Absolutely, you can omit th e sugar.
However, you need th e salt.
Salt acts as a yeast retardant so the bread doesn't blow up ou t of the machine.
If you wanted, you could use honey rather than maple syrup.
Honey, brown sugar, mo lasses.
I'm going to add a cup of water.
Is that cold water?
It's room temperature.
Room-temperatur e water.
And I'm going to put th e pan into the machine.
And that's all there is?
That's pretty much al l there is.
Now I'm going to close the door and in about five minutes, I'm going to check it just to make sure I don't have to add liquid or flour.
You know, many manufacturers say, "Do not open the lid."
Well, you have to open the lid.
The machine only has a computer; it does not have a brain.
( chuckles ) Brody: Great secret for success working with the bread machine is after about five minutes of kneading you want to check the consistency of the dou O oO gh to see if you need additional flour or water.
And I can see that this dough is a little sticky.
However, look how beautifully the gluten has developed.
Gluten is the protein in bread.
Look at that stretching.
We've got a wonderful, wonderful dough.
So I'm going to close the lid and let it bake bread.
So, in this bread machine, w 've made... Oh, my gosh look at this wonderful dough!
Isn't that terrific?
You know, the machine just works the gluten and makes it rise.
Now we've got th is great dough.
That looks lovely, I must say.
Thank you.
One of the things people say to me about the bread machine is "Well, I like to handle th e dough."
I like to handle th e dough, too so we could make a loaf of bread ve ry easily out of the machine.
So if you could give me a loaf pan I'm going to use th is dough.
In my experience with the bread machine I like it...
I think the bread is much better if you take it out after...
I'd leave it a second rise in there and take it out and then I think the texture's better.
How about if we do a John Henry?
We'll do the machine ve rsus handmade.
Fine, good.
I'll make a loaf in the machine and then we'll do a blind tasting.
I'm going to butter th e bread pan with a generous amount of butter.
If you wish, you can us e vegetable spray but I prefer butter.
This is not ab out being a bakery so this is probably not a perfect bakery loaf.
Well, do you have to firm it?
You don't firm it, you just dump it in?
I just dump it in.
I sort of made it lo af-shaped, as it were.
But you could firm it if you wanted to.
Yes-- I like actually ta king advantage of what's left of the rise here.
And you can now le t this rise at room temperature-- I'm going to cover it wi th a cloth--- or you can let it rise ov ernight in the refrigerator.
I'm going to set this aside.
And I've got so me other dough here.
Does this have to double in volume?
Double in bulk, ex actly.
Depending on the temperature in the kitchen it could take 20 minutes, it could take an hour.
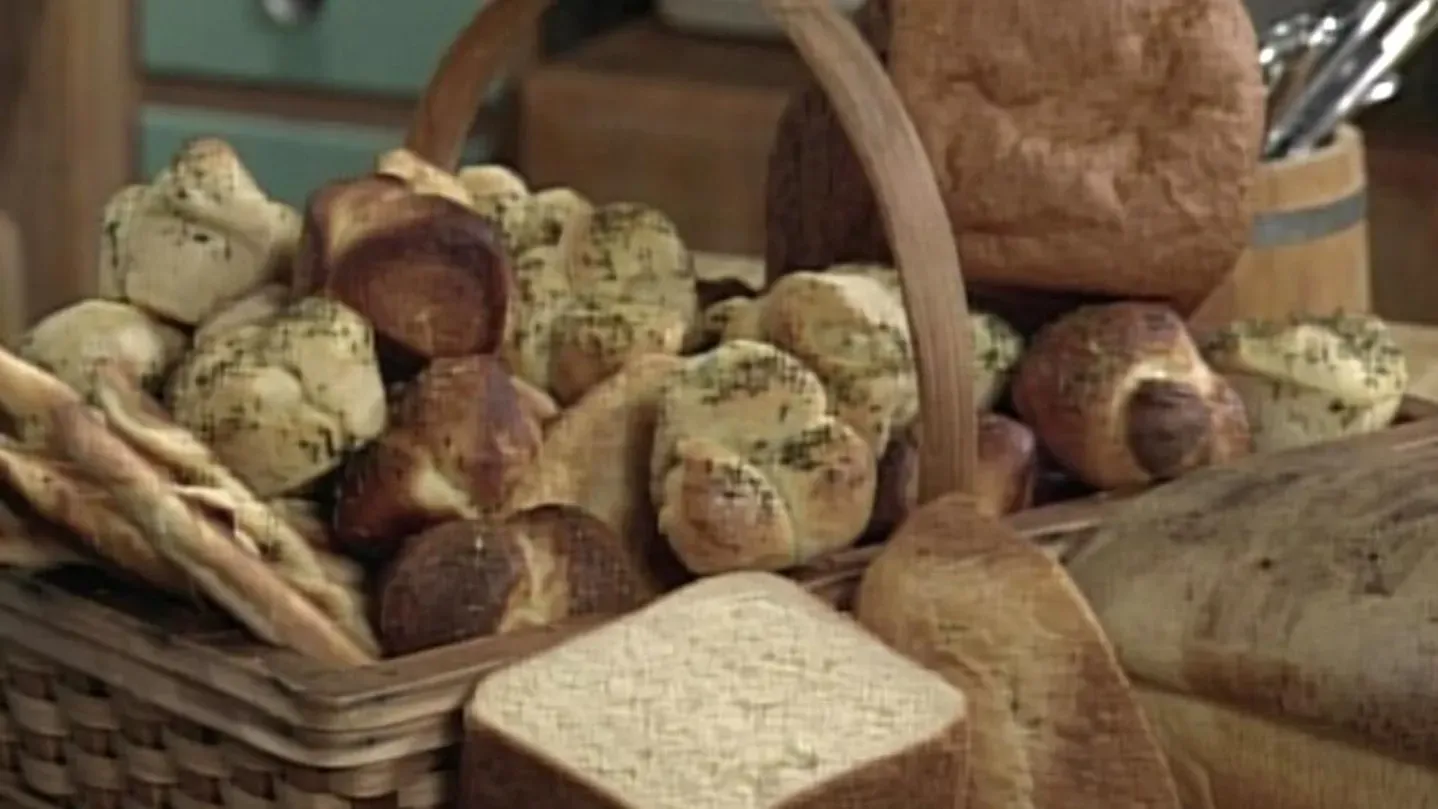
Now, this dough can also be made into dinner rolls an d all kinds of things.
How about if we make some cloverleaf rolls and some little tw isty rolls?
And these cloverleaf rolls ar e very, very simple to make.
I'm using this bench scraper, on e of my favorite tools.
And, again, you can use no nstick vegetable spray but we're going to use butter.
So perhaps you could an oint the cups.
I'll do that while you form the rolls.
That would be wonderful.
And the cloverleaf is formed by cutting th ree little balls.
You know, children lo ve to do this.
I just stick my finger up through there and form the ball.
It doesn't have to be a perfect ball.
What are you doing, sort of pulling it around?
Pulling it around my finger, fo rming the ball.
Mm-hmm.
And that's... that's it.
And then putting it in closely.
One, two, three.
And that's all you do.
That's it.
And, again, this is not about making it look perfect or all the same or... You know, they should be pretty much ba llpark the same.
But you can do it as well as you can.
Exactly.
As they rise, th ey'll grow together and become really pretty li ttle dinner rolls.
You can form these, an d at that point freeze them ri ght in the pan.
Oh, now, that's a good idea.
Pull them out just before you're ready to bake them and you can ba ke them frozen.
You put the dough ri ght in the oven.
Take the dough out of the freezer put it into a cold oven, tu rn the oven on and as the oven preheats, your dough will defrost.
That's a good idea.
Yeah.
Now, those don't look very neat.
But then you said that the yeast is forgiving and they'll look better.
Yes, as they rise, you'll be amazed at what happens.
Things sort of come together.
I'm going to use th is egg glaze as a finishing touch.
What is that?
It's got one egg mixed with about a half a cup of heavy cream.
Oh, that's interesting .
And it makes a beautiful shiny... al most like mahogany.
I've never seen that kind of a glaze before.
My mother used to...
When she made challah she would always use an egg glaze.
And we'll sprinkle it with so me herbes de Provence.
Mm-hmm.
And because I' ve glazed these I won't have to cover them.
They will rise without de veloping a crust.
That's nice.
I'm going to let them ra ise about 20 minutes in a nice warm place.
Now, do they have to double?
Well, about double in bulk.
So we can just let these ri se right there.
And now I've got so me extra dough and I'll show you how to make these terrific little twisty knots.
They're going to bake on a baking sheet, so...
I have one over here.
All right.
And I'll take th is dough out.
Thank you.
Since I have butter at hand, I'm going to quickly...
I love that sign that used to be on buses in Paris saying "La cuisine au beurre est toujours meilleur" or "Cooking with butter is always better."
And I couldn't agree more.
What's this going to be?
This is just a strip and I'm going to tie it in to a simple knot and make so me dinner rolls.
And, again, yo u can form these and have them in th e freezer, unbaked and whip them out in to your oven.
Let me see if I can do that.
Would you like to do it?
I would.
And while you do this I will attempt to make a breadstick.
You better watch me.
Now, what did you do?
Oh, this goes just like a regular knot.
Regular knot, mm -hmm.
That's it.
Try it a little tighter.
It can't stay in a knot.
You have to be assertive wi th the dough.
That's it.
It's a real knot.
And just put it do wn there.
Good.
And you want to leave en ough room between them because they're going to rise.
Yo u don't want them ri sing into each other.
Let's make one more... in case we have four fo r lunch.
Well, this is wonderful that you can do this... you can freeze it on the baking sheet.
On the baking sheet, ab solutely.
Mm-hmm.
And one of the other options is to make a breadstick.
And the way to do that is just take a long rope of dough, twist it out.
Would you like to make one?
I better try one, too.
Well, that's fun.
Pull it out there.
That's it.
And isn't... the dough is so flexible.
Isn't that nice?
Well, as you say, it's that gluten that's making it hold.
And that's why you use a good-quality flour made with hard wheat and that will give you th e lovely stretchability and that's what makes th e bread rise.
Now, do these get glazed?
These get glazed again.
How about if we glaze these and we'll add some poppy seeds to the breadsticks?
We have some poppy seeds ov er there?
You can sprinkle.
And if you don't care fo r poppy seeds you can leave them off.
If you want sesame seeds, you can use them instead.
Here are these...
Isn't this wonderful that all these right out... just out of the same dough?
I think that's great.
It's a very, very nice, fl exible dough.
Now, they just have to rise again.
They'll rise again probably for 20 to 30 minutes-- again, until they're double in bulk.
Well, how's ou r bread doing?
Ooh!
Look at that!
I'd say that's double in bulk, wouldn't you?
Isn't that a lovely loaf of bread?
Now, there's a surefire way to tell whether your bread ha s risen all the way and that's by poking it gently.
And see how the poke mark co mes right back?
Yes, it does.
So you don't want to do it too aggressively.
No.
That's splendid, isn't it?
So I'm going to bake it at 450 degrees-- my oven is preheated-- for about 15 minutes at 450.
Then I'll turn the oven down to 375 for another 30 minutes.
Until it's done.
Until it's done.
There we are.
There we go, right on the center rack.
Hey, what happened to your bread pan?
You may notice th at it's missing.
During the last ten minutes of the baking time I like to remove the bread to let it brown all around.
I'm going to show you a surefire way to tell.
No more of that thumping bu siness, which confused me.
We're going to take the bread's in ternal temperature.
And... 200 degrees.
200 degrees.
Now, this is one way of doing it.
You can use an in stant-read thermometer if you wish.
And this is a good way.
You can certainly do it this way.
And there it is.
Yeah, it takes a little while to get up there.
There we are.
Excellent, it is done.
I'm going to remove it to a cooling rack.
Close the oven.
Thank you.
This is a beautiful lo af of bread.
And our bread-machine loaf is done as well.
I like to bypass th at cooling cycle because I find that it ma kes the bread soggy.
So as soon as the bread is baked I like to remove it.
We're going to take out th is kneading pin.
Can you see that?
Yeah, mm-hmm.
And you want to be careful no t to drop it... Ooh, careful, it 's hot, hot.
Don't burn yourself.
You want to be careful not to drop it in the dispose-all or in the garbage.
I found out the hard way how difficult it is to replace.
Look at it.
Marvelous loaf-- lo ok at that.
Now, that's... That's the mark from th e kneading blade that's in the back of the machine.
Yeah, well, it doesn't make a pretty loaf, does it?
I think it makes a pretty loaf.
There, look at that.
It's a different ki nd of loaf.
Yeah, it is.
Now, the smell is re ally intoxicating and I think th at the urge is to eat it right away but it's a really good idea to let th e bread cool off.
It's still baking internally and if you take a knife and sl ice it, it gets sort of gummy.
Mm-hmm.
We've got the rolls that we baked at 450 degrees for about 12 to 15 minutes until they're ni ce and brown.
Those we can eat ri ght out of the oven.
Aren't they nice?
Should we open one up?
Sure.
This is still slightly warm.
Mmm.
That's nice.
Mmm, that's good.
Good?
So we'll have to let these wait...
Ten or 15 minutes.
Or even longer, or what?
I like warm bread.
All right, we'll wait 20 minutes.
All right, that's a good compromise.
There's a great debate about these st range-shape loaves.
Do you cut them fr om the top?
Do you cut them from the side?
This is the way I like to cut them.
All right.
How about if we check th e texture of this against... this is th e one that was baked in the machine.
Yeah.
And this is the one th at was baked... Kneaded in the machine and risen.
Well, what do yo u think?
Let's cut a little piece off and taste it.
All right, okay.
( chuckling ): It's a very thick piece.
It's a very thick piece.
One of the keys, actually, to cutting bread nicely is to use a very sharp se rrated knife and this is one of my favorites.
So, what you're tasting is the one that was ba ked in the oven and here is th e bread-machine.
It's got a lovely crumb.
Oh, that's pretty good.
It's so good, you don't even need butter, huh?
They taste much the same but I've not had the same experience.
Well, you're just going to have to have me in your kitchen more.
I think maybe that's it.
Well, Lora, this is fascinating.
I think it's a wonderful machine.
I think you've got the right spirit-- you're the boss of the machine.
Thanks very much.
Thank you, Julia.
This is a wonderful, gutsy, spicy bread and it's made out of all kinds of things-- Lora's secret.
And you're going to tell us what's in it and how you make it.
Secret no more.
What I did in this bread is I combined legumes in the form of refried beans and some really good wh ole-wheat flour-- creates a complete protein.
Well, let's make it.
All right.
We're going to start with yeast.
We're going to use a tablespoon of yeast.
And, again, it 's that instant...
Instant ?
dissolving yeast.
Yeah.
Yes.
And we have so me cornmeal.
You can use yellow or white.
It's a half a cup.
It gives that wonderful cr unchy and sweet te xture to, um... We've got three tablespoons of nonfat dry milk.
And I add this fo r two reasons: one, to give a nice st retching ability to the bread and for calcium boost as well.
And we're going to add so me chili powder, tw o teaspoons.
Is it triple... triple strength?
I hope this is mild.
I really like to give my guests not a tremendous su rprise-- or my eaters, as it were.
Teaspoon and a half of salt.
Do you use any special salt, like kosher or...?
I don't use kosher salt or coarse salt in the bread machine because I'm afraid it mi ght scratch the Teflon.
Aha, that's a good idea, yes.
Yeah, you know, if you scratch the Teflon it makes it aw fully difficult to get the bread out.
I'm going to use so me white wheat flour in this recipe.
You can certainly us e all white or even all white wheat but we're going to have a combination.
So it's one cup of the white wheat or whole-wheat, if you wish...
Whole wheat is white... white...
Whole wheat is... White wheat with... ( both chuckle ) White wheat is a lighter kind of whole-wheat flour.
Oh.
So it's two of white an d one of white wheat.
So those are th e dry ingredients.
Moving right along to the wet ingredients.
We've got these refried beans.
And they come in a can and I like to use the vegetarian refried beans.
There are lots of different ki nds on the market: nonvegetarian, sp icy, not spicy... And I'm eyeballing ab out one cup.
This is a ten-ounce can.
Yeah.
But, you know, mo re or less is not...
I've never seen it come in paste like that.
That's interesting.
And it smells re ally, really good.
And we've got this...
I brought this back fr om Santa Fe.
This is Taos re d-chili honey.
Red-chili honey?
Isn't that a beautiful color?
You can use any kind of honey you wish.
If you can't find re d-chili honey that's not a problem.
We have a quarter of a cup of oil.
And I've got this wo nderful mild chili oil.
Gosh.
And we've got an egg.
One egg.
And a cup of water.
And what I'm going to do is make this loaf of bread ri ght in the bread machine.
I'm going to put th e pan in there and press Start.
And, again, after ab out a few minutes I'm going to look in, se e how things are going.
But, you know, th e fact is you don't have to make th e loaf of bread.
You have some choices.
And if you use the machine ju st in the dough cycle you can make something ca lled "quitza."
And what's that?
It is a cross between pi zza and quiche.
And here is the dough.
I'm going to make it in this springform pan with slope sided... sl ope sides.
We're calling it a slope-sided sp ringform pan.
But you could use... That doesn't have to be this pan.
Oh, no, you can use a springform pan or...
It's just pretty.
You can also just make th is into a flat pizza and roll it out and put it on a baking dish.
Now, I'm going to get my rolling pin here and I'm going to roll this out.
You always use a marble pin.
Well, I like to do it be cause it's got heft.
Yeah.
And it really helps.
Mm-hmm.
And it's nice and cold.
The dough is a pretty color.
Isn't it a pretty color?
It's also, again...
Pinch a taste of it.
Now, at this point I could also bake it on a pizza stone if I wished.
But now I'm going to line th is pan with the dough...
But just tasting it, it doesn't have... it isn't overly spicy.
No.
No.
No.
And, again, this is not about being... having it perfect.
Nicey, nicey, no.
No, I don't...
I' m not good at that.
Rustic.
Rustic, indeed.
So there is my... And I've got a little do ugh left over.
We can just pa tch it up there.
So, to finish this off I've got some softened cr eam cheese here.
Oh, just plain old, usual cream cheese.
Cream cheese, yes.
Nice and soft so it 's easily spreadable I'm going to put this on the bottom.
And... this is so me jarred salsa and it's chunky salsa and what I do is I put it into a sieve and allow some of th e liquid to drain out.
and that prevents...
This is just store-bought salsa.
It is.
And you could certainly ma ke your own... Mm-hmm.
if you have a favorite recipe.
I'm going to spread it out here.
and then I'm going to top the whole thing with some grated ch eddar cheese.
There's about a cup.
I can smell that salsa.
Isn't that nice?
Yes, very fresh, nice.
So we'll just let it rise until it's double in bulk about 20 to 40 minutes and then we're going to be baking it.
At 475 for 20 to 25 minutes.
So, we have achieved qu itza.
It's beautiful, it's absolutely beautiful.
It's kind of like a deep-dish pizza...
Exactly.
with much more pizzazz.
That looks lovely.
You can have this ho t out of the oven.
Mmm, yeah.
Look at that.
I love it when everything me lts together.
Isn't that great?
Isn't that beautiful?
Wow!
Wowdy-dowdy .
All right, here's a piece for you.
and... an d I'll cut a piece.
Mmm .
Let me know wh at you think.
Oh, boy.
Mmm, that's wonderful.
It's not too spicy but you've got all the taste of things in it.
Exactly.
Delicious.
If you want to make it spicy you can just put so me hot sauce on top.
Mm-hmm.
So...
I think the combination of cheeses is so good.
Isn't that good?
That's not shabby.
I'm always amazed, yo u know.
It's just great.
Think of all that we've done.
I think it 's very exciting for the home cook, th e home baker to know that this ca n be done quite easily.
And all thanks to you, Lora.
Thank you so much for coming, dear.
It was my great pleasure.
Because I've always wanted to know what you could do with this machine and I'm very grateful to you.
Now, are you going to keep your machine on your counter now?
Yes, I certainly am.
( laughing ): Good.
Julia Child: Bon appétit!


- Food
Christopher Kimball’s Milk Street Television
Transform home cooking with the editors of Christopher Kimball’s Milk Street Magazine.


 New Episode


Support for PBS provided by: