A Three-Tiered Wedding Cake with Martha Stewart, Part 1
Season 3 Episode 1 | 23m 59sVideo has Closed Captions
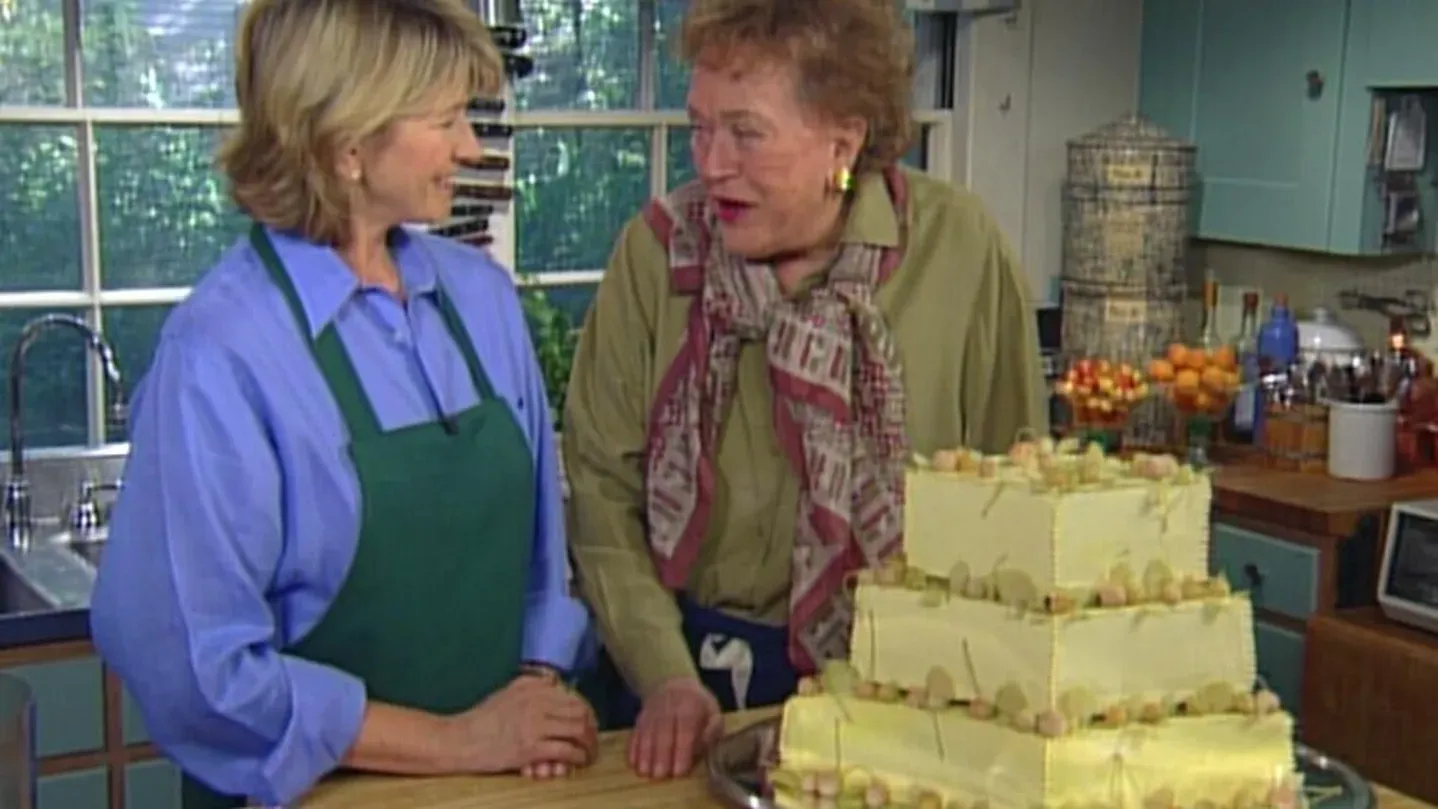
Martha Stewart joins Julia to bake one grand and glorious three-tiered wedding cake.
Martha Stewart joins Julia to bake one grand and glorious three-tiered wedding cake.
Problems playing video? | Closed Captioning Feedback
Problems playing video? | Closed Captioning Feedback
A Three-Tiered Wedding Cake with Martha Stewart, Part 1
Season 3 Episode 1 | 23m 59sVideo has Closed Captions
Martha Stewart joins Julia to bake one grand and glorious three-tiered wedding cake.
Problems playing video? | Closed Captioning Feedback
Where to Watch Baking With Julia
Baking With Julia is available to stream on pbs.org and the PBS app.

Visit the Julia Child Experience
Get recipes, read tributes from celebrity chefs, and more. Bon appetit!Providing Support for PBS.org
Learn Moreabout PBS online sponsorshipBoom!
Hello, I'm Julia Child.
Welcome to my house.
What fun we're going to have baking all kinds of incredible cakes, pies and breads right here in my own kitchen.
Martha Stewart started out as a caterer.
She did many weddings and has written a popular book on weddings.
Martha joins me today to bake this grand and glorious three-tiered wedding cake.
Learn how on: This beautiful wedding cake!
Look at it, this is all this yellow buttercream and these are marzipan cherries and they're all edible-- even the stems of the cherries.
And little golden raspberries.
They're just beautiful.
This is Martha Stewart's almond wedding cake.
Tell us what's inside.
Well, I can show you.
This is one layer cut in half of the dense almond cake.
In between, a really flavorful apricot jam filling and on top of the apricot jam is a dacquoise made out of almonds.
And you know when I first learned about dacquoise?
In 1961 when I got your Mastering the Art of French Cooking.
And that's the most delicious, crunchy layer that really adds another dimension to this cake.
So it's not only beautiful to look at it's marvelous eating.
"Eminently edible" I call it.
And all of the parts can be made ahead and stored.
Indeed, indeed.
And I'd like to show you how to make this almond cake right away because it's a little peculiar.
First, you need 9½ ounces of almond paste.
And I get the almond paste from the grocery store.
There's a block of almond paste that you can buy in most supermarkets.
Well, let's start her out.
And so I just throw this in here-- break it up.
Almond paste is really ground-up almonds, egg white and sugar.
And now you need one full cup of sugar, granular sugar.
And 18 tablespoons of butter-- or two sticks plus two tablespoons of unsalted butter.
Great.
And now just... process until the mixture is smooth.
Try to have all the ingredients at the same temperature-- room temperature-- when you start.
It already smells good.
Oh, yes.
That nice butter.
I like this cake because it gets better as it ages.
You know, it's one of those cakes that just tastes better and better.
Scrape it down one more time.
Mm-hmm... And I'll just do it once more.
There.
Let's look at that consistency.
You can see it still has a little graininess which you'd like because of the sugar, but it is smooth.
It hasn't gotten oily or anything.
No, not at all.
And now transfer this into your bowl of the electric mixer.
It's good to have a heavy-duty mixer, Julia.
And always have two bowls, I think.
At least.
( chuckles ) Okay, scrape it all-- don't waste anything.
This is too valuable and you don't want to disturb the measurements if you don't put everything in.
Okay, now you have to add to this six eggs.
Would you like to break the eggs?
No.
Oh, okay.
So, it's six eggs, whole eggs-- grade A, large eggs.
I think it's wise always to use the same size of egg, don't you?
Oh, yes, always.
I grow my own eggs so they're all different sizes so I have to sort of compensate every now and then.
Do they taste better, home-grown, do you think?
Definitely.
Next time, bring some.
I should have, I should have.
And so, just mix that up until it's smooth.
While it's doing that sift one cup of cake flour.
I put in slightly less than an cup just because I know after you sift it it assumes a little bit more volume.
But I like sifting like this.
I think I learned that from you, too.
( chuckles ) ( speed of mixer quickens ) And now just take a look at it.
I always like to look at the mixture, too Make sure that it scraped off.
This looks very smooth.
It looks lovely.
Oh, it looks perfect.
So you can see that lovely mixture.
That's beautiful.
Yeah, nice color.
And now, just gradually put your flour in.
Sprinkle it a little bit at a time on top of the batter and fold it in.
Now, some chefs use their hands to do the folding, but...
I think that's old hat now, isn't it?
( chuckles ) Well, then when the telephone rings who's going to answer the phone, right?
I don't know.
You're going to need to make this recipe six times for the wedding cake.
Just a little bit more.
But you see how quickly it goes.
It's a very easy cake.
There are no egg whites to beat.
It's just a very simple, simple... "Dense almond cake" we call it.
"Dense," I think that's a good... A wedding cake, you often like it to be dense because it cuts very beautifully.
You'll see how this slices.
There, it's perfectly incorporated.
And now I've prepared the small diamond and it is buttered and floured all around the perimeter and the bottom.
And then, I've cut a piece of parchment paper and inserted it right in the bottom.
That's to be sure it'll come out.
Right, you don't want it sticking.
You can always loosen the edges.
But loosening the bottom is the difficulty.
It looks lovely, I must say.
It is a great cake.
It's nice having it nice and deep.
Well, it cooks a long time-- 1½ to two hours in a 300- to 325-degree oven.
You have to watch it closely.
You don't want to burn it.
You don't want to make it dark.
That layer there is a beautiful, golden color without being burned at all.
Burning it will not do.
And then, so we'll just smooth this out.
I like to shake it a little bit.
Okay, so here we have... our first layer ready for the oven.
We've got to make it six times more.
Exactly.
Okay, so I put this in the oven.
The oven's ready.
Good.
And always in the middle of your oven-- preheated.
All right Great.
Heavens to Betsy, Martha!
This looks like an artist's palette.
You going to fix your fingernails or something?
Well, it looks like that, doesn't it-- all these odd tools.
These are the tools of the marzipan maker's trade.
And you'll see how we improvise.
It's a very interesting way to make a delectable and beautiful confection.
You're going to make these?
Golden raspberries.
And these beautiful, white Queen Anne cherries and the leaves.
We try to use the best almond paste-- the same as we used in the cake.
One pound of almond paste... One pound almond paste... one pound of confectioners' sugar that has been sifted.
Mm-hmm.
We don't want any lumps.
No lumps.
And just add this to the bowl.
You want a very, very, fine, light mixture to form the fruits and the flowers and the leaves-- whatever you're making out of marzipan.
And you add one-third of a cup of Karo syrup.
You can use egg whites but we want these to last a long time and we don't want to deal with the egg white problem that we hear about so we're going to use Karo syrup.
And I've already pre-measured one-third of a cup.
Karo, that's... Clear Karo syrup.
What in the world is that made of?
Corn.
Oh, corn syrup, of course-- I'd forgotten that.
There.
When it stops, take it out.
It's just gotten so stiff.
Yes, it is very stiff.
So what we do is turn this out right on our board... and knead it a little bit by hand just to bring it all together.
Probably don't want to heat it up.
No, no, no, no, not at all.
Work in a cool room, not hot.
If it gets too hot, it will get oily because of all that oil in the almond.
But, look, that's beautiful.
And form this into a flat rectangle.
You don't want to waste any of it and wrap it in plastic wrap.
What you really want it to do is sit in the refrigerator-- chill it-- for a couple hours.
Even overnight is good.
So, you want to get this cooled off.
And it will meld together nicely in the refrigerator.
Tight-- make sure it's air-tight.
And I always put it on a cookie sheet or something in the refrigerator.
There.
Chill it, let it rest.
We have a piece already prepared here.
This is the same dough that we've just made.
Nice and cold.
Well, it's not too cold.
You don't want it really, really cold.
It's cool.
But if it gets too cold you won't be able to form it you know, it will crumble.
Now, I'd like you to try, too.
We'll take a little bit... Show me how.
Okay, well, here's enough for a cherry.
And you have to really work it with your fingers.
You want it smooth as can be.
And roll it into a ball.
Make sure that there's no air spaces left in that ball.
Look, perfect.
I can see that that is getting a little oily.
Yeah, that's okay... because we're going to now... You're going to need an awful lot of these.
Well, we are.
This is a large wedding cake and one should start making these oh, a week in advance.
And you keep them in air-tight containers.
Marzipan will last a long time.
So now we have a round ball.
Using the edge of a knife... this is a little candy maker's knife.
We want to make those little indentations that a natural cherry has.
A little on that side, a little on this side.
You know how cherries are divided in half.
So you can do that.
And using this tool we want to make the cherry stem.
So, already we're getting something that's looking quite a bit like a cherry.
Oh... Do it on the other side, too.
And leave the top without...
Okay, that's good, that's good.
You don't have to go all the way around.
And right here we'll make the...
There.
That does look like...
It really looks like a cherry.
It does.
And then we'll put these right here.
And I'll show you how to color in a moment.
But let's make raspberries, too.
You do the same process again.
A little bit smaller since golden raspberries are...
They're so pretty, too.
Oh, they are.
They're called "fall gold berries" and they're very, very sweet very different in taste from the red raspberry or the brandywine raspberry.
And now, you know how raspberries have that peculiar tiny indentations.
Well, we found that this side-- the very, very finest side of a grater-- works very well if you just roll the...
Isn't that wonderful?
See, it makes it...
They look just like either a strawberry or a raspberry.
It has that effect.
Isn't that cute?
Yeah.
And raspberries, too are going to need a place for a top so I'm just using this star-like top.
See, it's perfect.
And I use this tool to make your...
There.
So now we have two raspberries and two Queen Anne cherries.
And we have to now show how to make the leaves.
Take a little bit of your marzipan.
Again, knead it very well.
Now, these are all little tools, these rollers.
They can all be gotten at a confection-making store.
Just look in the yellow pages.
Cake-decorating stores.
Now, we want it thin because the thinner and the more delicate the more beautiful our final result.
And the leaf cutters can be found also at the same place.
So here we have...
This is the top of the raspberry leaf.
Isn't that pretty?
So, here we have... That's charming.
a very pretty leaf.
So, here we have two of those leaves and these are very nice little leaf cutters, too.
Isn't that cute.
But these are all the tools that if you have them the job is not too difficult.
This is a rubber leaf with veining so usually I would take a knife and vein the leaf one by one but with this, all you do is just press on your leaf and you have a perfect... Well, that's... You see, it's all very, very much easier than you can imagine.
It certainly is.
So let me show you now the next step: stems.
Stems.
Yes, we want cherry stems.
You just roll in your hands and then on the marble or on whatever surface as very fine as possible little snakes.
Now, if it gets too long just cut it in half and keep rolling.
This is time consuming it's delicate but the result pays off.
The more fine, the better.
Okay, so here's a stem, and you want to taper it a little bit because a real true cherry stem has a fatter end.
So, here is our cherry stem.
Okay, and then we can just make that end a little, with our fingers.
These powdered colors are petal dusts which are non-toxic colors for... Organic?
Well, I don't know what it's made out of.
But anyway, they are okay.
And I'm using a little bit of buttercup a little bit of spiced pumpkin and a little bit of brown for the end of the stem.
If you're going to do the leaf, for example you want to get this leaf just slightly green.
So, find a brush that you like and brush just on the edges of the leaf, just a powdering.
See how delicate it is?
I'd think you'd have to start two or three months ahead in order to do this.
No, not really.
And the whole family...
Practice first, and then proceed.
There, that looks good.
Now, I forgot, I didn't make a little indentation right here on the leaf.
You must do that.
That's good.
And that makes it more realistic.
Yes, it does; see all these little touches.
You think, "What do you have to do that for?"
But I'll tell you, it really makes a difference.
And then, the leaves because we just want tinge of color just along the edges, so there.
And now, for the cherry a larger brush, a nice soft brush and a little bit, I think...
I love this color mango and buttercup together.
And you just want to blush that cheek.
You can do as much as you want or as little.
There.
That's the Queen Anne cherry.
And for the golden raspberry that's a little bit more yellow and just a little bit.
And I'll use a little bit of the pumpkin color.
If you see these on the vine, on the bush these are just about that color.
And then you insert your leaf right on the top and you can affix it a little bit more, like that.
You can use, also, if you're worried about it sticking just a toothpick of Karo syrup just a drop.
But here you have your raspberry.
That's charming.
Oh, and the stem... a little brown on the tip of the stem as it would be in nature right there, and the rest a little bit of green on the stem, there.
And that can be inserted with a little Karo syrup right in here.
And that holds it in.
That will hold the stem and then you have your cherry.
After you've made your 3,000 cherries how do you keep them?
( laughs ) Well, you don't need 3,000 Don't scare everyone away.
This is a wonderful method.
These little plastic containers and guess what, bubble wrapping that is the bane of our existence.
Well, cut it up, don't throw it away.
And you just place your freshly made marzipan in its little nest and it stays perfectly.
And then you cover it?
And you cover it with yet another sheet of bubble.
Do you have a warehouse full?
( laughs ) All different kinds.
Everything you can imagine.
But they really do stay well... That's wonderful.
like this... Then you put the plastic cover on it.
Yes, air-tight, and they won't dry out and they won't go stale.
Good, okay.
And now, Martha's going to make her famous butter cream.
Well, this is a very nice one.
I'm calling it the border variety because it's neither Italian meringue butter cream or Swiss.
It uses only egg yolks instead of the egg whites or the whole egg.
And what I do with the egg yolks, because you know there's an awful lot of filament and fiber and albumen is I always put the egg yolks through a strainer to break up... That's because you're going to do some fine piping.
Exactly, and you don't want that one little glitch to get into your tube and then you have to take it all off.
So this really avoids any lumps from the eggs.
And now we're using, Julia, 16 egg yolks-- sounds like a lot-- two pounds of butter and two cups of sugar in this frosting.
Well, that's an enormous cake.
Well, it is, it's large and you don't want to run out of frosting.
You certainly don't.
And now, we want to get the sugar syrup.
It's two cups of sugar and 1½ cups of cold water to get to 239 degrees.
I'll just turn that up to high and it should get to that right away.
And I see that you are using the tried and true method of a... cold water and a spoon to test.
Let's see what we have here.
It's almost thread stage.
See, it's almost forming that.
As soon as it gets just to the thread stage then you have to watch out, don't you?
Yes, and when you're using this very, very hot syrup I find it's very important to always keep a dish of cold water or ice water nearby.
If you get anything on your fingers put your finger right into that cold water.
Don't put it in your mouth because then you'll have a burnt lip and a burnt finger.
We're at 239, Julia.
Great, so we're there.
Okay, so we'll turn it off.
And this is the soft ball stage, or 239.
And when you pick it up in your fingers in the water it's supposed to just barely hold its shape.
Now, turn your mixer on, and very, very slowly pour the syrup into the eggs as they are beaten.
What we're doing is cooking the egg yolks but not poaching them.
So they're perfectly safe to eat.
Oh, yes, oh, yes, they're perfectly safe.
But this is quite hot.
But we don't want to get them too hot all at once so you have to be very careful.
You don't want to curdle them.
And now, an improvisation.
You can get a little attachment that works very well but we're using your copper bowl, filled with ice and I'm going to add some ice water.
Now, look, Julia, it's creamy it's cool, it's smooth and it has volume.
So now's the time to start incorporating the butter.
Two pounds of butter that I've softened with the flat beater until it's very creamy.
And remember, unsalted butter.
If you use salted butter, you will not have... You will ruin it.
a good-tasting frosting.
Have you got enough butter in there?
Wowee!
The cake will serve over 50 people.
Oh, yes, it will, yeah, so don't worry.
So that's not very much.
And remember, this is a wedding cake.
It has to taste good.
A butter frosting is imperative.
Yes.
It's getting to look like butter cream.
If it starts to get too cold remove that ice bowl because you'll start getting lumps.
Now, oh boy, is it looking good!
Just scrape down the edges and the bottom all the way to the bottom.
Because you want to get that butter totally incorporated.
And we are almost ready to add our flavorings.
I thought, with the almond and the apricot filling we would use a little rum.
That was a half-tablespoon of vanilla.
A half a tablespoon of vanilla and... A dark rum.
and a dark rum.
It smells good.
That makes that wonderful, wonderful flavor.
There, I think that's good.
It smells delicious.
Well, there you have a rich... Beautiful butter cream.
Notice how I clean the beater because you don't want to... With impeccably clean fingers you always have to say.
Exactly.
And these must be washed in the dishwasher in very, very hot water.
You don't want to leave any butter on them.
And now, just stir it up again with your rubber spatula...
It looks delicious!
and you have icing ready to put on the cake.
I think we ought to have a little taste of that, don't you?
Would you like to?
Here.
Yeah, do you think it's really any good?
Well, tell me what you think.
Mmm, you can taste the rum in it but not too much; it's just right.
Very delicate.
Thank you.
Delicious.
In the next episode Martha will show us how she assembles the cake.
First, she makes a crisp almond filling and fits it into each layer Next, she ices the cake constructs the support system for the three tiers and decorates the entire cake with the marzipan fruits we just sculpted.
The final step... it goes without saying: we ate it.
Mmm, all on the next episode of Baking with Julia.
Julia: Bon appétit!


- Food
Christopher Kimball’s Milk Street Television
Transform home cooking with the editors of Christopher Kimball’s Milk Street Magazine.


Support for PBS provided by: