Garden Party
Easter Sunday Dinner
2/26/2026 | 56m 47sVideo has Closed Captions
Head Butcher Chris Spear shows us how to prepare the best ham for Easter dinner.
Trace Barnett visits Head Butcher Chris Spear to learn the best techniques for preparing a juicy and delicious ham for Easter Sunday dinner.
Problems playing video? | Closed Captioning Feedback
Problems playing video? | Closed Captioning Feedback
Garden Party is a local public television program presented by APT
Garden Party
Easter Sunday Dinner
2/26/2026 | 56m 47sVideo has Closed Captions
Trace Barnett visits Head Butcher Chris Spear to learn the best techniques for preparing a juicy and delicious ham for Easter Sunday dinner.
Problems playing video? | Closed Captioning Feedback
Where to Watch Garden Party
Garden Party is available to stream on pbs.org and the PBS app.
Providing Support for PBS.org
Learn Moreabout PBS online sponsorship- What are you bringing for Easter dinner?
Whether it's a side, dessert, or maybe even the star of the show, I'm sharing some of my favorite recipes for you to try, and I'm sure they'll be a hit at your table.
I'm Trace Barnett, and welcome to "Garden Party", a show where we dive into my favorite family recipes, garden tips and tricks, and Alabama specialties, all with a swanky Southern twist.
(upbeat music) Today, we're making my favorite fluffy yeast rolls, a fresh twist on green bean casserole, classic banana pudding from scratch, and I'm so excited to take a little field trip off the homestead to learn how to make the best ham from the experts.
I've even got a few tips for decorating your table, too.
(upbeat music) If there's a special occasion, this is my go-to recipe for homemade rolls.
They're super nostalgic, and I call them lunchroom lady rolls.
Let me show you how to make 'em.
First things first for our lunchroom lady yeast rolls, you are going to need warm water.
And when I say warm water, you want warm water that's coming out of your spigot.
And the best way to test it is simply with your finger.
Dip your fingertip in there, and if it's too hot for your finger, it's gonna be too hot for our yeast and it will kill it, which we do not want.
So this is just warm water, feels good to the touch, and I'm going to pour that into our yeast.
And so you want to take a fork and just ever so lightly stir the warm water and the yeast together.
This is a yeast packet, so if you're using a bulk yeast, use two and 1/4 teaspoons.
I'm gonna pour in a teaspoon of sugar directly into our yeast mixture.
I'm also gonna set a timer, so this is really important if you are gonna make rolls or if you've got a lot of stuff going on in the kitchen.
I love having just a regular old kitchen timer.
I'm gonna set it at five minutes.
We are gonna know that this yeast is ready to go into our dough when it starts to foam and bubble up, we'll know the yeast is activated and it's working.
Now all we have to do is wait.
(clock ticking) So you can see that our yeast here has really foamed up nicely.
So this means our yeast was healthy and active, and so time to pour it into our bowl.
I'm gonna pour that in a large bowl here.
And we are going to add the other components of our dough.
So I have some milk here, just whole milk that I have heated, and I'm going to add some butter directly to that milk.
I like to melt my milk and my butter together because it kind of kills two birds with one stone.
So I've heated this milk up just like we did the water earlier, just to where it's warm to the touch.
So I'm gonna pour our mixture here.
Our butter has sufficiently melted into our milk.
And I'm gonna pour that into our yeast mixture.
I'm also going to add a fourth a cup of sugar.
I'm gonna give that a stir as I go.
Now, a lot of times people with yeast think you have to just rush to keep the yeast warm, but you don't have to.
It's actually quite a relaxing process.
I'm gonna put in just a little bit of salt there.
And then I've just lightly beaten one egg, and that goes right into that mixture.
We essentially want to mix our wet ingredients really well before we start adding our flour.
So I've got a fork, and I'm just kind of lightly, not to where I am almost frothing this up, but I'm just making sure that all of my egg and butter are sufficiently dispersed in our wet ingredients.
It just makes it super easy when you start adding your flour to control your wet ingredients this way.
(apple crunching) So these are lunch lady rolls because it was my lunch ladies who, like, first introduced me to them, Ms.
Chestine and Ms.
Gilbert, who, you know, they were the roll queens of Brilliant Elementary.
So did everyone get fresh rolls when they were in school?
Because I remember walking down the halls and I remember smelling those yeast rolls cooking, and you always knew, like, it's a special occasion, it's a holiday, Ms.
Chestine and Mary Gilbert are making their rolls.
(upbeat music) (apple crunching) So now to our flour.
I'm using a bread flour today that is wonderful for yeast breads.
You can use an all-purpose flour, but if you have access to a good bread flour, use that.
It's really light in texture, as you can see, and it's just perfect for yeast breads and rolls.
So I've taken my measurer here and I've just measured it all the way to the top, and then I've taken my knife and leveled it off.
Be sure and do that, because you want to make sure that your cups are precise.
I'm gonna add them in two cup increments just so I can incorporate that flour into our roll mixture here.
See that cup there has a little bit of space?
If I were to pour that in there, it would not... It would alter our rolls just slightly, so we want that to be perfectly evened off.
Now comes my favorite lunchroom lady utensil, and my grandmother always used a broken wooden spoon for her bread, so I do too.
It's almost like just a claw so I can really get down in there.
So this is two cups of our flour, so roughly half, and I'm just going to mix that ever so slightly until everything just starts kind of coming together.
I can already smell the yeast wafting up from the bowl, and it's already starting to bring back memories of the lunchroom back in the day, when Ms.
Chestine would make these rolls.
I'm going to add our other cup of flour, and I'm going to give that a good stir.
All right, so here is the part where we will start to form our dough.
You want to just eyeball this until a soft dough starts to form.
And if you are a biscuit maker, you will recognize that this batter comes together to a soft dough almost just like a biscuit.
I'm just running my half claw spoon around the bowl here, so you can see that that has come together and really made a good, soft dough, so it's ready to go onto our floured surface.
So I'm gonna dip into our flour here.
Always keep this around my work surface.
I'm gonna bring a cup over here and I'm gonna flower our surface.
Now, I know this looks like a lot of flour, but I'm gonna pull from the flour as needed because we are going to knead our dough in just a second.
I'm gonna flour my hands, I'm gonna flour the dough as I pull it out.
And you want the dough sticky.
So we are going to knead this dough for eight minutes, so I'm gonna set my timer here for eight minutes and I'm just gonna dive right on in and I'm just gonna have a nice, relaxing hand massage for eight minutes, or working hand massage, rather.
I often wonder, like, how much dough and how much kneading did these lunchroom ladies do, like, to feed a whole elementary school of kids?
Had to be some tough hands.
So as you can see, like, I'm basically kneading this dough, I'm just turning it over, playing around with it, just kind of starting to work it.
In the time that we're done in this eight minutes, you'll see this transform into this, like, bouncy, rubbery dough, which you would think that wouldn't make any kind of wonderful, fluffy yeast rolls, but it does.
So you can see I've kind of made a well here with my dough, and what I do is I just knead it out, and then I'll just rub it back in and just keep a constant flour on the outside.
If you're kneading your dough and you see that your hands, it starts to stick to your hands, just dip your hands in and just dive right back in to your dough.
If you have a stand mixer that has a dough attachment, you can just as easily do it in that mixer.
You'll know that your dough is finished when it starts to climb the hook and want to jump out.
(upbeat music) (clock ticking) All right, so our eight minutes is up, and a good way to, like, make sure your dough is sufficiently kneaded is to, like, take your finger and just dive down into it.
As you can see, that's a pretty deep hole, and it's already bounced back, so it's perfectly ready to go.
I usually just form my dough into a little bit of a circle, just like a small moon.
And in a bowl, I'm gonna put just a little bit of oil.
This is just a neutral oil, just like a vegetable oil.
And I'm gonna take that and rub the sides of the bowl.
The reason I'm doing that is because we want this dough to double in size, and that is gonna allow the dough to easily come up the sides of the bowl and not get stuck.
I'm gonna take my dough, and I'm gonna put it right into the bowl, and I'm gonna rub it around on that oil just a little bit, and then flip it back over.
I just want to coat both sides so we don't have any fear of sticking.
Now it's time to let our dough proof, and the best way to do that is just to loosely cover your bowl with the cloth.
The cloth doesn't have to be damp or anything, and I'm gonna transfer this for an hour to just over near my stove.
It's a little warm over there.
If you have a warm spot in your kitchen, not on direct heat, but that will help our dough proof and become real fluffy and double in size.
(upbeat music) The hour is up, and now it's time to check on our dough.
Of course, I've had to peak a couple times, and you should too.
Just lift up and make sure that everything looks as it should.
So we have doubled in size here on our dough, and I'm gonna take my fist, and I'm just going to smush it down just like that.
I'm not really sure why, but everyone I know, all the lunchroom ladies, they always punch that dough down.
And so what I'm gonna do now is I'm going to oil our muffin tin.
And if you don't have a muffin tin, you can just as easily use a sheet pan.
I use a muffin tin because when I was in school, I always remembered the lunchroom lady rolls out of a muffin tin, and I always thought that was the cutest thing, and tastes good too.
Again, I'm just using a simple oil here, just a vegetable oil.
And this makes 12 to 15 rolls, so I'm gonna hold it there at 16.
And what I'm gonna do is I'm gonna take our dough here, you don't have to use any flour or anything, and I'm just gonna pinch it off and eyeball it.
You can make these as small or as large as you want, but you kinda want them about that size.
I like a big roll that kinda puffs up over the top, and I'm just pulling our dough off and rolling.
♪ Keep those doughs on rolling, rolling ♪ ♪ They see me rolling ♪ Last one.
Boop!
Feels right at home in there.
So I'm going to take again our cloth here, and if you have a cotton cloth, that works best, and I'm just gonna cover that loosely with our cloth, and I'm gonna let that proof again for a half hour.
The waiting is the hardest part of this recipe, I promise.
(clock ticking) Our 30 minutes are up, and now is the grand reveal.
And they've just puffed up ever so slightly, and I'm going to brush these with just a little bit of butter so they brown up nicely in the oven.
So I've preheated my oven to 375, and we're gonna bake these for just 15 to 20 minutes, which, after the hour and a half, I think I can wait that long.
Now's the time if you're wanting to sell your house or impress anyone, bring them in while these are cooking in your oven.
They smell amazing.
I'm gonna cook these uncovered directly in the oven.
(upbeat music) (harp chiming) Our rolls just came out of the oven, and I wish y'all were here to smell it.
The house just smells so homey, so cozy.
And while they're still hot, I'm just gonna brush a little bit of melted butter on top.
You never can have too much butter with a roll.
Plus, it's gonna make them really nice and shiny for when they go to our table.
I've waited enough time here, I think, and I've gotta have a bite and put a little big dollop of butter in there.
Mm.
It's the perfect blend of fluffy yeast.
Texture reminds me of being in elementary school again.
I hope I made my lunch ladies proud.
Lunchroom lady rolls, minus the hairnet.
(upbeat music) Is it even a holiday dinner without green bean casserole?
Of course, on "Garden Party", we love to elevate a classic recipe, so how about we skip all those canned ingredients and make our own creamy bechamel sauce with some of my homegrown green beans?
Don't worry though, we're still gonna have some of those crispy onions on top.
You can't have it without that.
I'm over the stove here, blanching my green beans, so no matter if you're using fresh green beans from the produce section, or like me, if you're using green beans from your gardens fresh out of the freezer, you're gonna wanna blanch those beans for about five minutes.
Now, I've taken my beans, I have stringed them, and I have broken them off into, like, half inch pieces.
You don't want this large green bean, you want them almost bite size.
So think about the can that you would normally be using, that size, in a nutshell.
So I blanched these for five minutes, and blanching is just basically throwing in fresh vegetables into already boiling water, allowing them to hang out, float around for a few minutes, and then we're going to throw them in a water bath.
Now, what the water bath does is it's just gonna preserve the color of our beans, make them really pretty, bright.
I'm using three different beans that I grew in my garden this year, so I have rattlesnake beans, I have, like, Blue Lake green beans, and some Chinese long beans.
I really like the combination together.
Really has some good texture to it.
So I'm just gonna let my green beans hang out in this really nice, cool bath while I throw together our bechamel sauce.
So I'm melting three tablespoons of unsalted butter in a skillet here, and I'm gonna add in one finely chopped onion, and I'm just gonna let the onion cook away there until it is tender, translucent, probably about three to four minutes.
We're gonna add our mushrooms in there, too.
Which I'm sure mushrooms are an interesting addition to green bean casserole for you if you're used to using, like, a cream of chicken.
I know some people use cream of mushroom.
But there's just something about green beans and mushrooms that just are the perfect marriage in a casserole.
Really adds that little hearty bite to it.
I'm also preheating my oven to 375, so our oven is ready, hot, waiting for our casserole to go in.
Stir your onions frequently, because we don't want any of the onions to burn.
This is also why I like to do them in a small chop versus a larger.
They just cook more evenly, and you're just not biting into a large piece of onion.
So the onions are starting to kind of brown up a little bit and turn just ever so slightly translucent, so I'm gonna add in eight ounces of mushrooms.
I'm using baby portobello mushrooms today, but feel free to use any kind of mushroom you like, cremini mushrooms, chanterelle mushrooms, any kind of shroom will work in this situation.
I'm gonna give that a good toss and make sure they're coated evenly in that butter.
We wanna cook these mushrooms until they're just turning golden and they've sweated out all of that moisture.
I've just lightly chopped these mushrooms, too, into slices.
I really like that mushroom look when you're diving into the casserole.
I'm using stainless steel instead of cast iron today because I don't want the cast iron to impart any dark color onto our mushrooms or our onions.
Last but not least, I'm going to add three cloves of finely minced garlic.
I'm adding that to the end because we don't want to burn that garlic, because if you've ever bit into burnt garlic before, you probably just now recovered.
You're gonna cook this for about 30 seconds just until you start smelling that garlic, it's real fragrant.
So I'm gonna take three tablespoons of all purpose flour.
So this is gonna be the basis and the thickener of our bechamel.
And the thing about a bechamel sauce is once you learn it, you can use it so many times in the kitchen when you're cooking.
So I'm gonna sprinkle that over and I'm going to give it a toss just to make sure all of our mushrooms and all of our onions are evenly coated.
Now, you don't want to let this sit here and burn, but what we want is we want to take that raw flour flavor off, so we're just basically toasting the flour.
Looks like a good, ample coating, and I'm going to pour in one and one half cups of whole milk.
(upbeat music) Give that a good stir here.
And I'm gonna add in a cup of chicken stock.
So after you add your chicken stock, I'm gonna ditch this little guy here and I'm gonna grab a whisk.
What we're looking for is we're wanting this to kind of gradually thicken slowly.
This is also one of those things you don't want to throw on top of the stove, have it cooking away, and then go somewhere else, because this really does have a tendency to stick.
So we're just starting to come to a little bubble here, and we're gonna cook this probably about five minutes, four to five minutes.
You don't wanna overcook it.
I guess technically this would be our cream of chicken in the grand scheme of things.
And I have no aversion to canned cream of chicken, I just think it's just so much richer when you make it at home.
You can really also control the whole entire flavor too.
So we're just really starting to really bubble here, and I can tell that my sauce is really thickening already, simply just how the bubbles are bubbling (chuckles) for lack of a better word.
Now, I'm not gonna cook this until it's just super, super thick.
I'm basically just wanting to add that little bit of thickness before we add the heavy cream.
So I've turned the heat off of my bechamel here, and I'm gonna add in half a cup of heavy cream.
That's really gonna give us that richness, that really good stick to your mouth feel, what you want in a really good sauce.
Now let's season it up a little bit.
I'm gonna add in a teaspoon of salt, a teaspoon of pepper, half a teaspoon to a teaspoon of garlic powder and onion powder, just to give us that little flavor punch, and last but not least is a 1/4 teaspoon nutmeg.
Of course, that's completely optional, but it really adds that little bit of something.
You know when you're sitting having a dish and you're like, there's just something there that's so good in the back of your mouth in a sauce?
The nutmeg is that.
And it really goes well with the green beans, too.
I'm actually just gonna go ahead and give it a taste.
Absolutely perfect.
This is one of those times when you wanna go ahead, just dip a spoon in there, or your finger if you're not watched by the health department, and give it a taste, because whatever it tastes like now is what it's gonna taste like in our dish.
So now that we have gotten that all pulled together, I'm gonna grab another utensil here and I'm going to add half a cup of Parmesan cheese.
I'm waiting to the end, and I'm just gonna fold this in.
I'm gonna reserve a half cup for our topping.
It is so pretty.
(apple crunching) I can barely say bechamel.
I don't even know if that's right, so don't ask me to spell it.
I mean, I guess the roundabout way is it's just one of the classic five mother sauces.
So basically, a really good, creamy, all encompassing white sauce that can be a base from everything, of course, from green bean casserole to mac and cheese.
And, you know, it's relatively easy to make.
I think people think they hear the name and it just sounds a little intimidating.
The amount of ingredients that goes into it also creates a large amount, so it's perfect for large dishes.
And I think, like, the price ratio, when you're making, like, buying something from the can versus a fresh bechamel, it, like, definitely evens out.
The taste itself is worth putting the elbow grease in for.
(apple crunching) So you'll want a nine by 13 casserole dish here, and I've got a deeper dish casserole pan, just because I don't want it bubbling over in the oven.
So we roughly need about two pounds of green beans.
Obviously I cooked about 14 pounds here, so don't follow my lead.
And you can do this in the same pot that you cook your bechamel in, or I actually just put my green beans down into the actual casserole dish itself, and then I will pour the sauce directly over it.
Looks about like two pounds.
I'm gonna do one more just for good look.
Might as well use 'em.
All right, now comes the good stuff.
Just gonna pour that delicious sauce directly over.
Look how ooey gooey and creamy it is.
So perfect.
I could literally eat this like a soup.
And look at that Parmesan cheese.
It's so gooey and stringy.
So, give it a good stir.
You just wanna be sure and coat every one of your green beans.
We don't need a dry green bean in our casserole here.
And then just even it out.
Last but not least, let's make a topping.
So to make our topping, I'm melting two tablespoons of butter, just over a low heat.
Don't let it burn.
Can't really come back from that.
So our butter is melted, and I'm gonna add some familiar key players to our topping here.
Just some breadcrumbs.
You can also use panko if you want an extra crunch there.
And I just wanna coat this, just so it browns up ever so slightly.
So once it looks like coarse crumbs, you know it's good to go.
I'm gonna sprinkle that directly on top of our casserole.
I love a good breadcrumb topping.
And here we go with our crispy fried onions, because, you know, you can't just steer too far off the course without having something familiar there.
And I like a lot, so I'm really gonna layer it up on there.
And I'm gonna add just a few chopped pecans.
I had some on hand, and I really love a little bit of nut crunch whenever I'm doing green beans.
And last but not least, just to add that extra little bit of touch, some Parmesan, just to brown up on top and really look beautiful.
I'm gonna throw this in a preheated 375 degree oven and cook it for roughly 35 to 40 minutes.
You wanna cook it until it's bubbling up from the center, the cheese is all melted on top, and we've got that really nice, crunchy topping.
I mean, could it get any better than that?
(clock ticking) We've got a hot, popping green bean casserole fresh out of the oven sitting right in front of me, and it looks absolutely beautiful.
Super crisp, super crunchy on top.
Take this out of the oven and let it kind of hang out for, you know, a good 15 to 20 minutes or more.
This is something you can definitely serve at room temperature, so it doesn't have to be piping hot.
Let's give it a taste.
Go for this corner piece here.
(upbeat music) Leagues above the old timey traditional green bean casserole.
I love the crunchiness of the fresh green beans.
It's so good with the bechamel, and then you've got the crispy, crunchy top and the ooey, gooey cheese.
Some cool beans casserole if you ask me.
(ducks quacking) If you've ever felt intimidated by the thought of preparing a ham for Easter dinner, you are not alone.
But I know some folks who can show us how to make the pork-fect main dish.
Oink, oink!
From ordering it at the butcher, to making a delicious glaze, to carving and slicing, we're gonna cover it all today.
Roll that ham cam footage.
Today, we're at Evans Meat and Seafood Warehouse in Birmingham, Alabama, and we are looking for the perfect Easter ham.
And I'm here with head butcher at Son of a Butcher, Chris Spear.
Tell us what kind of ham we have here in front of us and some details in general about ham, because I feel like most people usually see ham, very seasonal, in the big coolers at your big box grocery stores, in plastic.
What's different about this ham?
- Well, this is a bone-in smoked applewood Nueske spiral ham.
- There's quite a few ham varieties that are out there.
- Yes.
- So tell me a little bit about the different curing processes in smoking.
So here in the South, you know, we all grew up with smokehouses back in the day.
And, you know, there's just nothing better than a little smoke flavor.
But tell me a little bit of detail about each different ham.
- Yeah, well, with your smoked ham, you're gonna have, either you're gonna do a dry brine or a wet brine, and that's just gonna help the ham to not only collect flavor, but also to make sure that it stays nice and moist during the smoking process.
Obviously, if your ham is bone-in, your bone acts as a conductor and the insulator of heat, so it kinda helps keep the ham really nice and moist.
Where with a boneless ham, you would definitely cook it at a very lower temperature, 'cause you don't have that bone to kinda help it, like, stay moist.
And obviously, covering it as you cook it helps out tons.
Then you have, like, say, like, a cured ham, like a country ham or a prosciutto, which you would take the hind leg, which is also known as like a green ham, you would cure it until it was cured all the way through, and there's all these little equations of how much it weighs, how much salt you use, and pink salt, and the nitrates that you would use, and the amount of time you would cure it.
And then you would wash out that cure, you would hang it till it's dry, till it's dry enough to be able to slice it.
And then you have your raw hams.
A lot of people, what they do with the raw hams, they would just roast it, just like roasting a whole pig.
- Gotcha.
Whole pig.
Now, nothing screams party like a whole pig when it shows up.
So I feel like a lot of mistakes are made when people buy already pre-sliced ham in the store.
- Yes.
- And I think it all boils down to the fact that all the slices are already there, so they dry out super quick.
- Absolutely.
- So, what's your biggest tips on when you purchase a ham that is already sliced and already pre-cooked?
How do you keep that moist, good flavor in there?
- So, slow and low would be the best way to do it.
And the way you calculate how long you do it is that you'd weigh the ham.
And so it'd be 20 minutes per pound.
- 20 per pound, gotcha.
- If that makes sense.
And then what you would do is add... You would have it, like, in a pan with a roasting rack.
Underneath that roasting rack, you can pour in some water, pork stock, vegetable stock, chicken stock, whatever you choose to do, and then you'd wrap it with aluminum foil when you bake it off.
As that liquid evaporates, it just goes into that ham and kind of helps to keep it moist.
- Do you prefer, like, a roaster, or do you prefer the tin foil method?
- I prefer tin foil, to be honest with you.
- [Trace] Just 'cause some steam's allowed to escape, so it just gets to that perfect happy medium.
- Yeah, yeah, yeah.
- Okay, so what's the biggest mistake?
So you buy this precooked ham and they're reheating it.
- Yeah, I mean, a lot of times, it's just, not to be insulting, but just negligence.
- Yeah, I just throw it in the oven while I'm making all my sides.
- Yeah, and they're not paying attention to it and stuff like that.
The best way to kind of heat it up is kind of the method I was talking a little bit earlier with the water in the pan and covering it with the foil.
But you only need to heat up the ham to 140 degrees.
A lot of times, it just stays in there, then you temp it, it's like 200 degrees, then your ham's gonna be very dry, a little rubbery.
- And I think every kitchen should have a good meat thermometer.
- Absolutely.
- I mean, I think that's one of the necessities.
- Yeah.
- So I'm smelling something real good floating around this kitchen.
- Well, I actually have a ham in the oven for us.
- Well, let's get it out and roll that ham cam.
Oh my gosh, look at that.
So how did you prep this ham before you went in the oven?
What's some of your big tips?
- Well, what I did is I pulled it out two hours before I was going to cook it to help get the ham to room temperature before, and just heats up the... It just speeds up the heating process.
And then I put it into a 325 degree oven.
- [Trace] 325, so pretty low.
- [Chris] Yeah.
- So, you know, when you get a ham, especially cured or smoked, you're not necessarily throwing a bunch of seasonings on it, right, before you put it in.
- I don't think it's necessary, no.
- 'Cause then you all, like, have this salt lick of a ham that's just a lot.
So, but we're gonna glaze this ham, and glazing's like a whole important thing for hams, and I kind of feel like it's the spray tan of hams, if you know what I mean.
- Yes, it is.
- Every ham just looks better with it.
- Yep, it does.
- So tell us about your glaze.
- So basically, how I make my glazes, I like my glazes a little bit more on the savory side.
A lot of people like on the sweeter side to balance out the salt that's already in the ham, but I love salt.
So, my glazes are a little bit more savory, a little Dijon, thyme heavy.
- So you've got a lot of the traditional heavy hitters too.
You know, I always, I'm like right in the middle, so, like, savory sweet, which is one of my favorites.
So like, of course, mine has Dijon, but also a little bit of that brown sugar in there, 'cause I love that caramelization.
- Yeah, so basically, what I do is I just melt butter, and then I mince some fresh thyme, and then I add the fresh thyme to the butter, let that butter collect that thyme flavor, and then I add honey, brown sugar, and Dijon.
- So you've got us a glaze made up back here on the stove top.
- [Chris] Yep.
- Let's transfer this over and let's talk glazing.
- Great.
So, what I usually do is I'll turn the oven 50 degrees higher than what I cooked it at.
- Okay, and so what point do you feel like is the perfect time to glaze the ham?
Is this, like, toward the last 20 minutes?
Is it midway?
What's the plan?
- Yeah, yeah, about the last 20.
So, you want to heat your ham up to about 140, and then when it hits about 135, 135 degrees, that's when I start the glazing process.
So basically, what I do is I put my first layer of glaze on, I'll put it in the oven, wait five minutes, pull it back out, another glaze, five minutes back in the oven, and then I'll do it a third time.
- [Trace] So that's what really gives it that good caramelization, that really good stickiness that you want with a ham.
- [Chris] Yeah.
- Look how beautiful that is.
- Yeah, what I like to do is kind of brush it.
I suggest always using a brush that has, like, the actual hairs on it.
I don't understand the plastic brushes.
- Don't make a whole lot of sense, does it?
- They don't.
- [Trace] So you're getting this in every nook and cranny, right?
So there's no part of this ham unturned with glaze.
- [Chris] Ideally.
- And so you were talking to me a while ago about, like, cooking your glaze on the stove top here, and you were talking about, like, getting that perfect ratio so it's really good and emulsified.
So, what ratios are we talking here?
- Basically, if you're making a glaze and it's a little bit too watery for you, what you always do is reduce it down until you get the glaze that you want.
- Right.
- Yeah.
After you glaze your ham, and when that glaze is cooking on your ham, it's also gonna get really sticky.
- Right, yeah.
I always just feel like the taste of the glaze is super important, you know, not necessarily making it perfect on the stove top, 'cause like you said, it's gonna get sticky.
Speaking of sticky, this is in the oven.
I know a lot of cooks, especially home cooks, they tend to, like, glaze the ham, and then the ham kind of chars, it burns a little bit.
What's your tips on keeping our glaze from turning to charcoal?
- My biggest tip is just paying attention to the ham.
- Paying attention.
- Yeah.
So, you know, sometimes, people's ovens at home, they don't heat evenly, so rotating your ham during the cooking process will help where one side gets dark and one side doesn't, right?
But just kind of, just really paying attention to what you're doing.
- Beautiful, should we pop it back in and let it get nice and crispied up?
- Yes.
- Let me get the oven for you here.
- I appreciate that.
(clock ticking) (upbeat music) (upbeat music continues) (upbeat music continues) (upbeat music continues) - Oh my gosh, look at that showstopper.
Let's smell of it.
- After we do the final glaze, what I usually do is I'll do like a foil tent, and so we'll let it kind of rest for about 20 to 30 minutes, and to kind of let, like, everything just kind of, all the flavors kind of meld together as it cools down a little bit, which would be great that it's cooler, so when you're touching it to cut it, you're just not burning yourself.
- I also think a lot of home cooks are like, "I needed to get this piping hot piece of meat out," and it's just, like, so much flavor's lost while it's just so hot.
- [Chris] Yeah, yeah.
And so you just do it like a really loose kind of cover.
- All right.
Our 20 minutes have passed.
Let me do the honors.
Oh my gosh, this is perfect.
Look at the glaze, too.
So in that amount of time, the glaze has kind of really made itself at home on top of our ham.
- Absolutely.
- All right, I can't wait any longer.
It's time to carve this meat, the ham of all hams.
- Great.
- And you know, I think this is the problem with a lot of, like, people at home, myself included.
It's like, what's the proper way to carve this ham up and still keep it as a work of art?
- Sure.
- And I think that goes to say with any kind of big holiday meat, you know?
The turkey's intimidating.
- Yeah.
- The ham's intimidating.
All right, we're gloved up.
That means stuff's getting really serious.
Before we dive into this, this one's half... Is this half sliced?
- Yes.
- And then half whole.
Tell me a little bit about that.
- So, what we can do with this, today we are gonna slice this top part, but a lot of times, people will cut the top part off, and that'll be for leftovers that you pass out to your family, you know, for the next day.
And then the bottom part that we'll just slice is what's for dinner.
- Gotcha.
Show us those professional carving skills.
- So what you wanna do is that you want the bone, the bone of the ham away from you.
- Okay.
- And so what we're gonna do is we're gonna slice towards the bone.
And then once we get our slices, all we're gonna do is cut it down following the bone, and then it's all sliced.
- [Trace] I'm gonna look at the juice that's coming out.
- [Chris] We're just gonna just kinda slice it.
The thickness is up to you.
- [Trace] Is there an optimal thickness you think?
- [Chris] I think about like a half inch, a quarter inch to a half inch is pretty good.
- Oh, wow.
- And so all I'm doing is just kinda slicing and cutting right to that bone.
- That's the kind of piece of ham you want right there with, like, mac and cheese.
- Oh, yeah.
- Toasted later on a sandwich.
- And so at this point, all of it's pretty much sliced.
All we're gonna do is follow this... We're gonna follow the bone all the way down, down that angle.
- Man, that's so perfect.
This is like the ham of dreams.
- Yeah, now that we're sliced... - Look at all that glaze that's gone into that.
Oh my gosh.
Now, when you plate yours, would you reserve any of the drippings or glaze, like, from the bottom of the pan and- - Oh, yeah.
- Toss on that?
- [Chris] That would never hurt.
- So we've plated the pork here, but now's the most important part.
- Yes.
- Let me serve you up some.
Is there one piece you're eyeing over here?
- A nice glazed piece, please.
- Nice glazed piece.
How's that one?
- That one's great.
- That looks beautiful.
Mm.
I can just forego my fork.
(Chris chuckles) Mm.
The best ham.
So moist, so flavorful.
And I get every bit of that component of the glaze with the smoke too.
So for our viewers who don't know Evans Meats, will you tell me a little bit about the organization and its history here in Birmingham?
- Absolutely.
So, Evans Meats was started by Butch Evans in 1998.
And, you know, the focus is always just trying to bring the best product to the surrounding restaurants as possible.
And that rings true today as well.
- I feel like a lot of people are a little intimidated of butcher shops.
- Sure.
- You know, the whole concept of, like, meat cuts, and then, like, asking for that specific cut is, you know, just not your everyday thing.
So, if I'm a viewer, I'm going into the butcher shop, how would I go in and order the perfect ham?
- Well, in our butcher shop in particular, about four weeks out before a holiday, we set up a special menu where the customer can order online.
They can basically set their pickup date for it.
They come in, we have the order ready, and they just pay and go.
- Just magically appears?
- Yeah, yeah.
But also we take a lot of special requests as well.
Like, if someone wants, like, a pork crown roast or if they want a particular size of a rib roast, you know, they just communicate that with us, and we just get it ready for 'em.
- So, say I come in and order ham in advance.
- Okay.
- What's the best way to store a ham until I'm ready to cook it?
- Well, okay, so the hams that we sell in particular are already vacuum sealed.
So, they last a very long time in your refrigerator.
If you bought a ham from us, it would probably be fine for about three weeks before you cook it.
- Oh, that's a lot of, like, relaxed wait time.
I like that.
Beat the rush a little bit.
- Yeah, yeah, yeah.
- Well, I think we're done hamming it up.
It's time for me to get this masterpiece to my Easter table.
Thanks so much for having us today and talking ham.
- Thanks for thinking of us.
(gentle music) (rooster crowing) Before we make dessert, I wanted to share a few tips I have for dressing up your table.
The little details make all the difference too.
Let's get started with some homemade egg dye.
I'm gonna show you my two favorite ways to dye eggs naturally.
The first one just involves a little red cabbage.
I've roughly chopped one small head of red cabbage, and I've cooked it down just in some water.
Now, I've cooked it for about 30 minutes, just until the water is imparted with this really pretty color.
After I've strained it, I'm gonna add a couple tablespoons of vinegar.
I'm gonna take some eggs and submerge them in a bowl.
These are hard boiled eggs, by the way.
I don't trust myself if they're not.
And I'm gonna take our beautiful cabbage color, and I'm gonna completely cover our eggs, except for that one, maybe a bigger bowl.
Now, you want to leave these in here for a minimum of 30 to 60 minutes, but I would suggest leaving them in there overnight to really get that rich, dark hue.
Our second egg dye involves just simple turmeric, and because it's so potent, it really latches onto those eggshells.
I've just got a couple tablespoons here, and I'm gonna do the same as we did with our red cabbage dye.
Put that directly into our water, give it a good stir, and I'm gonna boil that down just until everything comes together.
You can use a small whisk if your turmeric is pretty clumpy, although it doesn't matter at the end of the day.
I'm gonna pour in a couple tablespoons of vinegar, and again, I'm gonna submerge our eggs.
Brown eggs actually work for this one.
They kinda have more of an orangey, deeper hue, but the white ones always work best.
(upbeat music) I'm gonna take our turmeric, pour it into our bowl, cover our eggs, and again, this is something that you want to leave in there for a minimum of 30 to 60 minutes, and that's really just gonna depend on the hue.
So you'll get anything from this really light color all the way to this kind of deeper color, which is one of the brown eggs.
I think these are just so beautiful.
Another option is if you wanna just take a little wax crayon or a wax candle, you can always put some cool designs, submerge your eggs.
So the great thing about this is you have a wide range of colors.
I'm gonna let those soak, and I'll meet y'all back at the dinner table.
(spring boinging) The final touch on our Easter table are our beautifully dyed Easter eggs.
It can't be an Easter table without the eggs.
And I'm just gonna scatter those in these little, small nests.
They look natural, but they're actually just from the dollar store.
When I think of Easter, I always think of just classic Southern style.
I love to use old dishes, and I love to mix match patterns, but one specific set of dishes I love to use on Easter is this old set that I have from Southern Potteries that used to come in flower sacks back when you got freebies.
My great-grandparents collected them when they had a general store.
But I love because they're floral, they're bright, they're also gold.
And of course, if you don't have a whole set of dishes, spring is also the perfect time to just mix a bunch of floral dishes together.
But of course, your silverware and your plates all don't have to match.
I actually prefer them not to.
But because my plates and bowls are gold rim, I just have this really inexpensive gold flatware.
Everyone thinks it's expensive, but it's actually super cheap.
It came from a thrift store.
I also love throwing in some unexpected elements, like this little art deco lighter in the shape of a gold egg.
So always think outside the box.
I literally didn't buy a single thing for this table.
I just kind of threw together what I already had.
So when I think of Easter, I always think of, of course, florals.
And one of my favorite things to do is I simply just used a saucer, and I've soaked some Oasis foam in water.
This forsythia's perfect for arrangements because the stems are really sturdy.
I've just taken moss and wrapped it around the Oasis and then stuck the branches down in it.
And I love when the petals fall off onto the table.
It just really feels like spring.
Another spring favorite that you should not ignore are these little, great hyacinths.
And I love to just nestle them in a little bit of a teacup with a little moss around them, just so they look like they're growing from the teacup.
The best thing to do is just look out in your yard or on your porch.
The table is looking beautiful, but our dinner is just missing one final piece, the dessert.
And I can't think of a more iconic Sunday dinner dessert than banana pudding.
In my family, we skip the box pudding mix and instead make a custard base from scratch with a meringue topping to match.
Meet me in the kitchen.
Banana pudding is one of those dishes that's just synonymous with any kind of special occasion in the South, and you're probably familiar with two different versions.
So when I think of banana pudding, especially nostalgic-wise, I always harken back to my grandmother's banana pudding.
And this is a custard-based banana pudding where you cook your custard on the stove top and then pour it generously over your bananas and wafers.
Of course, you're also probably familiar with the instant pudding mix, but I just really prefer this old school 'nana pudding.
To begin with, we are gonna start with six room temp eggs.
And I want my eggs room temp because they are easier to separate.
And this is one of my favorite things to do, is to separate the eggs, too.
There's all those fancy finagled things that separate the egg and the yolk, but I find that this method is just the best.
So just crack your egg directly onto the counter and just separate it like so in its own shell.
If you have fresh eggs, those are usually best to separate.
They're a little bit easier because the shells are just denser.
Man, that had quite a lot of white on that.
That's gonna make a good meringue.
We're gonna use the yolks for our filling, which is gonna be the base of our custard.
And then our whites, of course, will become our good old Southern traditional meringue.
And I'm doing good here.
No yolks have slid into the bowl yet.
Of course, it's always the last one.
Good plop.
So now that we have our eggs separated, I've got two cups of heavy cream, and I'm just gonna pour that into a saucepan.
I'm gonna take this to my stove top, and I'm just going to warm it.
I don't wanna scald this cream.
So I'm gonna pay close attention to this when it's on the stove top, and I'm just gonna heat it until it's just lukewarm, so almost like a baby's bottle.
(roosters crowing) So I'm gonna take our six egg yolks, and I'm gonna pour those into a large saucepan.
To our yolks, I am gonna add 3/4 a cup of our sugar, and I'm just gonna whisk this until it kind of all comes together and it's smooth, which is not very long at all, and it's just absolutely beautiful.
I'm gonna add in 1/4 a cup of flour.
I'm gonna do this gradually.
Just incorporate it.
And then I'm gonna add in just a pinch of salt.
You don't want too much, because we don't want our custard to turn salty.
That's a whole different thing.
And I'm again gonna whisk this until this is smooth and... (pan clanking) Sounds like the symphony.
I'm just gonna whisk this until it's really smooth and glossy.
And you can see that color is really coming through, so that's like the traditional banana pudding color that you really want.
So once we have all of that really glossy, smooth, custard goodness there, I am gonna pour in our warmed heavy cream.
(upbeat music) Now, if you had your cream too hot, this would literally just turn to scrambled eggs.
Sweet scrambled eggs, nonetheless, but scrambled eggs.
I'm gonna go ahead and give this a good whisk here on the island, just to give us a head start, and now let's go to the stove top and let the magic happen.
(xylophone plinking) So we want to heat our custard mixture over a gentle heat, and we are gonna stand and constantly whisk this velvety smooth mixture for three to four minutes, just until it thickens and becomes custard.
So this is just a traditional standard custard that you can basically use for any kind of desserts that you're whipping up.
Last but not least, a little bit of vanilla there.
Of course, I added a little extra because I'm just a vanilla fiend.
And one last whisk, and we are ready to assemble our pudding.
(gentle music) All right, that custard is looking some count right there.
It's so pretty.
And it's just the perfect color too.
So now comes the next step of our 'nana pudding, and that's the 'nanas.
So you're gonna need six to eight bananas here.
And I look for bananas when I'm making a banana pudding that have just the tiniest bit of green to them.
And the reason I look for bananas that are not fully, fully ripe or overripe is because I really like that banana texture that they have.
They don't seem to break down as easily in our pudding, plus it's just the perfect subtle banana flavor.
So we are gonna cut our bananas up into 1/4 inch slices.
Every time I say 1/4 inch, I'm always like, "How big is that anyway?"
So, about like that.
(energetic music) I usually wait and cut my bananas up after all my components are ready to go, simply because I just don't want them to prematurely brown before they even go into our dish.
Last but not least, the meringue.
I just love saying meringue.
I don't think we use it enough.
I don't eat enough meringue.
So I'm gonna take my egg whites and throw them into a stand mixer.
Of course, you don't have to have a stand mixer.
You can just use the handheld beaters.
Or you can just use the good, old elbow grease and use a whisk.
I'm gonna whip this just until soft peaks form at first.
(mixer whirring) I usually start out on a lower setting and then gradually increase it so we don't have eggs going everywhere.
All right, let's inspect this here.
We eventually want stiffer peaks, but when I add my sugar, I just want them soft.
Just a little bit more.
(mixer whirring) All right, so we are at our soft peaks here.
You can see, so soft peaks are just when the peaks are starting to form and they hold their shape, but they're not exactly solidified in.
So if I would have whipped that to stiff peaks before I added my sugar, it would just turn into super, super hard.
It wouldn't incorporate really well.
So I'm going to latch my mixer here.
I'm gonna go ahead and turn it up.
And I'm gonna gradually add the rest of our sugar.
(mixer whirring) And now I'm gonna crank it up.
I think we're almost there.
And that's a stiff peak.
It's almost like a marshmallow.
That's what we're looking for right there.
Beautiful, stiff, gorgeous peaks.
And as you can see, it's kind of changed color on us too, so it's very shiny, very bright, very beautiful, just like our pudding's gonna be.
I'm gonna pop this in the fridge just until I'm ready to layer it.
I just wanted it to be done so I'm not having to wait on it.
And if you're making meringue, say, in the heat of summer or on an exceptionally warm day, do it in a stainless steel bowl and take your bowl and refrigerate it beforehand, because that will help it retain its stiff peaks.
I'll be right back.
(apple crunching) (upbeat music) My recipe's pretty much the same as my grandparents', just a little bit more updated.
They always added cream of tartar.
I don't know if back in the day when you didn't have a stand mixer or powerful mixers, if that helped whip it up, but I just use sugar, and it always turns out beautiful and shiny.
So, people are a little intimidated by meringues, too.
And, you know, once you make your first meringue, you'll get the hang of it, no problem.
It's all just about, like, the speed of your mixer, your stick, whatever you're using.
It's all about the speed and then it's also about temperature.
So, if it's super hot that day, like I said, just keep your stuff chilled, do it quickly, and then get it back into the refrigerator till you use it, and there's nothing to it.
(apple crunching) So while our meringue is chilling and waiting for us, you're gonna need to count out 40 to 48 vanilla wafers.
No more, no less.
I'm just kidding, I'm using 52 today, so.
Just as long as it's over 40.
I'm gonna do an initial layer directly in the bottom of our pan.
(upbeat music) One thing great about using this traditional custard method is I feel like banana pudding, when it's made with the pudding mix, tends to really sog up these vanilla wafers.
It doesn't seem to have as long a shelf life, and I really like that crunch that comes from the wafers, so that's one plus of making your own custard.
So I'm gonna top that with our banana slices.
So you can use any kind of casserole dish, nine by 13, whatever, just make sure that it's oven safe, because we are going to brown our meringue up.
So this banana pudding is great served warm directly out of the oven, or also just, like, room temp warm, too, and it definitely can be served cold.
All right, that looks about half and half.
So I'm gonna take our custard and I'm gonna use just about half, and we're gonna smooth that over our wafers and bananas.
We wouldn't wanna go under a big blanket of custard.
So we're gonna repeat our layering process and I'm just gonna add some more, our final vanilla wafers, and our bananas.
And I also prefer to do my banana pudding in a smaller depth dish simply because I don't want it to be just so huge and thick, and plus we'll have our big layer of meringue too.
And let's smear just the last little bit of custard here directly on top.
And now, let's add our meringue, fresh out of the fridge, still got those great peaks there.
The key to using meringue is to not overwork it.
We're just gonna basically just fold it over to the sides.
The more you handle meringue and the hotter it gets, the more it turns just into basically egg whites again, just soupier.
I've done this last, and I've allowed our custard mixture just to come to room temperature.
You also don't want to throw your meringue directly on to a hot custard.
Let's just put a little bit of... Just to get those little peaks there.
Now into our preheated 350 degree oven, just till our meringue browns up and has really pretty golden points.
(clock ticking) Fresh out of the oven, 'nana pudding, with just the perfect brown meringue.
(gentle music) All right.
This banana pudding's the perfect temperature.
Always like to let mine come to basically room temp and let everything kind of marry together in there.
You don't want your hot meringue also just schlepping off onto your plate.
Last but not least is if it couldn't get any better, I'm just gonna take a little bit of our wafer dust and I'm just gonna garnish here.
So let's go in.
I've got grandmommy's little vintage spoons here.
I'm sure there's been a lot of banana puddings eaten off these.
Thanks for pudding up with me.
Mm.
That meringue is so fluffy, like a cloud.
(upbeat music) (upbeat music continues) Well, my guests will be here soon and I've still gotta hide the eggs, so I guess it's time for y'all to hop on out of here.
Thanks for joining us today, and we'll see you next time on "Garden Party".
And I've gotta hide the eggs.
(chuckles) Eggs.
Poof.
Casserole pan.
Let's dive in.
I'm just hovering over it like a vulture with a spoon.
I can see our dough over there peeking up through the thing.
(chuckles) Do you know that song by the Beatles, yellow, mellow... What is it, say yellow something custard dripping from a dead dog's eye?
"Garden Party".
(chuckles) - It just so happens I have a hot, juicy ham in the oven.
(crew laughing) No?
- Which side do y'all start peeling your bananas on?
I go both.
(chuckles) My parents, like, drew a bunny print, like, in the pollen on the porch when I was still, of course, believing in the Easter Bunny.
And I lived on that.
Like, I told everyone that the Easter... I mean, it was real.
There was bunny prints.
Hoppy Easter.
You can find all of our recipes, how-tos, helpful blogs, and a whole mess of fun over on our website.
Scan the QR code below or visit aptv.org/gardenparty.
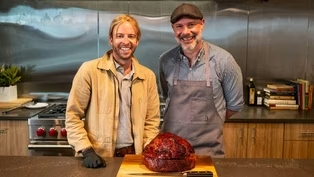
The Son of a Butcher's Head Butcher Chris Spear offers tips for preparing a juicy and delicious ham. (30s)
Providing Support for PBS.org
Learn Moreabout PBS online sponsorship

- Food
Christopher Kimball’s Milk Street Television
Transform home cooking with the editors of Christopher Kimball’s Milk Street Magazine.


Support for PBS provided by:
Garden Party is a local public television program presented by APT