Carpenter’s Toolbox
Season 14 Episode 1409 | 26m 47sVideo has Closed Captions
Learn the skills to make box joints on the table saw and add distinctive molding profiles.
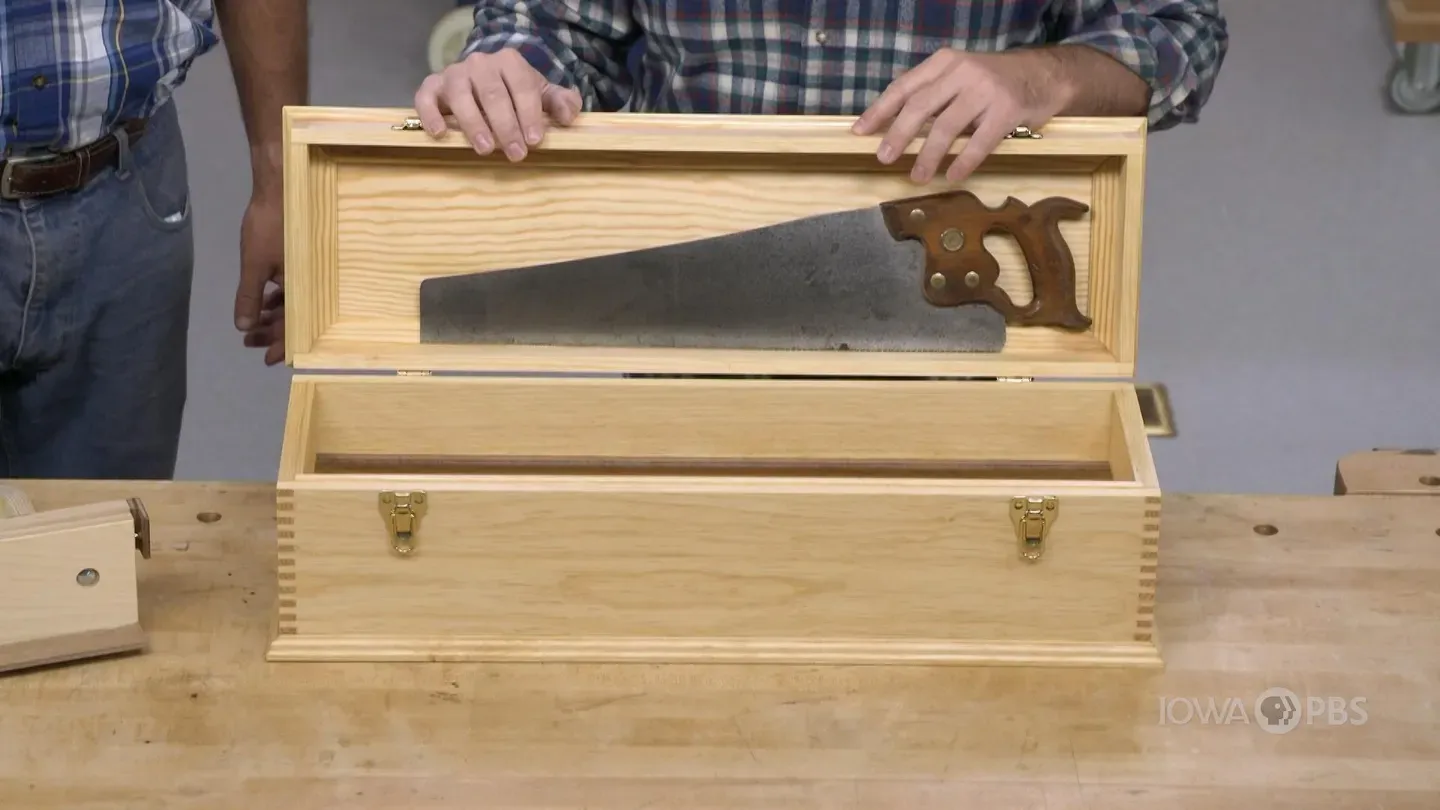
Take your tools wherever you need them with this classically inspired toolbox. Learn the skills to make box joints on the table saw. Add distinctive molding profiles and fit out the inside to hold your essential tools. It adds up to a practical, good-looking organizer.
Problems playing video? | Closed Captioning Feedback
Problems playing video? | Closed Captioning Feedback
Woodsmith Shop is presented by your local public television station.
Carpenter’s Toolbox
Season 14 Episode 1409 | 26m 47sVideo has Closed Captions
Take your tools wherever you need them with this classically inspired toolbox. Learn the skills to make box joints on the table saw. Add distinctive molding profiles and fit out the inside to hold your essential tools. It adds up to a practical, good-looking organizer.
Problems playing video? | Closed Captioning Feedback
Where to Watch Woodsmith Shop
Woodsmith Shop is available to stream on pbs.org and the PBS app.
Providing Support for PBS.org
Learn Moreabout PBS online sponsorship[ Power saw buzzing ] ♪♪ On the surface, our project for today's episode of "The Woodsmith Shop", this tool tote, seems like it's all about practical portable storage for your most used tools.
We're also looking at creating accurate box joints, and for that, you'll need to make another project -- this great box joint jig for your table saw or router table.
It's time to start building.
Announcer #1: Major funding for "The Woodsmith Shop" has been provided by... Old Masters -- craftsman quality stands and finishes since 1953.
Additional funding provided by... Announcer #2: Titebond Wood Glues, the pros' advantage.
Announcer #1: And by... Announcer #3: Kreg -- from the first cut to the final assembly, providing woodworkers with products that help to simplify woodworking challenges.
Kreg.
Announcer #1: And by... ♪♪ ♪♪ ♪♪ ♪♪ We've got a great project today.
It's the carpenter's tool chest.
You know, and this is a cool little project.
You know, tool chests were traditional for carpenters and the cabinet makers, and this one kind of follows that traditional form.
It's made out of solid wood, and we used pine here, so it's lightweight, easy to move around.
But really, this ends up kind of being two projects in one, right?
Mm-hmm.
It is.
Not only do you end up with a great tool chest, you end up with a box joint jig.
Look at these box joints.
They're an easy joint to do on your table saw or router table.
They're strong.
They look fantastic.
And once you have the jig bill, you can use it for different projects as well, which is really cool.
You know, and this is really sized to fir a hand side, right?
So, we can open up the lid.
You could stack a couple saws inside there, but you can really change the size if you want to.
You can make it bigger, you can make it smaller, whatever size suits your shop.
Mm-hmm.
I like this form, the classic carpenter's toolbox.
And if you'd like plans for this project, you'll find them at our website, WoodsmithShop.com.
The starting point for our toolbox project is to make up the main body.
Later on, Chris is going to make a lower frame assembly and then an upper lid frame assembly.
Now, the main body consists of the storage box and the lid.
Now, you could make separate pieces for the box and the lid, but I find that it's a lot easier if you start with wider pieces and cut all the joinery on these wider pieces.
So you can see that I have the four parts, the two short ends and the two longer front and back pieces.
What we'll do is go over to the table saw, cut the box joints on the ends of these pieces, and then we can glue up the box.
Once that's done, we'll trim the lid away from the box body.
The result now is that you have grain matching between the lid and the box, and the joint line between the lid in the box is going to match perfectly.
So let's head over to the table saw.
♪♪ ♪♪ You know, it's one thing for a TV woodworker to just walk up to a table saw and start cutting perfect fitting box joints.
It's quite another to do the same thing in your own workshop.
What you need is a good jig that allows you to do that, and that's what I want to talk about here.
You've seen the process already of what we've done to be able to cut the finger joints on our carpenter's toolbox, but I want to show you how this jig works and how it can set you up to be able to make those same kind of cuts in your own workshop.
Now, when you're talking about any kind of box joint jig, there are three things that you really need to focus on.
The first is the width of the dado blade that you're using.
That's going to define the spacing and the size of all the cuts.
The second thing is this key that's on the front of the box joint jig, because as you make one of those slots, you're stepping that over.
The final thing is the spacing between the key and the dado blade.
Now, all three of these things need to match as closely as possible.
Now, the way to get that is starting by setting up your dado blade.
Then you'll cut a slot in a spare workpiece and then you can size the key to fit into that slot snugly.
You want it to be able to be a relatively tight fit, but not something you have to pound together.
From there, you can put the key on the jig, and then using a series of test cuts, you can get the spacing between the key and the blade to match perfectly.
It sounds a little confusing, but once you make a first set of test cuts, you'll see what's going on, and the plans for this jig and how to create box joints are at our website, WoodsmithShop.com.
Now, as you're going along, there's a few other things about this jig that I think are really important and what make it work so well.
Now, one of those you can see is that there's this lip or ledge on the front edge of the jig.
What that does is give you a place to set the workpiece, and it's going to ride along with the jig.
Now, the workpiece isn't going to catch on anything on your saw table, and you're going to be able to get much more consistent cuts.
Now, like I said, you want to be able to fine tune the position of the key in relation to the dado blade, and the way to do that is to loosen the face of the jig with knobs on the back side of it.
And then there's an adjustment hole on the end that you'll use a screwdriver to fit into... ...a screw on the face of the jig.
So by backing out or advancing the screw, you can subtly shift the position of the face, left or right, to dial in that spacing that you're looking for.
So that helps you be able to lock in the settings of the jig really easily to get accurate cuts.
Now, another thing to point out is that as you're making box joints, over time, the blade's going to cut through and kind of booger up this backing on the jig.
That can result in a much wider spacing and can result in a tear out on your work pieces.
Now, this jig has a replaceable hardboard insert.
So once one end gets all chewed up, what you can do is unscrew it, flip it around, and be able to use the opposite end.
Now to get the jig to slide smoothly on the table saw without wobbling, this particular jig uses a pair of plywood sides.
Now, the plywood is just a little bit thinner than the width of the miter slots in the table saw.
The thing here, though, is you want the spacing between the inside edges of these sides to match the spacing between the miter tracks on your table saw, and what you want, and what we've done here is to create a jig that slides forward and backward easily, but doesn't wiggle side to side.
Another thing to think about is safety while you're making box joints.
Now, during the process that you just saw, while I was cutting the box joints, my attention is focused right here, where the blade is actually making the cuts.
What you can lose sight of is where the blade exits the cut on the back side of the jig.
Now, this jig is a big, thick block made of two layers of plywood that span between the two sides, and what you'll notice on the bottom side -- bottom face is that the dado blade cuts into this block.
But it doesn't cut through it on the top side, so it acts like a blade cover.
So in the process of making the cuts, I don't have to worry about the location of my fingers or thumbs, and I'm not going to get cut because the blade is protected and I'm going to be safe.
Now, for this particular project, we're using quarter inch box joints, but you can set up your table to cut almost any size kerf.
That means you can create box joints in almost any size that you want.
And like I mentioned, since this face on the jig is easily loosened and adjusted, what you can also do is create different faces for different size box joints.
So here we have one that's for an eighth-inch-wide box joint.
These would be great on small gift boxes that you'd want to make, you know, for the holidays or something.
And it uses just a single curve from a standard table saw blade.
Now, what you could also do is make something that's even wider.
So what I have here is a 3/8-inch-wide box joint.
So, that's for larger projects or, you know, maybe like a wall-hung tool cabinet or something like that.
You can go up to three quarter of an inch wide for use on the table saw, and then because each one has its own adjustment screw, you can swap between the faces and know that your jig is going to be set up and ready to go.
Like I said, cutting box joints on the table saw can be a lot of fun, and it's easy to do when you have the right jig.
There's one last step to take care of at the table saw before we can glue up the body of our toolbox, and that's to cut a groove on the inside face of the front and back pieces.
This holds a hardboard runner for the tray that you can add later on.
Now, when you glue up a project with box joints like this, there's a couple of obstacles you face.
The first is getting glue efficiently on all of those fingers and slots.
The second is keeping it square as the glue dries.
To address the first, what I like to do is to hold one of the pieces on end and then run a bead of glue across the ends of the box joints.
That way, you can start to get glue to fit down into those slots when you put that together with its mating part, as those pieces slide together, the glue gets spread efficiently.
What you want to avoid, though, is getting a lot of squeeze out on the inside corners, where it's a hassle to clean up.
So, what I like to do is to use masking tape and apply it to the inside face of the corners.
Now, when I press the pieces together, any squeeze out is going to collect on the tape, so once the glue dries, can peel the tape away, no more squeeze out.
So, I'm going to take care of the rest of this, and then we'll talk about getting everything squared up.
♪♪ ♪♪ Once you have the parts fit together, you want to go around and just make sure that they're fully seated, either using clamps or a mallet just to tap pieces together.
Then, what I'll do is use a square, and you can peel the tape back a little bit.
Check the corners for square.
Once they're where you like them, then I like to just let this sit here without clamps for the glue to dry.
Once it's done, we'll cut the lid free from the body.
Now that the glue is dry on the body, I'm ready to cut the lid free from the box.
And to do that, I'm going to do it here at the table saw, and I need to do two different types of cuts.
For these long edges, what I've done is raised the saw blade so that it's a little bit more than the thickness of the front in the back.
So I'll make these two cuts and then come back and make a second set of cuts for the ends.
[ Saw buzzing ] With the two long cuts complete, the second set of cuts are going to be across the end, and I don't want to make these as through cuts, because what can happen, especially on that last cut, is that the pieces, the lid, and the box will pinch on the blade, and that'll spoil the fit of how the lid fits on the body.
So instead, what I've done is to lower the blade slightly so that it's slightly less than the thickness of the ends.
What that means is that there's going to be a thin web of material left over on the ends, and once the cuts are complete, I can trim that away back at the bench using a utility knife.
Okay, while I was at the table saw, I also made the cuts necessary to get the lid to its final width, too.
Like I said, with that thin web of material that's left on the ends, you can trim that using just a utility knife, and since we're working with lightweight pine, it's going to cut pretty smoothly.
So, you can just fit that right in there.
And there we go.
Now we have the two pieces separated.
Now, you'll probably find that there's a little bit of leftover material there, but you can trim that with a chisel, or I'll probably just use a block plane here just to shave that down... ...so that it's flush.
And then we can get started on adding a few details to the inside of the toolbox before turning it over to Chris.
After separating the lid from the toolbox body, I spent a little time sanding the box joints flush, and yeah, I'm going to admit it, I used a little bit of wood filler wherever I had a few small gaps that I wanted to just close up.
So with the outside taken care of, there are a few other details that we want to add to the inside of the toolbox, and the first of those are a pair of hardboard runners that the tray is going to slide on.
So I can glue these in place real quick into those grooves that we cut in the front and back.
The last pieces to include are some thin pieces of wood that fit just on top of those runners, and they stick up slightly proud of the box sides and ends, and what they do is help align the lid as it opens and closes.
I can just put a bead of glue... ...down in there and fit them right into place on top of the runners.
Now, in the plans, these pieces are mitered in the corners, but for such small pieces, I'd rather just skip the miters, go with the square joints.
Once the glue's dry, I'll come back with a sanding block or a block plane and ease the edges so that the lid fits right over the top nicely.
Looks like I can hand this off to Chris.
With the sides of our toolbox done, it's time to turn our focus to the moldings, both top and bottom.
Now, these moldings do double duty.
Let's take a look at the bottom moldings first.
Now first off, you'll notice there's a five 30 second OG cut into it on an attractive profile, Then a 1/2-by-one-quarter-inch plow.
This plow fits directly over... ...the sides of our toolbox.
This half-inch-by-a-quarter inch rabbet in the back is for the bottom.
And the bottom's going to be a piece of quarter-inch hardboard.
So this molding is not only decorative, it also serves the function of holding the bottom of the toolbox.
This is the top molding, and the top molding also has that same five 30 second OG for an attractive decorative detail.
It has the half-inch-by-quarter-inch plow, which acts to cap onto the top of the toolbox edge.
It has a deep plow on the edge, a quarter-by-half, and that is going to hold a solid wood panel to create the top.
Also, to soften the molding up a little bit, a quarter-inch radius has been applied to the underside of the molding and to the top lip.
So, with our moldings cut, we're ready to go ahead and start wrapping the bottom and the top of the sides of our case.
With this end clipped on our bottom molding, it's time to fit the molding to the box.
Now, generally with moldings, we wrap those around a box.
We might fit the miter to the miter, but in this case, we fit the molding to the box, and if we do that, the miter should be fine.
So what we'll do to start with is place the box into the channel that we've created in the molding, and things will pretty much bottom out exactly where they need to go on this end.
To mark the location of our miter, you can use a sharp pencil, or what I like to use is a marking knife.
I'll place the flat of the blade against the box side and make a nice, clean mark in my molding.
So, now that that's done, I'm ready to go to the miter saw and cut that miter.
Well, as you can see, I have the molding cut for the bottom of our toolbox and for the top lid.
Now, the next step for me is to go ahead and glue on the bottom molding onto the toolbox.
But before I do that, I want to go ahead and cut the quarter-inch hardboard bottom for the toolbox.
In order to size the hardboard bottom...
...I'll simply use the long edge of the rabbet that'll support the bottom to get my measurement.
So I'm going to glue the molding on, glue the bottom in place, and move on to the lid.
[ Saw buzzing ] The tongue on our panel, which fits into the groove of the moldings, was made of the table saw using a dado blade.
Now, in order to find the final size of my panel, what I needed to do was to get the measurement of the interior of this opening.
To get the final size from my panel, I measured this interior.
I added one inch to allow for each of those half inch plows, and then I subtracted 1/16 of an inch to give our panel a little bit of room to float.
One little decorative detail that I want to do to our panel is to cut a chamfer all the way around the perimeter.
Now, I've taken a pencil and I've marked a line approximately 1/8 of an inch inside, and what I'm going to do is take a block plane, and I'll ease that edge down.
Once I have my chamfer done, I can then take these moldings, apply them dry around the panel, and then this whole assembly gets glued to the sides and ends of our lid.
♪♪ Well, it's time to put the hardware on this tool box, and I always enjoy hardware because it means we're making good progress with our project.
The hardware we have selected for this toolbox is very easy to apply -- surface mounted hinges and surface mounted hasps.
So, to apply these, I'm going to need to take the lid of our box and put it in place on our toolbox.
But before I do that, I'd like to space the lid off of the tool box a little bit before adding the hinges and hasps, and that just allows a little bit of room for film finish or an accumulation of grime over time, and that way, things will bind.
To give me that little bit of space, I'm just going to take some tape and put about two layers of it on the ends.
And now, when I put my lid on... ...it'll be spaced off just a little bit.
In order to hold things together, while I apply the hardware, I'm going to use two clamps and snug the lid and the bottom of our toolbox together.
Now, the hinges are centered four inches in from the sides.
So, I'll take my ruler... ...and just make a very light mark to help me place the hinges.
The barrel of each hinge is going to be centered along the joint line between the lid and the body of the toolbox.
Once it's in place, I'm going to take an awl, and I'm going to carefully mark the center of each of the holes.
Even in a soft wood like pine, it's always a good idea to pre-drill for all the screws and hardware.
It's very frustrating when these small screws fracture and break off in place.
Don't tighten your screws all the way until all of them are in.
Once all the screws are in place, then go back and do the final tightening.
The hasps are applied in the exact same way as the hinges.
I have set a mark at four inches in from the edge, placed both pieces of the hasp in the correct position, use a scratch awl to mark the holes, pre-drill, and sink those screws in.
With the hardware on this toolbox, we're ready to apply some finish and put the toolbox to use.
There are a few simple ways to transform the look of almost any project, and you can see that in the smaller version of the toolbox that we built on today's episode.
Now, I made this one a few years ago out of some Douglas fir.
I changed the length of it and some of the hardware details.
I also went with rabbeted joints instead of the box joints, and it served me really well for keeping some of my prized tools here at the shop.
To get things started for your own toolbox build, you can check out the plans.
They're at our website, WoodsmishShop.com.
Once you've built your own storage container, whether it's for tools or crafting supplies or something else all entirely, you can join us right back here in "The Woodsmith Shop".
♪♪ ♪♪ ♪♪ If you'd like to get more video tips and techniques, sign up for the free weekly Woodsmith eTip.
Every week, you'll receive an e-mail with a video tip to get more out of your table saw, router table, and more.
Sign up at WoodsmithShop.com.
Everything in today's show comes from the newly expanded "Woodsmith Guild Edition", with shop projects, plans, tips, and techniques.
To get a free preview issue of the "Woodsmith Guild Edition" and a free "Woodsmith" book, go to WoodsmithShop.com.
In addition, past seasons of "The Woodsmith Shop" are available on DVD or you can watch them online from your computer, tablet, or mobile device.
For more information, go to WoodsmithShop.com.
Announcer #1: Major funding for "The Woodsmith Shop" has been provided by... Announcer #2: Old Masters, craftsman quality stains and finishes since 1953.
Announcer #1: Additional funding provided by... Announcer #3: Titebond Wood Glues, the pros' advantage.
Announcer #1: And by... Announcer #3: Kreg.
From the first cut to the final assembly, providing woodworkers with products that help to simplify woodworking challenges.
Kreg.
Announcer #1: And by... ♪♪ ♪♪


- Home and How To

Hit the road in a classic car for a tour through Great Britain with two antiques experts.


 New Episode


Support for PBS provided by:
Woodsmith Shop is presented by your local public television station.