
E1 | Adobe Bricks and Miter Tricks | Ask This Old House
Season 25 Episode 1 | 23m 42sVideo has Closed Captions
Mark learns about adobe; Tom shares a miter trick; Jenn revisits a project from season 18.
Kicking off Ask This Old House's 25th season, Mark McCullough travels to New Mexico to learn the art of adobe, from mixing and forming bricks to repairing a cracked earthen floor. Tom Silva shows Kevin O'Connor an easy trick for cutting miters on imperfect corners. Then, Jenn Nawada revisits a garden she transformed on the show over 10 years ago to see it fully grown in and flourishing.
Problems playing video? | Closed Captioning Feedback
Problems playing video? | Closed Captioning Feedback
Funding for Ask This Old House is provided by The Home Depot and Renewal By Andersen.
Support provided by:


E1 | Adobe Bricks and Miter Tricks | Ask This Old House
Season 25 Episode 1 | 23m 42sVideo has Closed Captions
Kicking off Ask This Old House's 25th season, Mark McCullough travels to New Mexico to learn the art of adobe, from mixing and forming bricks to repairing a cracked earthen floor. Tom Silva shows Kevin O'Connor an easy trick for cutting miters on imperfect corners. Then, Jenn Nawada revisits a garden she transformed on the show over 10 years ago to see it fully grown in and flourishing.
Problems playing video? | Closed Captioning Feedback
Where to Watch Ask This Old House
Ask This Old House is available to stream on pbs.org and the PBS app.
Keep Exploring


This Old House Insider Newsletter
Get This Old House exclusive stories, tips, and behind-the-scenes information delivered right to your inbox every month.Providing Support for PBS.org
Learn Moreabout PBS online sponsorshipKevin: Our experts travel across the country to answer questions about your house.
Today, we kick off a special 25th anniversary season of "Ask This Old House."
First, Mark travels to New Mexico to learn how to work with one of the oldest building materials, adobe.
And Jenn revisits one of her favorite landscaping house calls to see how it's grown in and how the experience inspired a homeowner to transform the rest of her backyard.
♪ All that's coming up next on "Ask This Old House."
♪ Kevin: Welcome back to a brand-new season of "Ask This Old House."
And this isn't just any season.
This is season 25.
♪ Tom: You know, most people call that a silver anniversary.
Zack: Our "Silva" anniversary.
Lee: And before we pick up a single tool and get started... Ross: ...we want to thank you, our viewers.
Jenn: For 25 years, you've reached out from every corner of the country to ask us your questions.
Mark: You've welcomed us into your homes, literally.
Heath: And for those of you that we haven't visited in person, thank you for inviting us into your living room every week.
Nathan: So we can share with you what we know.
Mauro: So, thank you for helping us to get to 25 years.
Richard: After all, "Ask This Old House" wouldn't exist if you weren't doing just that -- asking questions.
Kevin: Let's make this the best season ever.
Keep those questions coming, and join us as we celebrate a special 25th season of "Ask This Old House."
Parker: I grew up in the Boston area, and I've been a fan of "Ask This Old House" since it began.
Happy 25 years.
Matt: You guys have done amazing work teaching DIY'ers such as myself how to tackle home-improvement projects.
Teri: The largest project that I've ever done on this house was this room, which is the kitchen.
Mike: You guys have been instrumental in me developing my skills as a woodworker, as a carpenter.
Matt: Whenever I'm working on a project and I kind of hit a dead end, or I'm kind of tired and just want to finish, I always stop and ask myself, "What would Tom Silva do?"
Walter: Thank you for everything you guys do.
We love and appreciate you.
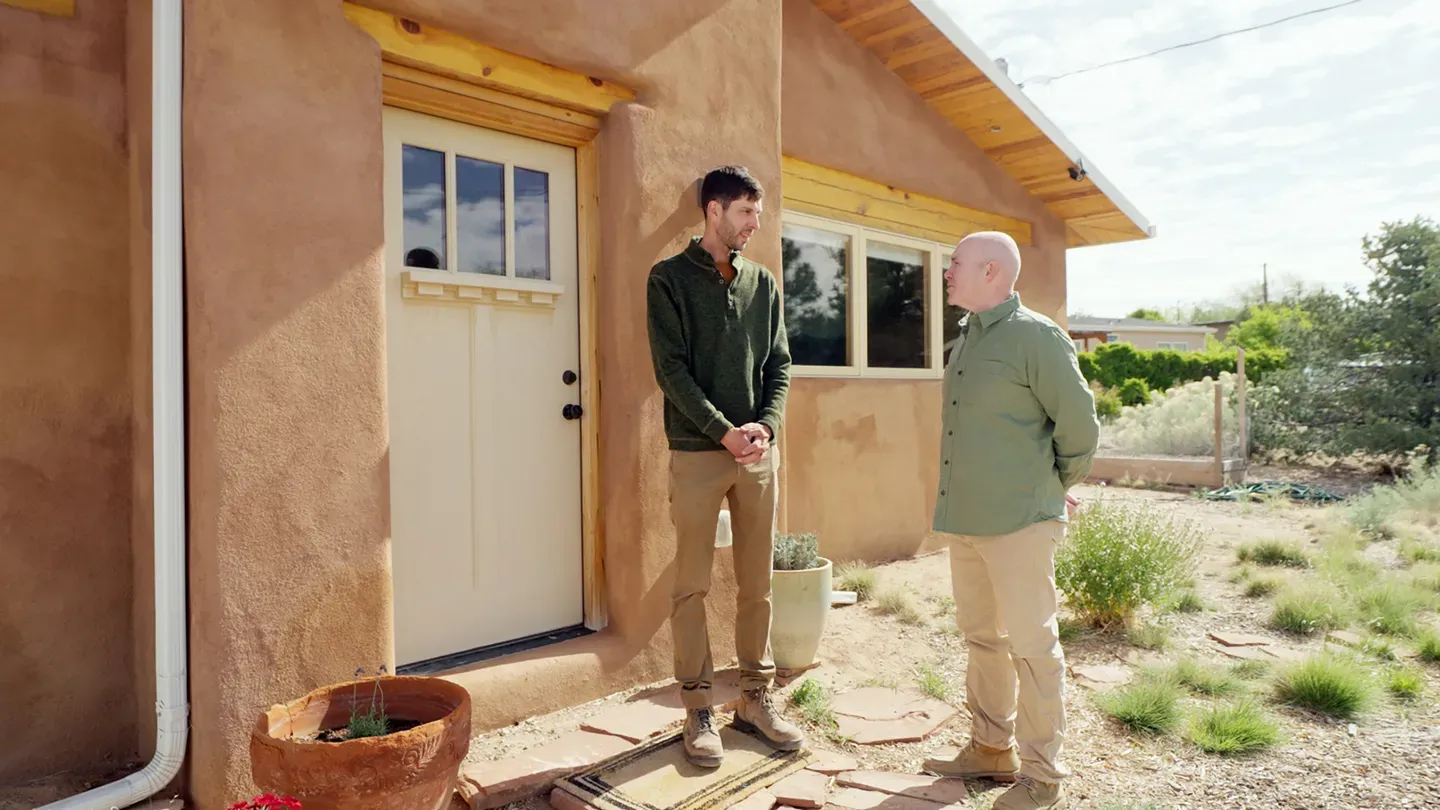
♪ Mark: Today, I'm in New Mexico to learn about adobe.
It's a building material that's been used for thousands of years, especially in older houses here in the southwest.
And if you have earth underneath your feet, you've got everything you need to build it.
Now, brick and stone, I work with that all the time.
But adobe?
New territory for me.
So I've come here to meet someone that really, really knows the craft and can share a few techniques to help us work with it.
Paul.
Paul: Hey, Mark.
Mark: How you doing?
Paul: Good.
How about you?
Mark: I'm doing great.
Thanks for having me out.
Paul: Yeah.
Welcome to New Mexico.
Mark: Oh, man, this is great.
I have to say that adobe is on my bucket list.
You are an instructor?
Paul: Yeah.
You came to the right place.
Mark: Okay, great.
Paul: So, I've been working with this local nonprofit, called Adobe in Action.
Mark: Okay.
Paul: And they instruct people how to build their own homes out of adobe.
Mark: Okay.
Paul: And so I've been helping them facilitate and organize work days with other owner-builders in the area.
They're also the ones who helped me when I needed guidance when I was building this house.
Mark: Tell me a little bit about the build.
So, all the walls here are adobe.
It's earthen plaster and earthen floors inside, as well.
Mark: Okay.
Paul: I designed this house to maximize the thermal properties of adobe.
During the winter months, when there's a low-angle sun, it pours right into these south-facing windows.
And then, the adobe blocks retain the heat and re-radiate out the heat during the night when the sun isn't shining.
Mark: So, in a sense, you're getting free heat.
Paul: Exactly.
Mark: All right.
Paul: My energy bills are very low.
Mark: All right.
Excellent.
I would love to dive into this.
This is so interesting to me.
Paul: I had a feeling you would.
I actually have something set up out back.
I'll show you how we make them.
Mark: Ooh!
Let's go, Paul.
Paul: So, adobe's made out of three ingredients.
Four, if you count the water.
Mark: Right.
Paul: This is the clay.
So, this is what's gonna bind everything together.
You'll find this anywhere in New Mexico.
A lot of the dirt has clay in it.
Mark: All right.
Paul: Here is sand.
You'll often find this in local riverbeds.
Mark: Okay.
Paul: And this provides the strength.
And this is a local straw.
It's usually barley or wheat straw.
This also adds an additional layer of strength.
Depending on what you're making out of the adobe, you might cut it up or you might just leave it like this, straight out of the bale.
Mark: Okay.
So, what's fascinating to me is, these materials are very similar to what we use.
We'll use a lime, we'll use a Portland cement, we'll use sand -- that all binds together.
And this straw, again, I find the most fascinating because that mimics what we call fiber mesh, just gives it that extra little bit of strength that you're looking for all the time.
Paul: Yeah.
So, I can show you how we mix it up here.
I have a recipe in mind.
Mark: Absolutely.
Paul: First thing, gonna add a little water to the wheelbarrow.
Mark: Okay.
Paul: Just a little bit.
Mark: That's so our material doesn't stick.
Paul: Exactly.
And then, I'm gonna start with the clay.
I'm gonna do three of these.
Mark: Excellent.
And, Paul, fun fact a lot of people don't know, but that shovel that you're using is what they call a number eight, and that refers to the size.
Paul: Oh, okay.
Mark: Yep.
Paul: So, yeah.
And we are gonna try to keep our shovel sizes the same.
That way, when I switch to sand, I don't all of a sudden do smaller or larger... Mark: Right.
Paul: So, we're gonna move to sand.
I'll do four of these.
Mark: Okay.
Cool.
Paul: And even though I am trying to get my shovelfuls the same, it's a forgiving material.
So if we're off by a little bit, it's okay.
We're not measuring in ounces and cups.
Mark: Okay.
Paul: Shovelfuls is close enough.
Next is gonna be straw.
We're going to do about a baseball size.
Mark: Okay.
Paul: Yeah.
And this -- I'm just gonna tear up a little bit as I go.
We're not going to get too fussy about it.
Mark: Yep.
Paul: We're gonna add water.
We're gonna try not to overdo the water.
We're going to try to do a thick mix.
Mark: Okay.
Paul: And that allows us to pull the form on the same day.
Mark: Okay.
Excellent.
Looks like we're ready to add the mud to the form.
Mark: Yep.
Okay.
Paul: So, first, I'm gonna wet down the form.
Mark: Okay.
So you're gonna wet the form down, Paul, because if you didn't, that form is a sponge and it would actually steal the water out of the mix and ultimately make it weaker.
Paul: Exactly.
Exactly.
Mark: Yep.
Paul: All right.
Let's see how we do here.
Mark: Okay.
Paul: So, now I'm gonna -- since we did a stiff mix, I'm gonna try to poke the mud into the corners.
We want to make sure that we don't have those empty pockets.
Mark: Exactly.
Paul: Also gives us an opportunity to get our hands dirty.
Mark: Okay.
That's what we love.
Paul: I never turn that opportunity down.
Mark: Never.
Paul: All right.
We're looking pretty good right there.
Mark: Oh, yeah.
No, you're looking good.
Paul: So, Mark, if you want to grab the shovel, I can start wetting the form down for you.
Mark: Okay.
That's great, Paul.
Excellent.
Paul: Now all you got to do is make sure that the corners don't have those empty pockets.
So you use your hands and -- exactly -- just stuff the mud into the corners.
Mark: Okay.
Yeah.
I can see why that would be critical.
Paul: And now if you want to just kind of start thinking about leveling it out, you can do what you're doing.
You can also give it a little jiggle.
That kind of, like, makes everything kind of mesh together.
Yep, exactly.
Mark: Okay.
Paul: I think we're looking pretty good there.
Mark: Okay.
Paul: And so, next steps is just letting the sun do its thing.
Mark: So, Paul, a clay brick, we need a kiln.
Adobe brick... Paul: No.
Mark: Just the sun.
Paul: We're just letting the sun do its thing.
Mark: Okay.
Paul: Yeah.
So, next steps for this one is, we're gonna wait 24 hours, and we're gonna pull this form, let it dry a little more.
So, this brick is about two days old.
Mark: Okay.
Paul: And it's just about ready to be turned on its side.
Turning it on its side just allows more air flow, more surface area for the wind to go and air dry it.
Mark: Makes sense.
Paul: Yeah.
And this one is fully cured.
Mark: Okay.
Paul: So it means that it has at least about 7 to 10 days of fully curing.
Mark: Okay.
Paul: Yeah.
Also, we have a really rudimentary test -- it's called the drop test -- to see if what we've done made a brick strong enough to build with.
Pretty much all the drop test is, is grabbing a fully cured adobe.
You want to make sure it's dry.
Mark: Yeah.
Paul: I'm gonna drop it on its corner from about waist high, and if it breaks, we probably need to adjust our recipe.
Mark: We got a brick.
Paul: This brick is good to go.
Mark: Good to go.
All right.
Paul: Also, adobe is not just for bricks.
Mark: Okay.
Paul: There's mortar.
There's also plaster or even earthen flooring.
I actually have an earthen floor fix that I need to do.
Would you like to go help me with that?
Mark: I'm your guy, Paul.
Paul: Okay.
Let's go do it.
Mark: Let's get at it.
Okay.
Paul: Come on in, Mark.
Mark: All right, Paul.
Paul: Yeah.
So, this is it.
Mark: Okay.
Paul: Yeah.
So, all these walls here, all adobe.
Mark: Wow.
Paul: Finished with an earthen plaster, so similar mixture as the adobe itself but sifted a little finer.
And then, we even have the earthen floor that I've been talking about.
Mark: Oh, yeah.
I can actually still see the straw, am I right?
Paul: Exactly.
Mark: Okay.
Paul: Yeah.
So, when we burnish it for the final time, kind of brings that straw up to the surface.
Mark: Yeah.
Paul: But I do want to show you this.
This is the fix that I've been telling you about that I really need to -- to get going.
Mark: Sure.
Paul: So, some of these cracks are really natural, these smaller ones.
It's just part of earthen floors.
Just cracks are fairly common.
It's these that we're a little more worried about, and we're gonna need to fix that.
You can see the loose debris coming up.
Mark: That's right.
Paul: So I do have some tools and some materials, if you want to help me fix it.
I got them outside.
We can bring them in.
Mark: Let's get on it, Paul.
Paul: Okay, great.
So, I think we're all set to start our fix here.
Mark: Okay.
Paul: So, the first thing we're gonna do is, we're gonna remove the damaged area.
And the idea is, we want the bottom of the removed area to be a little bit bigger than the top.
Mark: Okay.
So you want it to "V" out a little, and that way the material grabs.
Paul: You got it.
Exactly.
Mark: There's a tool for every job, Paul.
I think that chisel's perfect.
Paul: Yeah.
You get a sense of the strength of adobe.
You know, it's not like concrete kind of strength, but it really has a lot of strength.
You can kind of tell when you're trying to break it.
Mark: I'm a little surprised on how strong, but pleasantly surprised.
Paul: Exactly.
Mark: Yeah.
Paul: So, let's -- let's clean it out.
Mark: Just clean it out.
Paul: Now that we're feeling pretty good about the hole that we've chiseled out, we're gonna go ahead and make the mix.
So we'll do four parts sand, three parts clay.
The clay is sifted a little finer than what we did outside.
And we're also gonna omit the straw 'cause I think, for a patch of this size, it's okay if we don't have straw in it.
Okay.
Actually, I think we're gonna mix -- do a little dry mixing.
Mark: Do a dry mix.
That's what we always do.
Yep.
And, Paul, I also noticed this spoon, and this is actually called an adobe spoon?
Paul: Yeah, exactly.
Mark: All right.
Paul: You know, it says adobe spoon on it, so I thought it was a sign we should use it.
Mark: Exactly.
I love it, I love it.
Paul: So, again, we're gonna go for a stiff mix on this one.
Mark: Okay.
Paul: The idea with that is, we want as little slumping as possible.
Mark: Right.
Paul: Next step would be to dampen this.
Mark: Yep.
Paul: That way, the dry material is not sucking any moisture out of our patch.
Mark: Exactly.
So, Paul, I would treat this "V" notch exactly the way we treated the corners as we were making the brick.
Paul: For sure.
That's where the strength is, right?
Mark: Exactly.
Yeah.
Paul: That's where all the locking happens.
Mark: Right.
So, if you didn't do that, you would actually be creating a weak spot.
Paul: I think so.
Mark: Yep.
Paul: Okay.
I think we're about there for being done with the spoon, and then we might want to think about troweling that in and getting the grit a little smoother.
Mark: Okay.
Paul: So, I think this is about as far as we're gonna take this today.
The next step would be for me to let this dry about halfway, and then I'm gonna take this tool and burnish it.
It's really just like a yogurt lid or something like that.
I'm gonna kind of be smoothing it near the edges, pushing the grains back down.
And then, after that, I'm gonna let it fully dry.
Mark: Okay.
And I can see what that burnishing tool is gonna do.
It's really gonna match everything around it.
I like that.
And one thing I did notice, Paul, is there a finish on the rest of this floor?
Paul: Yeah, exactly.
It's a linseed oil.
Mark: Okay.
Paul: So it actually goes through a curing process and that adds some strength and a little bit of waterproofing.
Mark: Excellent.
Paul: We're gonna have to wait for this patch to dry fully before we apply that linseed oil.
Mark: Right.
Okay.
Paul: Yeah.
Mark: Well, Paul, I want to say thank you very much.
Again, I've read plenty of stuff about adobe but have never gotten my hands dirty like I did today.
And I really appreciate you having me out here.
Paul: No, thank you.
It's been really great.
It's been my pleasure.
And thanks for visiting New Mexico.
Mark: All right, Paul.
♪ Kevin: Ooh, Tommy.
Some finished trim work and some miters, huh?
Tom: Yeah.
How do you figure out the angle for that outside corner right there?
Kevin: Well, this is not going to fit.
Tom: That's a bad guess.
Kevin: Yep.
And this one -- I'm not even gonna bother with that one.
And this one.
Well, that's -- Oh, yeah, that's pretty close.
Tom: We're getting closer.
Kevin: Just caulk that.
[ Both laugh ] Tom: Three tries.
How long before you're gonna try to figure it out?
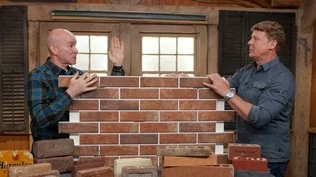
Kevin: So, you know, you got a 90-degree corner.
You hit 45, you go to the saw, Bob's your uncle.
Tom: Keep guessing, you get it wrong.
Kevin: Yeah.
Tom: Now you could figure that angle out by simply using a compass.
Draw a few arcs on the floor, then transfer those arcs to a sliding T-bevel.
Kevin: Yeah.
Tom: Put that on the fall, line it up with your mark, take it over to the saw.
Change the saw to that angle, and you'll have a bisected angle.
Kevin: As if that's not a bunch of work.
That's a lot of work and time-consuming.
On the job site, you want to get things done quickly.
That's how you make money.
So, two boards exactly the same width.
Kevin: That's the key.
Tom: They have to be exactly the same width.
Kevin: All right.
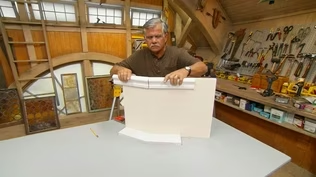
Tom: So, I take the two boards, and I put one on the floor, and I put it right here.
Kevin: Mm-hmm.
Tom: I take the other one, and I put it on top of it.
Kevin: Tight to the wall?
Tom: Right, tight to the wall.
I hold down tight so they don't move, making sure that both are tight.
I draw a line here and another line here.
I take that, I bring it over here like this, and I transfer... I line up that mark there and this mark here.
Let me see if I got it there.
Right there.
Draw a line.
And that's my bisected angle right there.
To check it, I take the two boards that are exactly the same width, and I'm gonna cut them on the saw, setting the saw at that angle and cut them both at the same time.
The reason I want to cut them both at the same time is that'll verify that both angles are exactly the same.
So when I put it together, It'll fit perfect.
Kevin: I trust you, but let's verify.
Tom: All right, let's check.
[ Saw motor whirring ] [ Saw motor whirring ] All right.
Let's see how it went.
Kevin: Let's see how we did here.
Tom: Tight against the wall.
Bring it over.
Bring the two points out so they meet.
Just like that.
Kevin: Yep.
Tom: And there's your miter, Nice and tight.
Kevin: All right.
And so, obviously, that's not our cut trim, but this is the angle that we can now set the saw to.
I mean it's set for this.
Tom: Right.
Kevin: So that you can then go and cut your trim at this angle.
Tom: And cut my trim.
I can cut a border on the floor, I can cut the baseboard, I can cut a chair railing, or even a crown molding at the ceiling with that setting on the saw.
Kevin: Let's cut some trim.
[ Saw motor whirring ] Tom: Okay, that's one side.
We know that angle.
Now, rather than tilt the saw, I'm actually gonna take the board, and I'm gonna flip it upside down and cut the other end of the board.
And the miter will be perfect right there.
You have a perfect miter, and I saved a lot of time by not tilting the saw back and forth.
Slide that over.
Nice tight miter right there.
Kevin: It is.
Tom: As simple as that.
Kevin: Mm.
Tom: The nice thing about it is, once you've established that angle this way, on the outside corner, you can do the same thing on an inside corner.
Kevin: Same trick.
Tom: Same trick.
Kevin: Draw the line, set the saw, cut your trim.
Tom: Yep.
Kevin: Nice.
Very good.
Great trick to have.
And you don't need as much caulk as this one.
Tom: No, no.
Exactly not.
That's joint compound.
That's not caulking.
[ Both laugh ] ♪ Jenn: As part of our 25th season's celebration, we are revisiting some of our favorite projects.
One of my favorites was a home that used these historic landscape plans that were developed by a landscape architect who worked for Frederick Law Olmsted.
I would love to pull from this plan whatever we can and implement in your backyard.
Alex: Cool.
All right, Jenn.
Come on in the backyard.
Jenn: Wow!
Alex: Yeah.
You think this is what Olmsted's apprentice had in mind?
Jenn: I mean, Olmsted is into wild and making it look natural, but this is just a little bit too far gone.
So, what I would like to do here is rip everything out.
Alex: Do you know that I have been pulling that up?
Thought it was a weed for eight years straight.
Jenn: This is sweet autumn clematis.
It flowers white in September.
And I think what we could do is just pin it up on the fence.
And then dig up the perennials that are worth saving, set them aside, and then pull stuff from his plan, so we could start to re-create that layered feeling.
♪ It's been about 10 years since we planted that garden, and I cannot wait to see how it's developed and how it inspired the homeowner to redesign the rest of her garden.
♪ Alex: All right, Jenn, welcome to the garden 10 years later.
Jenn: Great job keeping this place up!
The peonies are here, the sedum.
Alex: Thanks, man.
Well, I have to say that, you know, I mean, I have very high standards now, and I got to make sure that I don't let you down.
Jenn: Did you add that lupin?
Alex: I just added that this year.
You'd be very proud of me.
And I will tell you, every year, I dutifully string up my sweet autumn clematis.
Jenn: Proud of you.
Alex: Thank you.
Jenn: I'm so glad you know that's not a weed now.
Do you remember, you thought that that was a weed growing every year?
Alex: I do.
And in the fall, it is the most beautiful smell.
And we have all of these bees that come from all over, and they are pollinating and all over.
It's really beautiful.
Jenn: It makes me so happy.
Alex: It's so awesome!
Jenn: So happy.
So, you got your sedums, some hydrangeas.
Do you remember planting this?
Alex: I do.
And I remember it was like this big.
Jenn: Yeah.
Really filled out the space very well.
Alex: It's amazing.
It's huge.
And I remember, when we did this, you were very careful to say that you planted everything so that some things bloomed at different times.
And so we have, like, the peonies now and the lupin now and then that will go in the fall, and then this goes all during the summer.
So we always have something blooming.
It's really pretty.
Jenn: And my inspiration was that design on your wall.
Alex: Well, I got to tell you, this was a very big inspiration.
And I took it to the next level, and we kind of went bananas with the rest of our yard.
You want to see what we did?
Jenn: I'd love to check it out.
Alex: Let's roll.
Jenn: All right.
I can't believe you have a pool.
Alex: This was the best thing that we ever did.
My husband put in the rock wall a couple years ago.
This year, we did a little something else.
Welcome to Chateau Shammi.
Jenn: I mean, come on.
This used to be your compost pile, right?
Alex: It certainly did.
Jenn: I remember chucking stuff.
There certainly were not these at the compost pile.
No.
Have a little mint mojito.
Yeah, it's been a big day.
Jenn: Wait.
Tell me about this space.
Alex: Mm.
So, during the pandemic, all of a sudden, one year, we turned around, and growing on the fence, my husband was like, "Alex, come over here and look at this."
I was like, "What is that?"
And he said, "These are grapes."
I was like, "We didn't plant grapes."
We literally think a bird flew by and dropped something down there, and all of a sudden, grapes started growing.
Jenn: So cool.
Alex: So, this year, what we did was we put in the pergola, and my husband put down the awesome patio.
Jenn: Yeah.
Alex: And now here we are.
Jenn: I really like how the grass, like, softens the space.
Alex: Yeah.
Jenn: Well, I cannot even believe what you've done.
And, like, it's so fun to be outside.
And you could constantly be -- It's evolving, creating.
And then, you have a place to make memories, so... Alex: Well, I have to thank you, because 10 years ago, you were the one who helped inspire us to start this whole thing, and you helped kick it off, so I appreciate it.
Jenn: Cheers to that.
Alex: Cheers, man.
Thank you.
Jenn: Anything I can do to help.
If you have any questions about your house, we'd love to hear from you, so keep them coming.
But for now, I'm Jenn Nawada for "Ask This Old House."
Cheers, Alex.
Alex: Cheers, Jenn.
Thanks, man.
♪ Kevin: Next time on "Ask This Old House"... Heath helps a homeowner who wants a no-strings-attached way to turn on her basement lights.
Heath: All right, gym's on.
It looks good.
And the storage area.
Kevin: Then Lee gets assistance from a pair of grandkids to repair a lawn that was damaged by a snowplow.
Girl: It looks great.
Kevin: And it's flat, orange, and has spiky feet.
What is it?
All that on "Ask This Old House."
















Support for PBS provided by:
Funding for Ask This Old House is provided by The Home Depot and Renewal By Andersen.