E11 | Garage Graffiti, Nursery Closet | Ask This Old House
Season 22 Episode 11 | 24m 58sVideo has Closed Captions
Mauro paints over graffiti; Ross discusses radon testing; Nathan installs closet shelves.
Nathan Gilbert shares his love of flea markets, what items he's found, and what he recommends looking for; Mauro Henrique teaches a homeowner how to paint over old garage graffiti and which primer is right for the job; Ross Trethewey shares how radon tests can detect harmful levels of radon in homes; Nathan helps a homeowner ready her nursery for a second baby by installing closet shelving.
Problems playing video? | Closed Captioning Feedback
Problems playing video? | Closed Captioning Feedback
Funding for Ask This Old House is provided by The Home Depot, Renewal By Andersen, and ChipDrop.
Support provided by:


E11 | Garage Graffiti, Nursery Closet | Ask This Old House
Season 22 Episode 11 | 24m 58sVideo has Closed Captions
Nathan Gilbert shares his love of flea markets, what items he's found, and what he recommends looking for; Mauro Henrique teaches a homeowner how to paint over old garage graffiti and which primer is right for the job; Ross Trethewey shares how radon tests can detect harmful levels of radon in homes; Nathan helps a homeowner ready her nursery for a second baby by installing closet shelving.
Problems playing video? | Closed Captioning Feedback
How to Watch Ask This Old House
Ask This Old House is available to stream on pbs.org and the free PBS App, available on iPhone, Apple TV, Android TV, Android smartphones, Amazon Fire TV, Amazon Fire Tablet, Roku, Samsung Smart TV, and Vizio.
Keep Exploring


This Old House Insider Newsletter
Get This Old House exclusive stories, tips, and behind-the-scenes information delivered right to your inbox every month.Providing Support for PBS.org
Learn Moreabout PBS online sponsorship♪♪ Kevin: On "Ask This Old House," our experts travel across the country to answer questions about your house.
♪♪ Today in preparation for a new addition, Nathan helps a family organize their nursery closet.
Michelle: Thank you so much.
It's gonna be so much more functional for this room now.
Kevin: Then Ross gives us a primer on radon testing.
Mauro: Pinky, let's go.
We got a lot of work to do.
Kevin: And Mauro makes a friend as he takes a garage from graffiti to glam.
That's all coming up next on "Ask This Old House."
-I enjoy going to the flea markets.
You know, summertime, outside, completely packed flea market -- that's the best.
I'll buy anything that really I find interesting.
Tools is the focus, but I've bought artwork, I've bought maps, I've bought just some really quirky stuff, I bought statues.
You never know what you're going to come home with.
Flea markets are cool around here because we have so much history.
I think there is that Yankee mentality when it comes to the flea markets.
You're going to save money.
You're not -- you know, you're not going to spend top dollar.
You're going to get something you need.
If it's older, usually it's really well built.
Everyone has their own niche that they're into.
Mine's tools.
Got this really nice appliance heater.
15 bucks.
That's a steal.
I'm always a sucker for a soft blow hammer.
Little speed square.
Five bucks.
Bought this caulking gun at the flea market.
$4.
Paid $4 for this.
It's still written on it.
♪♪ I'd say it's a hobby that benefits me for work, you know, because I'm able to put a lot of tools into my truck or into my shop at a reduced cost.
So I've saved money.
It gets me up and out of the house on a Sunday morning.
I think the secret to finding good things at the flea market is not being afraid to dig.
You know, some guys, their van is loaded up with boxes of junk and they take it and they put the boxes out.
The secret is to get down and dig through it.
You know, look cautiously, because there's still razor blades and knives and sometimes some rusty tools in there.
But as you dig through, I mean, I've found really, really good hand tools.
I picked up some Sawzall blades, circular saw blades, you know, for, like, half the cost.
I got a diamond grinding wheel one time for, like, five bucks.
♪♪ This is a nice one.
A chisel -- chisel depth gauge.
That might be a possible, uh, sell that item, resale.
♪♪ So this is like a feeler gauge set.
These all fan out.
These are really good for setting up tools.
I got a Walker Neo 125 magnet that is really cool.
It's it's about this big.
It's a little brick, and you can turn it on and off, and you can lift like plate steel with it.
I got that for five bucks, and it's definitely worth a lot more than that.
Stickers, "This door must remain open during working hours."
I held it up.
I'm like, "What do you want for this?"
And he's like, just take it.
The biggest value I see in buying used tools is just the value -- you know, the money that I save and, you know, helps that vendor.
You know, they're going to make a few bucks that day and it's a win-win.
♪♪ -Hi, Michelle.
-Hi, Nathan.
-Nice to meet you.
-You, too.
Thanks for coming over.
-Absolutely.
So you wrote me about a closet for a nursery?
-I did.
-Alright, let's do it.
-Come on in.
So this is our baby room.
We've got a two-year-old and, obviously, one on the way.
-Oh, yeah.
-And here is the closet that I wrote you about.
-Alright.
-So we have something kind of DIY off the shelf in our master bedroom, which we really like.
But with two kids now sharing this room, we're looking for something a little bit more functional.
-Change this whole thing up?
-Yeah.
It's all going.
-Okay.
Alright.
Well, let's start off with what do we have?
We have a shelf.
We have a simple pull dresser in here for organization.
I see some shelves on the left.
I think that the way we handle this is clear it all out, get it back to a blank slate, and then talk about the design.
-Sounds good.
-Alright, let's get started.
-Let's go.
-Gonna start by pulling this screw out.
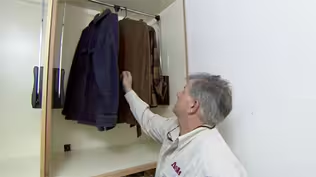
♪♪ ♪♪ ♪♪ Now that we have the old shelf removed completely, we have a blank slate.
We can start designing your new closet.
So I kind of have a little bit of an idea what I'd like to build.
I'm going to run it by you and see what you think.
It's very, very customizable, but you have a nice, big, nine-foot closet here.
So what I'd like to do is like three three-foot bays.
-Okay.
-But this bay here, I'd actually like to break it up into two 18-inch kind of cubbies.
-Because 18 and 18 is three feet.
-Three feet.
Fixed shelving on one side, adjustable shelving on the other side.
It's going to give you the customizability.
If the kid's clothes get bigger or smaller, move things around.
I was thinking about two closet poles on this side.
-One on top, one below.
-Yep, this side is still a great side for shelving.
I was thinking maybe two or three shelves in here.
-I think that's great, and we'll just make sure it matches the rest of the closet.
-Alright.
Sounds good.
One thing I do want to do is make it a little bit of a deeper closet.
You had about a 12 inch shelf before.
I'd like to stretch it out to 16 inches.
It'll give you more storage.
-Okay.
-So what we're going to do is actually start laying this out on the wall.
So I know it's nine feet, so I'll find half of that.
So that will be our center line.
-Oh, so it wasn't centered before.
-Yeah.
It was not centered before.
-Okay.
-But we'll work on just -- -We'll make it perfect.
-So what I'll do here is I'll come over 18 inches, I'll put a line there, and then we'll come over 18 inches.
Line there.
And now that gives us our three-foot bay.
Down here, a little bit more than three feet.
-That's okay.
-That's okay.
And down here, the same balance over here.
-It'll be centered in the middle.
-Centered in the middle.
So what we can do is, if you want to pass me that tall level behind you, is we can put these down.
-And make it so that we know where that line is all the way up and down the wall.
-Okay.
-Using a level like this for our layout lines keeps us true and speeds up our install.
-Work smart, not hard.
-Okay, so we have shelving stock here.
We have cleat stock that we need.
I have a really good idea of the materials that I should go out and grab.
-Okay.
-I'll go grab those.
I'll come back and show you what I got.
-Awesome.
Let's do it.
♪♪ -You may think that creating a functional closet requires a hefty budget and professional help, but with the right materials and a little bit of creativity, you can create the closet of your dreams.
♪♪ Before you get started with your project, it's important to know the dimensions that you have to work with.
Make sure that you write them down and bring them with you to the store.
Here, you'll find a variety of kits that work in a number of spaces.
This one here is expandable from 5 to 10 feet.
Make sure you take a step back and look up -- lots of accessories to pick from, from extra drawers all the way to extra closet rods.
Like this -- this is an expandable one that goes out, but if you need a really long length, you can buy that and cut it to the length that you need.
♪♪ If you want to take a more hands-on approach, we'll head over to lumber aisle and I'll show you what to grab.
By picking up some three-quarter-inch cabinet grade plywood, I'm able to maximize the space of the closet because I can rip it to the exact depth I need.
I can also do this for about the same cost as one of the kits from the other aisle.
♪♪ If you don't have a work truck like me, you can ask an associate to help cut the piece down to a manageable size.
♪♪ Alright.
These are all the parts and pieces that we need.
First off, we have some three-quarter-inch cabinet grade plywood that we're going to build our panels and our shelving out of.
I have some three-quarter-inch screen stop here that we can apply to the edge.
-Oh, nice.
-They'll take paint really well.
I have a closet rod.
We can cut this in half -- two three-footers.
We have the cups needed to mount it for screwing, our panels, and our fixed shelving.
We have some trim head screws for applying our cleat to the wall to the studs.
I have some cabinet screws.
-Something stronger.
-Yep.
Stronger.
Better pull.
And I also have these adjustable shelving standards here that we can put clips into easily, adjust those shelves anytime we want.
You ready to go?
-Let's do it.
-Alright.
So we're going to get started by applying this nosing to this rip of plywood that I have.
Real simple, just a bead of glue.
So I'm going to staple this on.
-Okay.
-We're going to flush one end.
So I am flush right now.
And then I'm going to put my eyes and ears on.
Got it.
♪♪ Just going to sand.
This is actually a really good, really good connection right there.
Now we'll roll on a layer of white priming paint.
♪♪ And cut the rods to length using a pole cutter.
♪♪ Alright.
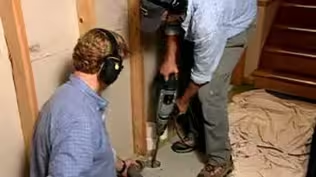
So we're going to start by applying a cleat to the wall.
And we know that we have a nice level line to work with.
And then we have a plumb line right there.
So just to get started, I'm going to catch one on each.
Alright.
So now that we have that, we are ready to put our first panel in, which is going to be this guy right here.
-Okay.
-And again, we have those plumb lines.
So if you can switch with me.
-Yep.
-All I'm gonna do is start a screw right here.
Push harder on top.
-Yeah.
-Okay.
-Nice.
-That's one.
-Rinse and repeat.
♪♪ ♪♪ ♪♪ -Alright.
So we're ready to put it in our fixed shelving.
I cut four pieces all the same.
Slide that in.
I pre-drilled holes.
Alright.
Let's repeat that process a few more times.
♪♪ ♪♪ ♪♪ And since this is a nine-foot-long cabinet, I'm splitting the top into two pieces.
♪♪ I have a little spacing block here.
-Okay.
-We'll go off the front.
♪♪ ♪♪ ♪♪ Michelle, this looks awesome.
Great job decorating it.
-Thanks, Nathan, and thanks for your help to build it.
-You're welcome.
You're welcome.
But a little bit of homework if you want.
So we have some of the staple heads that we want to putty.
We have a coat of primer.
So we can putty it, then sand it, and then a coat of finish paint, and you're 100% done.
-Awesome.
-So enjoy it.
-Thank you so much.
It's going to be so much more functional for this room now.
-Thank you for all your help today.
Good to see you.
-You, too.
♪♪ -Hey, Ross.
-What's up, Kev?
-So the ongoing conversation about indoor air quality.
-Yeah, we're talking about radon.
-Okay.
-It's the number one cause of lung cancer in nonsmokers, right?
It's not being talked about enough.
-What is it?
Like, where does it come from?
-Yeah.
So radon is a naturally-occurring radioactive decay of uranium.
So uranium is an element that's found in rocks and soils below our feet, and it decays, and that gives radon gas.
And the radon gas basically comes up through the soil, makes its way into the basement, and then we have a radon problem.
-So it's literally everywhere.
The problem is, is that when we put a house on this stuff, it can build up and get contained.
-That's right.
Yeah.
You're containing it below that, and then wants to come somewhere, it's going to come into the basement.
-Decaying radioactive uranium, whatever, okay.
-Yes.
Yeah.
-Let's stop that.
How do we test for it?
-Yeah.
So there are things like this called a short term test.
Right?
So you basically set that up in your basement 2 to 5 feet above the surface.
This one's a three-day test, so it measures it over three days.
You send it off to a lab, you get the results back.
About 20 bucks.
-Nice.
We did these when we bought the house.
It's of course required in a lot of places.
And they said no radon, no problem.
-That's right.
The next one is a long and short term electronic test.
So this one is measuring the radon level in the house.
And so you put this down in the basement as well.
And it's going to give you that long-term average, and it's going to give you the short-term immediate peak, when it sees.
-Okay.
And then this guy?
-And then this one does the same thing, but it also gives you particulate matter VOCs, CO2, temperature, relative humidity.
-Wow, it's the Ross Special.
Has it all going.
-Yeah.
-But wait a second.
If I do a three-day test and it says no radon, what do I care about the rest of the year?
You're just trying to upsell me here?
Because I don't have radon, I don't have radon.
-The thing that people don't understand is radon is dynamic.
It's not static.
You don't -- If you get a snapshot, you know, over the next three days, that doesn't mean that a year from now, you're not going to have a potential radon issue.
So here's an example of a house that we looked at.
So this was the radon test that was done when the house was built, when we did a three day test -- came out an average of 0.3.
-So this is hours -- 24 hours, 36 hours.
-That's right.
These are hours.
-What are acceptable levels and risky levels?
-Yeah.
So this is picocuries per liter, and we want it to be below four and ideally below two, right?
-4.0, not 0.4.
-That's right.
-So this is way below.
-This is, yeah, 1/10th, yep.
-So they're safe.
-So they're safe.
However, when we set up a monitoring kit in their basement, like one of these units, and this is doing the same thing, but we're looking over the course of days, right?
So to get the actual peak, we went from 0 to 20.
-Is the dotted line here sort of the four?
-That's the four.
Yep.
And you can start to see that we had peaks above the four line, and then we really went up.
We went up to 19 picocuries per liter.
-What?!
-Yeah, that's right.
Five times.
Almost five times.
-What happened?
A bunch of things can cause radon levels to spike, right?
If you have a lot of bath fans and exhaust fans running, right, you're going to pull a negative pressure on that house, you're going to induce more radon gas into that house.
-No kidding.
-We also have issues with, you know, wind and stack effect, right?
So if you have a really, really cold day, you're heating that house, all that heated air wants to rise up to the roof, go up to the roof.
It has to -- That air has to come from somewhere.
So it's coming in from -- into the basement.
Sometimes it's coming in from below the slab.
And we also have groundwater and other things like that where you have a big rain event, the rain water comes down, it raises the groundwater table.
If you think about that gas below the slab, it's in a set volume.
If the groundwater rises, I now have less volume of space below it.
So I'm forcing more pressure of radon gas into the basement.
-Interesting.
Okay.
So that's sort of a compelling story for why you might want to look at it for more than just a couple hours or a couple days.
If I have it or I'm worried about having it, how do I mitigate it?
-Yeah.
So there are systems called active subslab depressurization systems.
It's a fancy way of saying, let's take a pipe, let's stick it below the slab, let's seal that pipe penetration up, and let's put a fan like this, a radon fan, at the attic or up on the roof and vent all that radon gas to the outside.
Not give it a chance to get in the house.
-What you're doing is you're literally sucking air from beneath that slab, all across the basement or whatever.
-That's right.
-And it stops the radon from accumulating.
As long as you get it out of the house, you're okay.
-That's right.
Exactly right.
Yeah.
That gravel layer, all that air in that gravel layer, we're getting all that up and away.
And if in a retrofit, let's say you can't get a pipe like this up to the attic, you can bring it outside and bring it up the side of the house.
-I've got one in my house.
It was there when we moved in.
It's been running continuously, which I love.
But what does it costing me to run this thing?
Because now we're starting to realize it's on 24/7, 365.
-Depending on the size of the fan, it's typically going to be somewhere like 80 bucks a year, maybe 100 bucks a year, depending on the size.
So, I mean, for peace of mind, for 80 to 100 bucks a year, you know, that is a great way to go.
And you have the manometer, right?
You have that little "U" tube that tells you that the fan is actually operational.
It hasn't failed on you.
-It's the only "YouTube" we do in the house.
Hey, listen, when you said radioactive and decaying uranium... -It's not fun to talk about, but yeah, it's good for people to know.
-Alright.
Great information.
Thank you.
♪♪ -Hey, Mauro.
-Wendy.
Nice to meet you.
-Nice to meet you, too.
That's Pinky.
-That's Pinky.
-Yeah.
-Alright.
-And this way to the garage.
-Let's do this.
Pinky, let's go.
We got a lot of work to do.
Wendy, tell me a little bit more about the garage.
-Well, my son was a real big artist in high school.
I thought he was going to go to college for art, but then at the last minute, he decided he wanted to major in agriculture.
So he still continues with fun art.
And I have a lot of his art in the house.
So I want to show you the garage.
-Can't wait to see it.
Wow.
Look at this.
-[ Laughs ] Yeah.
-Amazing.
-So my son, when he was in high school, he wanted to graffiti.
And rather than having him go out where it was illegal, I gave him some canvases.
I said he could do it in his bedroom.
He filled that.
So I said you could do the garage, any place except the brick or the ceiling.
-Well, it looks like he left a message for you up there, right?
-He is awesome, but now I want it to look nice.
You know, he's in college.
He doesn't care if I paint over it.
I've got lots of his paintings in the house.
-Okay, so you want to paint over this?
-I think I'm ready.
I really need your help.
-I can help with that.
-I don't know how to do this.
-Alright.
I can help with that.
I need to grab a couple things from my truck, and you and I and Pink, we'll go to work.
-Okay.
-Come on, Pink.
♪♪ -Alright, we're ready to go to work.
Okay, here's what we're going to start rolling the walls with.
This is a three-quarter-inch nap.
You can feel that kind of a thick roller.
-It's so soft.
-And soft, too.
So because we're working against the surface, you see this heavy texture on the walls and also the very different colors, bright colors.
We want to make sure we get a good coverage.
And we don't know if it was water based or if it's oil based.
If it was oil based, sometimes it bleeds through the primer.
We don't want that.
Uh, my preference is, like, the acrylic primer.
Doesn't smell bad, dries fast.
It's all good about.
But if we see anything from the paint that is bleeding through, then we're going to have to use the oil-based paint.
Ready to go to work?
-I am.
-Alright.
Let's go.
To start, we will prep the area by vacuuming any dust or dirt on the walls.
We will also use painter's tape and plastic sheeting to cover the shelves.
-Look at that.
And such a perfect size.
-See?
Look at this.
Time to test the primer.
This is the acrylic one.
I wanted to make, like, a 12-by-12 square.
Make sure that we get... -Is that a big enough square?
-That's good.
If you want to do a little more on top of the red here, that's good.
-Okay, so the thick nap for covering the texture.
-Texture, which is kind of a heavy texture.
-So I still see it underneath here.
-Still see a little bit.
Yes.
We may need to put two coats of primer on top.
-Okay.
-So what I like you to do, just put a little more primer on that little roller.
Okay.
Just take the excess off a little bit.
-Okay.
-Okay, let's flip it.
And another coat.
Yeah, yeah.
Don't spread too thin.
Okay?
-Don't spread it -- Oh.
So don't push so hard?
-Don't press too hard.
Yep.
Alright, alright.
That looks good.
-Oh, that looks a lot better.
Yeah.
-Now we're going to do the oil.
Okay.
So let's go, spread it out nice and nice and easy.
Yep.
-Oh that feels different.
And it smells different.
-It smells a little stronger, but it's a good primer.
Just go side to side, too, sometimes.
Make sure you get all the texture covered.
Well, it's been about 30 minutes and we can clearly see which one we have to go with.
-Oh, I am so shocked because when I put the acrylic on, it seemed to go on smoother.
-Yeah.
-But the oil base definitely covers so much better.
-That looks much better.
This one here, you're still seeing the red come right through it, and this one gets a much better coverage.
-Oil-based it is.
-Ready to go?
-Yeah.
♪♪ Bye-bye graffiti.
♪♪ ♪♪ ♪♪ I'll close my eyes.
You do it.
[ Laughs ] He's still awesome.
-Now that the primer is dry, we can start painting.
We are using a flat interior acrylic paint because it's durable and is easy to clean.
In the past, you would use an oil-based paint on top of an oil based primer.
But the primer we used is actually a sealant primer that's designed to have any quality paint applied on top of it, even a water-based paint.
♪♪ -This is absolutely amazing.
I mean, it's such a different garage right now.
It's finally my adult garage.
-Well, I know you also mentioned to me that you have some graffiti on that brick wall.
-What do I do about that?
-Well, actually, there's some product that you can spray it on and let it sit for 15-20 minutes.
And with a scrub brush, scrub it off, rinse it off, and you're going to have your brick wall nice and clean back to you again.
-That's fantastic to know,, because I thought once paint was on brick, that it would never come off.
So I really appreciate learning that.
-Now you know how to do it.
-It's my next project.
-Alright.
-Thank you so much.
-Thank you very much.
♪♪ ♪♪ Kevin: Next time on "Ask This Old House"... Richard helps a homeowner solve the mystery of why their water heater keeps running out of hot water.
And I take a trip to visit maker Jimmy DiResta.
We check out his new workshop, and he teaches me how to make a leather tote.
Jimmy: So, it is very simple to do, but it takes a lot of patience, as you see.
Kevin: Yeah.
All that on "Ask This Old House."
♪♪


Support for PBS provided by:
Funding for Ask This Old House is provided by The Home Depot, Renewal By Andersen, and ChipDrop.