E12 | Hot Water, DiResta Leather Tote | Ask This Old House
Season 22 Episode 12 | 23m 42sVideo has Closed Captions
Richard troubleshoots a shower with no hot water; Jimmy DiResta makes a leather tote bag.
Richard Trethewey helps a homeowner troubleshoot why her upstairs shower runs out of hot water so quickly and helps her install a heat pump water heater; Kevin O'Connor returns to maker Jimmy DiResta's workshop in Upstate New York to get a lesson in leatherworking as they hand stitch a leather tote bag.
Problems playing video? | Closed Captioning Feedback
Problems playing video? | Closed Captioning Feedback
Funding for Ask This Old House is provided by The Home Depot, Renewal By Andersen, and ChipDrop.
Support provided by:


E12 | Hot Water, DiResta Leather Tote | Ask This Old House
Season 22 Episode 12 | 23m 42sVideo has Closed Captions
Richard Trethewey helps a homeowner troubleshoot why her upstairs shower runs out of hot water so quickly and helps her install a heat pump water heater; Kevin O'Connor returns to maker Jimmy DiResta's workshop in Upstate New York to get a lesson in leatherworking as they hand stitch a leather tote bag.
Problems playing video? | Closed Captioning Feedback
How to Watch Ask This Old House
Ask This Old House is available to stream on pbs.org and the free PBS App, available on iPhone, Apple TV, Android TV, Android smartphones, Amazon Fire TV, Amazon Fire Tablet, Roku, Samsung Smart TV, and Vizio.
Keep Exploring

This Old House Insider Newsletter
Get This Old House exclusive stories, tips, and behind-the-scenes information delivered right to your inbox every month.Providing Support for PBS.org
Learn Moreabout PBS online sponsorship♪♪ Kevin: On "Ask This Old House," our experts travel across the country to answer questions about your house.
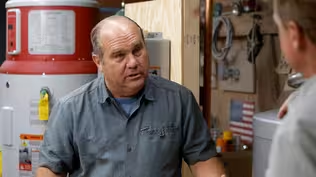
♪♪ Today, Richard helps a homeowner solve the mystery of why their water heater keeps running out of hot water.
And I take a trip to visit maker Jimmy DiResta.
We check out his new workshop, and he teaches me how to make a leather tote.
Jimmy: So it is very simple to do, but it takes a lot of patience, as you see.
Kevin: Yeah, you kind of got to get into the zone.
All that on "Ask This Old House."
♪♪ Richard: We got an e-mail from this lovely young couple.
They're quite excited.
They bought their very first house, a flip in this great neighborhood here.
And it was perfect until it wasn't.
Hello, our homeowner Rhiannon.
Nice to see you.
Rhiannon: Hey, Richard.
Good to see you.
Richard: What brings me here today?
Rhiannon: So we're having some issues with the hot water.
Richard: Of course.
Rhiannon: So basically if we only need one of us to shower in a day, or we only need to do the dishes or run the washing machine, then it's okay.
But if we try to back-to-back shower, we run out of water.
Richard: And did anything change from when you moved in?
Has it been like this -- Rhiannon: No, from day one.
Richard: Alright, let's see what you got.
Rhiannon: I'll lead the way.
Richard: So how long does it take to run out of hot water here?
Rhiannon: Usually shower one's okay.
Shower two is where we have the trouble.
So about 15-ish minutes.
Richard: Okay.
15.
So this looks like, when they did the flip, they remodeled the bathroom.
Nice new shower valve here.
Big shower head here.
But by code this is supposed to be restricted to 2 1/2 gallons a minute.
Rhiannon: Okay.
Richard: So what I want to do is start by doing a little test.
I'm going to take a bucket and measure the gallons per minute out of this.
Rhiannon: Okay.
Richard: At the same time, I'm going to have you downstairs with a temperature gauge and a timer, and we'll compare how much is coming out here versus how much is leaving down there.
Rhiannon: Alright.
Sounds good.
Richard: Alright, so I used this bucket to prove how much we're getting out of that shower head upstairs.
Rhiannon: Okay.
Richard: And this marked to one gallon.
Did the math.
That shower head's putting out the 2.5 gallons per minute that we thought it would.
Rhiannon: Okay.
Richard: So what did you get for the minutes that were ran out?
Rhiannon: About 12 minutes.
Richard: Okay, so let's start our math.
So we had 12 minutes times the 2.5 gallons per minute is 30 gallons that we went through.
Okay?
So this water heater sitting right here, it has cold water coming into the bottom right here through a dip tube.
Two electrical elements right here.
And here's the hot water coming out.
So 30 gallons is when you went cold.
And this tank is actually an electric water heater that's only 40 gallons.
It's got electric element here and it stores the 40 gallons.
And you go, "Well, 40 gallons.
That should be enough, right?"
Except anytime you have a tank-type heater of any sort and you take the hot water out, cold water has to come in and replace it down through this dip tube right here that has a little curl on it.
So what happens is hot water is leaving, cold water is coming in the bottom.
And it's diluting the tank, diluting the tank, diluting the tank until it finally goes.
So generally most tanks are only going to be able to give you 65% to 70% of the volume.
Rhiannon: Didn't know that.
Richard: Okay?
So this is a 40-gallon tank.
So let's do that math.
40 times 0.7.
40 times 0.7 is 28.
Oh, look at these numbers.
Rhiannon: Wow.
Richard: Okay?
You have available to you 28 gallons.
You're looking for 30.
And that's exactly why you went cold at 12.
Rhiannon: Oh.
Richard: So what does that mean?
This water heater is working exactly to spec.
Rhiannon: Really?
Richard: Maybe that's the bad news, right?
So it's just too small.
Rhiannon: Okay.
Richard: So if you didn't have any other choice, you could maybe just stagger the use.
But I'm not sure why they didn't put a 50-gallon water heater.
But I think the solution for you, with your permission, is to put in a new and better water heater.
The tank I want to propose to you is called a hybrid water heater.
So the tank itself is bigger.
It's going to be 50 gallons.
And it still has electrical elements in it if necessary.
But what it has built into the top of it is a heat pump.
And the heat pump is a refrigeration coil.
So now it can draw air in from the basement.
So all the heat that comes off the ductwork in the winter, all the heat that would store here in the summer can be pulled in, and using the refrigeration cycle, efficiently heat up that water.
And what it's going to do is be much more efficient to run.
But also it's going to dehumidify down here and you won't need that dehumidifier.
Rhiannon: That's very cool.
Richard: That sounds good?
Rhiannon: That sounds great.
Richard: Well, Christmas is coming early.
I'm going to go on a little shopping trip.
I'll be back.
♪♪ Alright.
New water heater is here.
We just got to start by getting the old water heater out.
And I'll turn off the cold water feed and now drain the tank.
Alright.
I just need to kill the power to the existing water heater.
That's it.
Breaker 14.
Now I'll disconnect the power line and cut the water piping to free the old water heater.
♪♪ ♪♪ One.
♪♪ Okay.
Okay.
The old tank is gone.
And look, here's your new tank.
Rhiannon: It's very shiny.
Richard: It's very shiny.
The tank itself only comes to right here.
And this is 50 gallons, not 40.
And above it, this is the heat pump unit right here.
Air is drawn in with a fan across this coil.
And it picks up the heat from the air, delivers it down into the water heater and discharges it over there.
So now, because the heat pump's on the top, the tappings are different.
Remember the old one's had hot and cold right here.
So now here's the hot and here's the cold.
So it's going to require a little more repiping for me.
While I do that, see this?
This has got all kinds of smarts, you know, Wi-Fi, Bluetooth, all that stuff.
You're young enough and smart enough.
You study up on that.
You'll be in charge when I get done.
Alright?
Rhiannon: I'll do my best.
Richard: Alright.
♪♪ ♪♪ ♪♪ ♪♪ ♪♪ ♪♪ Alright.
I've been busy down here.
I've got all of the water piping done.
We've got a cold water line that comes over here, drops down to the bottom, a vacuum breaker right here at the top.
Heated water comes out through here, now comes back to the building.
We got everything wired.
We got it all connected.
And now this thing is running and you can hear it.
It's just acting as a heat pump.
And there's a little bit of cool air coming out there and you're in business.
Rhiannon: It's beautiful.
And I'm so excited to have hot showers again.
Richard: Good.
Rhiannon: How much more expensive is this going to be since it's so much nicer?
Richard: Well, it's way less expensive to run, first of all.
You know, I want to compare a few things.
One is, remember the 40-gallon water heater we took out?
That thing had an energy rating, I think, of $555 a year, and this is about $117 a year with plenty of hot water.
Okay?
So there's an operating cost story.
There's also, you know, for every dollar you put in, you get about $3 equivalent energy back out, which is pretty good versus a regular resistance heater.
And then there's all kinds of people trying to be your friend.
Most states are giving away $500 to $1,000 rebates to invite people to put these in because they really want to lower the electrical consumption.
Rhiannon: Yeah.
Richard: And the federal government is doing a tax credit of up to 30% on the entire installation, labor and material, up to about $2,000.
Rhiannon: That's awesome.
Richard: So that could be up to 2,000 bucks.
Rhiannon: Yeah.
Richard: Alright?
So there's a lot of ways that you can get one of these things affordably.
So a little bit of homework.
Did you learn all your smart stuff?
Rhiannon: I did.
I downloaded an app and it looks like I can control it remotely and it'll, like, give me system status.
So I've got some learning to do.
Richard: You might have to teach me once you learn.
Okay?
Rhiannon: I'll do my best.
Richard: The other thing I want you to do is just insulate the last of these pipes because we're fighting so hard to make as much energy go into the water as we can.
And I've got one thing left to do for you, to find the adapter right here, because right here is going to be all the condensate that we're extracting from the air, and we're going to dump that to the pit right there.
Rhiannon: Gotcha.
Richard: Alright?
But I want you to stay in hot water.
Rhiannon: I appreciate it.
Richard: You were a great help.
Alright.
Rhiannon: Thank you.
♪♪ Kevin: I am headed to upstate New York to go see an old friend, Jimmy DiResta.
Jimmy is a maker, which means he is somebody who can -- Well, just that.
He can pretty much make anything.
And he has over the years.
With us, he's done a couple projects.
He did a dining table made out of spalted maple.
He also worked on a beautiful epoxy end table with some small round wood cutoffs, also some channel letters with marquee lights, and he worked with Tommy once.
They welded a coat rack together.
But it's been a couple of years since we've worked with Jimmy.
He's got a brand-new workshop and he was kind enough to invite us up.
He says he's got a new project he wants to try out, so I'm looking forward to getting up there and see what he's got in store.
♪♪ Hey, Jimmy.
Jimmy: How are you, buddy?
Kevin: Good.
Good to see you again.
Jimmy: Welcome back.
Kevin: Yeah.
Thank you.
Great to be back.
Jimmy: Thank you.
Kevin: Been a while.
Jimmy: It's been a minute.
It's been a minute.
Kevin: Yeah.
So, what've you been up to?
Jimmy: A lot of changes.
A lot of good stuff.
You know, I did a Netflix show.
Kevin: I saw it.
"Making Fun."
Jimmy: "Making Fun."
It was a ridiculous show.
Kevin: It's a whole different side of you.
Jimmy: Yeah, it was fun.
Kevin: Giving the kids a little bit of a -- Yeah.
Jimmy: Yeah.
The best part about that show was that we used my property.
We used the shop, which you haven't had a chance to see yet.
We did all the crazy stuff in the backyard, and most of those ideas came directly from the kids.
Kevin: I remember when that started going up, so I do want to check it out.
Jimmy: Yeah, we'll go take a look.
Kevin: But I see a couple new ones too.
A peak of what -- You got another one down there?
A barn?
Jimmy: Building a horse barn.
I started that a few years ago.
It's still in progress.
It's a lot of work.
Kevin: Everything's in progress.
The new shop, I'd love to check that out.
So maybe a tour from you of...?
Jimmy: Yeah.
Let's go take a look.
Kevin: Alright.
Jimmy: I think you'll like it.
Kevin: Last time I was here, the siding was going up, I think.
Jimmy: Oh, yeah, yeah.
You said Dave was doing -- Kevin: Yeah, David was here and he was banging it out.
Jimmy: Yep.
A lot more has happened since.
A lot more.
♪♪ Kevin: Oh, yeah.
This has come a long way.
Jimmy: It has, hasn't it?
Kevin: Holy mackerel.
Jimmy: A lot of work.
Kevin: Yeah.
Jimmy: The stained glass was a prop for the TV show.
Kevin: That's a replica of the little one that was hanging over the old shop.
Jimmy: That's right, that's right.
Kevin: Oh, yeah.
Look what you have done here.
Holy -- The space.
Jimmy: Isn't it nice?
Kevin: It is.
Jimmy: I love it.
Kevin: And the stuff.
Jimmy: I like having cool stuff around.
Kevin: Did you make or did you find?
Jimmy: Me and my buddy Wesley made that for a YouTube video about a year and a half ago.
Kevin: That's awesome.
Jimmy: Yeah.
Kevin: We made some channel letters, you and I, back in the day.
Much smaller than... Jimmy: Yeah, yeah, yeah, yeah.
Kevin: So you got a ton of space and you bring people here, right?
Because you're doing classes.
Jimmy: We do classes.
I bring friends together, we do maker sessions.
It's a lot of fun, a lot a lot of room, a lot of resources.
Kevin: A maker's mecca.
I love it.
Jimmy: It is, it is.
Kevin: So what do you think you're going to do with me?
Jimmy: Well, I think we should do a leather project.
And I broke out some leather to show you.
Kevin: I've never worked in leather.
I'll be honest with you.
Jimmy: It's a lot easier than a lot of people think.
Kevin: It's kind of intimidating.
I think of it as sort of a refined material or skill.
Jimmy: Well, a lot like fine woodworking.
People get nervous to cut into that beautiful, expensive piece of material, and so it's intimidating if you've never done it before.
But it's very simple.
Kevin: So if this is the material, what do we actually work with?
Are these the tools?
Jimmy: These are your basic simple tools to do mostly any leatherworking project.
We have our stitch fork which creates the holes where our stitching is going to go.
Then we have our razor blade.
Kevin: Yep.
Jimmy: Needle and thread.
Kevin: Yeah, that's pretty simple right there.
Jimmy: And your mallet to nail your stitch forks in.
And just the divider so we could mark from the edge of our cut piece.
Kevin: Well, I'm a little less intimidated seeing the tools because they seem pretty basic.
Jimmy: They're basic.
This is all you really need to get started with any leather project.
Kevin: Alright.
What are you thinking?
Jimmy: Well, I got some inspiration here.
These are some bags that I've made over the years.
This is a no-stitch bag.
It's just rivets.
All things held together with rivets.
Kevin: So just press those in there.
Jimmy: This one's a little more complicated.
Done with a sewing machine.
Complicated one.
Kevin: Lots of nice detail.
We're not going to tackle that today, are we?
Jimmy: No.
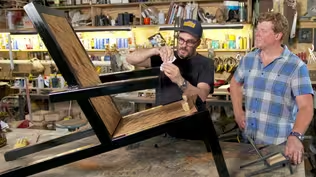
The simple project we're going to do today, we're going to copy this bag.
Classic tote bag.
Kevin: Perfect.
Tote, canvas.
Jimmy: We're going to make it in leather.
We're going to take this basic shape.
We're going to hand-stitch it together in leather.
Kevin: Okay.
Listen, if you're willing to teach, I'm willing to learn.
Jimmy: Alright.
Kevin: You might lose some leather in the process, but... Jimmy: Nah, we won't lose anything.
We just got to make a paper pattern on this to start.
Kevin: Let's do it.
Jimmy: Let's go.
Kevin: Okay.
Jimmy: Alright.
This is our bag.
We're going to use this bag as our inspiration.
And we need to make a paper pattern first.
Kevin: And obviously in paper because we refine it in paper before we cut any leather.
Jimmy: Exactly.
We'll just do a couple of quick little bits of tape to keep it together so that we have our little leather shopping bag at the moment.
Kevin: Right.
Jimmy: Alright.
This is a very hearty piece of leather.
It's going to make for a pretty bag.
We're going to have to wrestle it around a little bit, it's so thick.
Kevin: Back side, front side.
Does it matter?
Jimmy: This is what's going to show.
Kevin: This is what's going to show.
Jimmy: Yeah.
So this is what's going to be inside.
Kevin: Gotcha.
Okay.
Jimmy: Okay.
Now with this paper pattern, we're just going to gently trace it.
And then we'll freehand razor blade it out.
♪♪ Kevin: Start to get a sense of the shape that's coming our way.
Jimmy: Mm-hmm.
Kevin: Okay.
Jimmy: Like I said, I could skive this, but I'll see what kind of bends I can get without skiving it.
Because leather is very pliable.
♪♪ ♪♪ Kevin: That's cool.
That's coming together.
Jimmy: So once we stitch this side, this triangle is going to fold up to create that corner.
But we might have to skive it so it folds up a little bit easier.
Kevin: Boy, it's stiff enough.
It actually works like wood.
Jimmy: Yeah.
So now what we need to do is establish our stitch line.
You see the tiny line that it impresses in the surface there?
Kevin: Yeah, just a scribe.
Jimmy: Just a little scratch.
Kevin: Boy, it is subtle.
Jimmy: Yeah.
This will give us a nice, consistent parallel line to our stitch edge.
For when we're about to use the stitching fork.
We establish our hole and you see how deep we got to go through to get there.
Kevin: That's a punch all the way through.
Jimmy: And so we stay on our line, but we leave the last fork into the last previous hole.
That's how we maintain... Kevin: The consistency.
Jimmy: ...our consistency.
Kevin: Interesting.
If it were thinner, would you always use a fork or could you just push the needle through?
Jimmy: Oh, no.
Only Rambo can push the needle through.
Kevin: [ Laughs ] And there we go.
And so now I know my whole consistency in that spacing, I should land with the exact same number of holes.
So if there's 100 holes there, there'll be 100 holes there.
Kevin: Mm.
Jimmy: Now I'm not punching.
This is something I often do too.
I don't punch all the way through right away.
Kevin: Set them up.
Make the line.
Jimmy: Yeah.
And this way, I don't have to focus on my next pass.
I know exactly where I need to land.
So now we want to establish our stitch coming up the side.
We'll do an X pattern.
So there'll be like an X across.
And I'll show you how we do that.
Kevin: Okay.
Jimmy: Give me that black thread.
Kevin: Special thread or no?
Jimmy: This is a wax thread.
So it is a leather wax thread.
It's super strong.
Okay, so we are establishing our first stitch.
You see we'll go through and through.
Kevin: Yeah.
Jimmy: It gets a little awkward, but once you start establishing your stitch, everything comes together.
Kevin: So in this case, the one that came out of the right is going back to the one on the left.
Jimmy: Yep.
Kevin: And then vice versa?
Jimmy: Yep.
Kevin: That's your cross.
Jimmy: Yeah.
Kevin: So you can see why a high-end bag or something like that, a person would come in and inspect the stitching, really look at it and see how precise.
Jimmy: Yeah, take a close look at certain stitches on.
I mean, I think they're still overpriced, but you can see why.
♪♪ To tie off the end, I go back down the stitch pattern a couple of holes.
Kevin: A little reinforcement.
Jimmy: Yeah.
Just to reinforce that end.
And then we'll tie it off inside down the line a little bit.
So that should be good.
And then I might, later on, put a dab of glue on there just to keep that from coming undone.
Kevin: Well, what do you say Jimmy?
You gonna let me jump in there?
Jimmy: You think you got it?
Kevin: Well, it's -- I will see.
We're going to find out together, but I'll give it a try.
Jimmy: Very good.
Kevin: Sort of like lacing the shoes.
Jimmy: Yeah.
Going through the punch hole is easy.
Coming back out of it is the hard part, because they're not very easy to see from the inside out.
Because the inside of this leather is furry.
Kevin: Yep.
Jimmy: So it hides all those holes.
Okay, so we got both of our stitches up on the side.
You did a really beautiful job there.
Kevin: You're being kind.
Jimmy: No, no, no, you did.
But you see how you catch a rhythm?
Kevin: Yeah, totally.
Jimmy: Yeah.
It's a little wear and tear on your fingertips, but you get used to it.
And now we're going to fold this corner up and stitch that.
So now that that's ready to go, I'm going to pull that up tight like that.
And then I have an awl on the drill.
Kevin: Oh, look at that.
So it's almost like an extended needle.
Jimmy: Yeah.
And we're just going to start putting some holes.
[ Drill whirring ] So it is very simple to do, but it takes a lot of patience, as you see.
Kevin: Yeah, you kind of got to get into the zone.
I think if I took it up, the ladies in my family would be bringing me dinner in the garage because they'd never want me to stop.
They'd be like, "Make me another bag, Dad."
Jimmy: It's really accessible to most people because I've seen friends get into leatherwork for the first time ever, and then all of a sudden they're selling bags right away because they might have a unique spin, a unique approach to it.
Kevin: The creativity from your painting or your pottery might translate into your leatherwork.
Jimmy: Exactly.
Okay, so those knots that I tied, to ensure they won't come undone, I put a little bit of PVA glue on them, and that will ensure that those knots won't become undone.
Kevin: I like it.
Jimmy: So, I have a bottle of Edge Kote.
That's to finish the edge here.
Do you ever get a fancy wallet and the wallet has a darker edge?
Kevin: Oh, that's cool.
Jimmy: Yeah.
Kevin: It's actually a good match.
Jimmy: And now we're going to cut handles.
What do we think?
We like?
Kevin: I do like.
Jimmy: Seem like it's about the right length.
We could see.
Feels good?
Kevin: Yeah.
Jimmy: Okay.
All of our Edge Kote is dry.
Time to put on the handles with the rivets.
Kevin: Mm-hmm.
Jimmy: There's our hole.
Kevin: Oh.
Jimmy: And now we want to punch the hole in the bag.
Kevin: Mm.
Jimmy: Now, these little saddle rivets are really good-looking and they work really well.
♪♪ It bangs it down like that.
Kevin: Makes it tight.
Jimmy: Makes it tight.
Cut off whatever we don't need.
♪♪ You have the honors.
♪♪ Good.
Okay.
Done.
Kevin: Nice, fine touch.
Jimmy: What do you think?
Kevin: Beautiful.
Absolutely beautiful.
Jimmy: Thank you very much.
Kevin: Look at that.
Yeah.
Material is great.
I mean, the details, the stitching, it's all just beautiful.
Jimmy: What do you think?
Do you think you can handle it?
Kevin: Uh -- Now?
Absolutely.
Jimmy: It's a lot easier than it seems, right?
Kevin: It is.
It really is.
The material works well, the tools are simple.
And it's not going to look like this the first time I do it.
Jimmy: It might.
You see how forgiving the material is and like I said before, it's just going to get better looking with age.
Kevin: Yeah.
Jimmy: One last thing.
This is my maker's mark that I put on all my leather products.
Ah.
Kevin: Yes!
Ah, worthy of that name right there.
Jimmy: Thank you very much.
Kevin: That looks terrific.
I like it a lot.
Jimmy: Thank you.
That came out good, that one.
Kevin: Nice job, man.
Hey, thanks for having us.
Always good to be here.
Jimmy: Thank you so much for coming back.
I'm honored.
Kevin: Yeah, well, we'll come back anytime, brother.
Jimmy: Thank you very much.
Kevin: Alright, well, that's it for us.
So until next time, I'm Kevin O'Connor.
Jimmy: And I'm Jimmy DiResta.
Kevin: For "Ask This Old House" here in the DiResta workshop.
Jimmy: Thank you, guys.
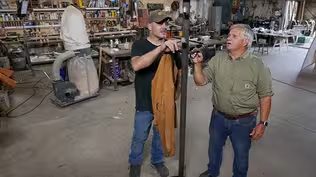
♪♪ ♪♪ Kevin: Next time on "Ask This Old House," we learn it's never too late to learn new things as Tommy takes a turn on the lathe.
Tom: I do most of my turning late at night.
I'm up.
And why not turn a bowl?
[ Chuckles ] Kevin: Then later, he shows us how to build a segmented bowl using the lathe.
Plus, Heath gives us a review on how to identify breakers.
All that on "Ask This Old House."


- Home and How To

Hit the road in a classic car for a tour through Great Britain with two antiques experts.


Support for PBS provided by:
Funding for Ask This Old House is provided by The Home Depot, Renewal By Andersen, and ChipDrop.