E14 | Suburban Victorian | Reduce, Reside, Recycle
Season 47 Episode 14 | 23m 42sVideo has Closed Captions
Aluminum siding removal; Visit to a recycling center; Installing a steel beam.
Charlie Silva meets abatement specialist Ron Peik, who confirms asbestos on ductwork, prompting a safe cleanup. Later, Kevin O'Connor joins Charlie to strip aluminum siding and visits an aluminum recycling facility to learn about the process. Back home, a steel beam is craned through a rear window to support the now open first floor layout.
Problems playing video? | Closed Captioning Feedback
Problems playing video? | Closed Captioning Feedback
Funding for THIS OLD HOUSE is provided by The Home Depot and Renewal By Andersen.
Support provided by:

E14 | Suburban Victorian | Reduce, Reside, Recycle
Season 47 Episode 14 | 23m 42sVideo has Closed Captions
Charlie Silva meets abatement specialist Ron Peik, who confirms asbestos on ductwork, prompting a safe cleanup. Later, Kevin O'Connor joins Charlie to strip aluminum siding and visits an aluminum recycling facility to learn about the process. Back home, a steel beam is craned through a rear window to support the now open first floor layout.
Problems playing video? | Closed Captioning Feedback
How to Watch This Old House
This Old House is available to stream on pbs.org and the free PBS App, available on iPhone, Apple TV, Android TV, Android smartphones, Amazon Fire TV, Amazon Fire Tablet, Roku, Samsung Smart TV, and Vizio.
Keep Exploring


This Old House Insider Newsletter
Get This Old House exclusive stories, tips, and behind-the-scenes information delivered right to your inbox every month.Kevin: Today on "This Old House"... Charlie: Homeowners decided to change the aluminum siding.
And I'm gonna be honest with you, I'm not sorry to see it go.
Kevin: Then, we'll see what happens to that siding after it leaves the jobsite.
Tom: And we're installing a new I-beam.
We're gonna jack it up and bolt it in place.
[ Drill whirring ] [ Blues music plays ] ♪♪ Man: That's it.
[ Pipe squeaking ] [ Power tools whirring ] ♪♪ [ Mid-tempo music plays ] Kevin: Hey there.
I'm Kevin O'Connor, and welcome back to "This Old House" and to our project here in Needham, Massachusetts, where Charlie and his crew are well under way renovating our home, built in 1896 for our family of five.
Now, last time we were here, we actually had three concrete pours to make up a new foundation for the addition going off the back of this house.
And you can see that the addition has now been framed.
And some of the sheathing has started to go on, as well.
The addition spans three levels -- basement, first floor, and the second floor.
And each level is gonna add about 200 square feet -- 600 in total.
In the basement, that new space they want to use for a home gym.
And they wanted that space to be connected to the existing basement.
And that means that we had to actually cut through the foundation, new pour and old rubblestone.
So our concrete-cutting specialist came in, and they had four huge blades, ranging from 32 to 54 inches.
They made our cuts.
And, then, when they were done, Mark McCullough showed up with some mortar, some hand tools, and he just sweetened up that rubblestone foundation so we had a nice, clean opening for a new door, which they decided to put right where there was an old window, because there was an existing header there and, well, why not use it?
Now, the 200 additional square feet here on the first floor is gonna be used to push the kitchen and the family room out towards the back, making them a little bit bigger.
And they're gonna add a new entryway into a proper mudroom and a powder room.
On the second floor, the additional 200 feet is gonna be used to make the primary suite bigger, as well as making one of the kids' bedrooms a little bigger, as well.
Now, there's been a scope change.
The homeowners have recently decided that they want to replace all of these windows.
Not something they originally had planned, but the more they thought about it, they figured they had to go.
They're over 30 years old, they're not the greatest windows, and they figured that they could do better.
Another thing they decided to do was have the aluminum siding taken off.
They don't like looking at that underneath.
There are some wood shingles.
Eh.
You know, they're not in terrible shape, but those are gonna have to be addressed.
But they definitely wanted to get rid of the aluminum, so we'll take care of that today.
And last week, Charlie, while he and his crew were demoing inside, first floor all the way up to the second, they actually bumped into a red flag, one that required Charlie to pull in our abatement specialist.
And the two of them got together to figure out how they were gonna deal with that problem.
Charlie: Well, Ron, you can see we're well under way in our demo.
And this was our dining room, which is gonna be our new living room.
And this entire wall is coming down, so we started to gut the walls and the ceiling.
There was even a china cabinet here that we took apart and we're gonna repurpose later.
And taking the plaster down, we see this ductwork.
And it looks like asbestos to me.
What do you think?
Ron: Yeah, it sure does.
Yeah.
You could have it tested to confirm, but just looking at it, judging from the vintage of the ductwork and the color, the texture, that's almost certainly asbestos.
So, asbestos was really like the wonder material back in the day.
So, they just knew it would never, never decay.
It didn't conduct electricity.
It's very impervious to rot, water, and heat.
It's a great heat insulator too.
They used it in glues and mastics because it also adds a little fiber to it, makes it stronger, so it resists cracking.
So you're gonna see it in a lot of materials in homes, 'cause it just -- it was inexpensive.
It was plentiful, easy to work with.
And it was very, very durable.
But now we know that it is hazardous.
Back in 1971, the EPA Clean Air Act identified asbestos as a hazard, so it's been a long time.
So then it started to get rolled back.
It's been used in so many processes.
It's taken a long time to get it out of our world.
And it's still in some building materials.
You have to be careful even today.
-Charlie: Wow.
-Ron: So the best thing to do would be just to take these ducts right out.
You have this section right here, which is pretty easy to get to.
And coming up over here and across there, even though that's not necessarily gonna be impacted by the project, other than just putting new ceiling up, that's falling apart, that's what's called friable.
It means it can create dust, it can be pulverized, and it's gonna create a hazard for your workers and ultimately people living here.
So you want to get that taken care of.
Charlie: It has to come out anyway because that's our delivery, you know, system for that vent up there.
So that's coming out 'cause the wall is gonna be gone.
-Ron: Right, right.
-Charlie: Take it out anyway.
Ron: You don't have to do anything beyond that, because by regulations, you just have to take care of the asbestos that's actually being impacted by the project.
If there's something in another part of the house, in the basement or up in the attic not being impacted by this project, it can stay.
Charlie: Right.
If you had a customer that wanted to leave the ductwork, but only remove the asbestos, what's the next step to make sure the ductwork is clean?
Ron: At the end of any of these projects, even a big renovation project, it's a good idea to do a duct-cleaning process.
You're gonna clean these ducts.
You're gonna run agitators down them and clean them all out.
And there's a lot of contaminants from mold spores, dirt, dust, whatever you want, plus probably some asbestos.
So having that duct-cleaning process when the project is all done, you get yourself nice, clean, safe ducts.
Charlie: And you'd be comfortable with that?
-Ron: Sure.
Yeah.
-Charlie: Alright.
Well, that's great.
Well, it's all on you now, so tell me your next steps.
Ron: Our reason for existence is to contain the hazards.
[ Mid-tempo music plays ] Protect the workers first.
They're gonna first put on their protective equipment.
We've got to create a bubble, an isolation.
You've seen them before.
We've done a few of them for you.
And then everything's gonna be sealed up like the set of "E.T."
And isolate that work area, make sure nothing's getting out.
♪♪ And one of the most important things we also do is to set up what's called HEPA-filtered negative air, make sure no asbestos fibers are blowing around this house when we're doing our work.
We're gonna be using water -- what's called amended water, which is basically soapy water, to mist that surface down as we're removing it to make sure that we're not breaking apart this dry, friable asbestos and making dust just kind of poof all over the place.
We're gonna just take those ducts out in sections.
♪♪ ♪♪ Can go into these double bags with special labels.
Those are gonna wind up at an EPA-certified landfill.
[ Mid-tempo music plays ] ♪♪ ♪♪ Kevin: So, Charlie, I noticed aluminum siding on the far side is down a little bit off the front, as well.
so you made good progress.
-Charlie: Yeah.
It only takes a couple hours to actually strip one side, so it comes off pretty quick.
So, we're gonna start here with the aluminum that's over the existing crown molding.
We're gonna start with this, take those off.
And then we'll start removing the siding.
But we got to be careful, because this aluminum drip edge is part of the roof system, and that's staying -Kevin: Alright.
Tool of choice?
Charlie: Flat bar and hammer.
Pretty simple.
-Kevin: Okay.
Charlie: Let's start here first.
Should come off pretty easy.
♪♪ Yeah.
♪♪ Kevin: Taking off all the aluminum siding was not in the original plan.
What changed the homeowners' mind?
Charlie: Well, they always thought down the road they would change the siding, like a phase two.
But once they saw the work started to get done, just said, "You know what?
Let's just do it now."
-Kevin: Yeah.
-Charlie: You know what?
It's actually cheaper to do it now because we're here.
-Kevin: It is definitely the right decision for this house.
-Charlie: Oh yeah.
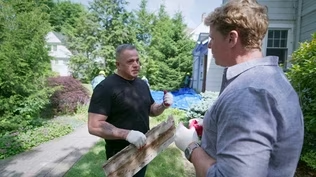
Right over there is a scrap-aluminum dumpster.
-Kevin: Wow.
-Charlie: So, it's a weigh-and-pay system.
They drop it off, re-fill it.
They haul it out, and they pay.
Kevin: So just the aluminum going in that one?
♪♪ [ Drill whirs ] ♪♪ ♪♪ ♪♪ [ Truck beeping ] Kevin: I couldn't resist.
I had to find out what was gonna happen to our aluminum.
So I have come here.
This is a recycling facility about 20 miles from our jobsite.
And it is the first stop for our aluminum.
It's gonna get weighed right there.
That's our dumpster.
That's our siding.
And I'm gonna find out what the rest of the journey looks like.
First stop's the weigh-in.
Second stop's the dump.
Anthony.
-Anthony: Kevin.
How you doing, man?
Nice to meet you.
Kevin: Nice meeting you.
You got a busy place here.
Anthony: It's not busy yet.
-Kevin: Not busy?
-Anthony: No.
We get very, very busy at different times of the day -- lunchtime rush, different things before the end of the day.
Kevin: Alright.
So, first off, how's our pile look?
Anthony: Looks great.
It's nice, clean, all aluminum siding, just what we're looking for.
Kevin: What happens with this pile now?
Anthony: So, this material, he's putting it right inside the hopper of our baler.
There's a gentleman up top doing the control.
So, as he puts a bunch in, that gentleman will hit the pusher.
And that allows a block to come over and squeeze it down to make it more compact.
So they'll do that a few different times throughout this process.
Kevin: And that's a bale of wire coming off?
Anthony: That's a bale of Romex wire right there.
It will come out as a finished product, and then it will be stored until we ship it out.
And this specific material will get shipped up to Canada.
Kevin: So, how do you guys classify aluminum?
Are there different grades, different types?
Anthony: As a company, we probably have about 25 to 30 different commodities of aluminum.
And that ranges anywhere from aluminum that has iron, such as a transmission or an engine block... all the way to clean, Mil-grade stuff like this here, or your bare, extruded pipe.
Kevin: And your guy's not gonna push out a block until at least all of this is in there, right?
-Anthony: Yeah, yeah.
100%.
-Kevin: Okay.
So, you guys are sorting more than just aluminum.
And I'm actually seeing a lot of people hand-picking stuff, which surprises me, Anthony.
Anthony: So, the scrap metal has so many different commodities and different nuances to it.
So, this here is our non-ferrous scale area.
So any customer who has their copper, their aluminum, brass, stainless steel, things of that nature, they'll come up here to get weighed compared to the iron yard outside.
-Kevin: Right.
Anthony: And if it has to get cut up and processed to be upgraded, it will go into a pile.
And everything else has its own home within the yard for processing.
Kevin: What do you mean by upgraded?
Anthony: So, the more purer form of a metal, the higher value it is.
So, you take a piece of copper.
So, in order to get, you know, a high, number-one copper, you need to get rid of any impurity.
So we take this piece here, and with our shears, our guys are gonna cut off all the elbows and fittings, and then you'll get straight runs of number-one copper, and you'll get little pieces of number two, which is what we buy it at.
Kevin: And where are the impurities in an elbow?
-Anthony: So, you have your solder joints.
-Kevin: Oh.
Anthony: Nowadays, a lot of people use ProPress, so the rubber gasket on the inside of that is an impurity.
-Kevin: So something like this?
-Anthony: Something like that.
We would just ship that as a number two.
We wouldn't waste the time to upgrade a little piece of that.
Kevin: But when you've got this much, it's worth upgrading?
-Anthony: 100%.
-Kevin: So when you buy this, you're just paying sort of a flat rate, and then you decide whether or not it's worth your time?
Anthony: In labor... -Anthony: To chop it up.
-Kevin: ...to chop it up.
To get it to the next upgrade.
-Anthony: Yeah.
-Kevin: Wow.
Okay.
Let's go see how our aluminum's getting processed.
Oh, look at that.
So, took Charlie and I a couple hours to get it off the house.
Took you guys about five minutes to get it into a nice, little bale.
So, all of our siding went in there.
What do you think this bale weighs?
Anthony: Average bale of aluminum, anywhere from 1,000 to 1,200 pounds or so.
-Kevin: Right.
Off to Canada?
-Anthony: Off to Canada.
Kevin: And then maybe right back to the States in the form of siding.
-Anthony: Within a few weeks.
Kevin: Awesome.
So, what do we make?
Anthony: Ah.
So, your can of aluminum weighed 780 pounds.
It was valued at 62 cents per pound, for a tally of $483.
-Kevin: Okay.
-Anthony: Minus a trucking fee, so you're looking at about $300 cash.
Kevin: $300.
Can you do any better.
[ Laughs ] -Anthony: On the next one.
Kevin: I appreciate it, Anthony.
You guys are awesome.
Thank you.
-Anthony: Appreciate it.
[ Mid-tempo music plays ] ♪♪ Kevin: After Ron's crew took care of the ductwork with the asbestos on it, Charlie's crew came in, and they built us four temporary walls, one on my left right here, with a second one just directly beneath it going into the basement, another one to my right, with a second one going beneath that one to the basement, as well.
With those up, we were able to take out this wall right here that originally separated the kitchen from the dining room so that we can open up all of this space.
And with it gone -- [laughs] -- we now have to put in a big beam to support all this weight so we can take those temporary walls down.
And for that, we turn to Mr.
Silva.
Hey, Pops.
-Tom: Hey, Kevin.
How are you?
Kevin: Good.
So you fit.
Tom: I did.
No problem at all.
A little bump here or there, but that's not bad.
-Kevin: So a long beam, right?
-Tom: Yeah.
Kevin: And I noticed the metal plate back there.
Is that where it starts?
Tom: That steel plate right there, so we can bolt the end of this steel beam that's gonna run in here into that steel beam.
That steel beam is supported by the column on that side and the one on the outside wall.
And so that's gonna carry half of this load right there on that beam.
And the other half is gonna end up down here.
About two feet in from this corner, it's gonna be a steel column to the wooden, center-bearing beam of the house, and another steel column and a footing in the basement.
So it's gonna carry a lot.
Kevin: How long are we talking in total, generally?
Tom: 24 feet and a little over 4 inches.
Kevin: Okay.
So long beam.
How are we getting that into the house?
Tom: Well, we're gonna bring the beam in through the window, and we're gonna bring it in in a couple of dolly jacks that will allow us to move it and pick it up and push it right into place.
-Kevin: Okay.
Tom: It's a big beam, and it's heavy.
It's probably close to 2,500 pounds.
Kevin: So 20-some odd feet long.
And how high are we talking?
Tom: The beam is gonna be 16 inches, so it's gonna hang down here somewhere.
-Kevin: Right there.
-Tom: Alright?
And it's 11 inches wide.
So we have to make an allowance to get the beam in, because it's padded with wood.
Now, remember, this is an I-beam.
It's got a wide flange at the top, a centerpiece, and another flange on the bottom.
We need to pad it with wood to make the marriage between the framing and the steel wood-to-wood connection.
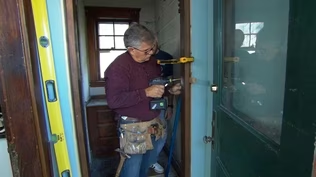
And we're gonna make that connection with the hanger like this.
This is an old work hanger, so it fits the old joist better.
And we're gonna nail it in, and we nail it -- we'll nail it at a very slight angle that will draw these up nice and tight.
Then we'll fill these holes, and we won't have any squeaking later on.
Kevin: Okay.
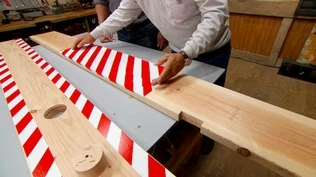
Looks like a bunch of notches were made.
I got my belt.
I can help you make the last, what, four or five?
Tom: Yeah, we got four or five more to go.
I just squared these down.
What we want to do is square them down from the floor above.
So I just hold my square up against the floor, line it up with my chalk line, bring it down, mark it on each side.
And then we'll do a saw and make a cut.
-Kevin: Just coming out.
-Tom: Yep.
If you get that out, it will be good.
It will make it easier for us to get the saw in.
[ Mid-tempo music plays ] ♪♪ ♪♪ ♪♪ Kevin: Oh, Tommy, you're a beast.
Tom: [ Laughs ] Alright.
Now we can get the beam in.
Kevin: I'll get this cleaned up.
♪♪ ♪♪ Tom: Alright.
We just took the beam off the truck to get it down on the ground.
We got to flip it over.
It's upside down.
Reposition it and then slide it in.
♪♪ Alright.
The beam's coming in.
They've got it cabled right here in the center, so it's doing a balancing act.
They're gonna get it in as far as they can, and then we're gonna reposition the cable.
Alright.
They're positioning one of the jacks.
They want to carry the load of the end of the beam right here.
You can see the strap that's on the end of the beam that's connected to the Lull.
And basically, he's holding the end weight.
They're resting the beam right here to take the weight off of the cable along with the jack down the other end.
We're gonna roll it on the jack.
♪♪ Hey.
Now you're coming for it.
Now you're coming, now you're coming.
Alright.
You can see they got it in as far as they can go right now, the cable, right?
Now they got to reposition this cable.
They're gonna slide it down to bring it in a little more.
♪♪ Whoop.
Watch that side.
This wooden beam -- this is the main beam of the house, the center beam.
Wooden beams -- old wooden beams get big cracks in them.
That's called checks.
Now, as long as they're running with the beam, like they are, believe it or not, it doesn't weaken the beam.
So, you have a wooden beam, top and bottom.
It's parallel, 'cause that's how it comes out of the sawmill.
If you have a check, or a crack, that runs down the side of the beam, guess what happens?
If there's no pressure under part of the post, or the beam, it will roll down slightly.
That takes my parallel of the beam out and gives it a curve.
So what we just did... -Man: Yeah, it's going.
Tom: ...is jack this edge of the beam back up, closing the check, or the crack, making it parallel again so the lally column would go in.
[ Drill whirring ] Oh, let it down.
Man: That should be it.
Tom: Okay.
Now we're ready to put the I-beam back into place.
We're gonna put it in against here, get it jacked where it goes, and put the second lally column in over here.
All that load's getting pushed down to the footing that's in the basement.
[ Drill whirring ] Man: Slow up.
Tom: We're putting some temporary bracing underneath the beam.
That way, we can reposition the jacks as needed and make sure everything's safe.
Alright.
We're almost there.
We've got the beam up under the floor joists.
Now we have to slide it over so it goes in the pocket.
So a little bit of finagling, a lot of safety watching here.
We don't want anything to break and snap and come down.
Charlie: Actually, you know what?
Have him go up a little bit.
Keep going.
There you go.
Go, go, go, go, go, go.
Tom: You got pressure off of it now.
Charlie: Good.
Alright, we're past it.
Tom: You're alright.
[ Drill whirring ] Charlie: A little bit of weight there.
Man: Yeah.
Now screw it in.
[ Drill whirring ] There you go.
♪♪ Man: You're doing it, Samuel.
You're doing it.
Tom: Alright.
Our beam is in the slot that we made all the way across.
Now, one of the problems that we have to think about here is because the beams got to go up that much more on the other end and still be about a quarter of an inch below the subfloor.
But when we hit here, because the house had a little dip in it, this dip is gonna be pushed.
This beam is gonna push against the underside of the subfloor tightly, which means when it comes time to put all of the timber hangers on the joist, we're gonna have to jack the joists individually, making the space above the beam equal along the run.
Alright.
He's putting the last nut on the eight bolts.
Once he gets it caught, he's gonna use the impact wrench, tighten them all up at the same time, and they slide the beam in place.
We'll see.
[ Drill whirring ] Charlie: This is a spud wrench -- probably the one tool I don't have, until today.
Line the holes with this end of the spud wrench, then flip it around to tighten up the bolts.
[ Drill whirring ] Kevin: Nice, big beam.
Look at that, huh?
Tom: Oh, yeah.
What a difference.
Kevin: So what's next?
Tom: Well, we have about six joists that are really badly damaged.
We have to repair those and then install the hangers.
Charlie: And then we can take the temp walls down and even the old exterior wall.
Kevin: Talk about opened up.
That will do it, right?
-Tom: Yeah, absolutely.
-Kevin: Alright.
So until next time, I'm Kevin O'Connor.
Charlie: And I'm Charlie Silva.
Tom: And I'm Tom Silva.
Kevin: For "This Old House" here in Needham.
Really nice.
-Tom: Makes a big difference.
-Kevin: Oh my God.
Kevin: Next time on "This Old House"... Richard: Even with our new addition, we're reusing the existing HVAC system, but we're adding some strategic ductwork.
Kevin: Then, we're gonna show you which insulation we're using on our roof system and why.
Oh, boy.
I see an uninsulated roof.
Charlie: Yeah.
HVAC system lives up there.
2x6, rough framing, no insulation.
Tom: And we're getting back to the basics, installing a new double-hung window into an existing opening.
Kevin: That's next time.


- Home and How To

Hit the road in a classic car for a tour through Great Britain with two antiques experts.


Support for PBS provided by:
Funding for THIS OLD HOUSE is provided by The Home Depot and Renewal By Andersen.