E17 | Fireplace Painting, Bathtub Tray | Ask This Old House
Season 21 Episode 17 | 23m 42sVideo has Closed Captions
Mauro paints a brick fireplace; Tom and Kevin build a bathtub tray.
Mauro Henrique helps a homeowner upgrade a fireplace by painting the brick surround and hearth with a high heat-resistant paint; Jenn Nawada introduces landscape contractor Lee Gilliam, and together they discuss different landscape tools and how to maintain them for Spring; Tom Silva and Kevin O'Connor build a bathtub tray out of zebrawood.
Problems playing video? | Closed Captioning Feedback
Problems playing video? | Closed Captioning Feedback
Funding for Ask This Old House is provided by The Home Depot, Renewal By Andersen, and ChipDrop.
Support provided by:


E17 | Fireplace Painting, Bathtub Tray | Ask This Old House
Season 21 Episode 17 | 23m 42sVideo has Closed Captions
Mauro Henrique helps a homeowner upgrade a fireplace by painting the brick surround and hearth with a high heat-resistant paint; Jenn Nawada introduces landscape contractor Lee Gilliam, and together they discuss different landscape tools and how to maintain them for Spring; Tom Silva and Kevin O'Connor build a bathtub tray out of zebrawood.
Problems playing video? | Closed Captioning Feedback
How to Watch Ask This Old House
Ask This Old House is available to stream on pbs.org and the free PBS App, available on iPhone, Apple TV, Android TV, Android smartphones, Amazon Fire TV, Amazon Fire Tablet, Roku, Samsung Smart TV, and Vizio.
Keep Exploring

This Old House Insider Newsletter
Get This Old House exclusive stories, tips, and behind-the-scenes information delivered right to your inbox every month.♪♪ Kevin: On "Ask This Old House," our experts travel across the country to answer questions about your house.
♪♪ Today, Mauro will show you the right way to paint a fireplace.
Then Jenn has enlisted the help of landscaper Lee Gilliam to show you how to give your lawn tools a tune-up.
And on "Build It," we'll help you up your relaxation game by demonstrating how to build a bathtub tray.
That's all coming up next on "Ask This Old House."
Mauro: Hi, everyone.
Welcome to a new episode for "Ask This Old House."
I'm heading over to a homeowner's house who wants to paint her fireplace.
Have you any idea how many times I answer this question -- "Can you paint bricks?"
The answer is, yes, as long as you understand the process.
Because once the paint goes on the brick, it's done, it's forever, it's not reversible.
Some people may say, "Don't paint brick.
You're gonna add color to it.
You're gonna get rid of that nice texture and that natural color from the brick."
And some people may say it's a trend.
It comes and goes.
But, to me, the important thing is as long as the homeowners understand the system and it's that what she really wants, I go for it.
After all, this is what I do every day -- painting.
♪♪ Brenna: Hi, Mauro.
Mauro: Brenna.
Nice to meet you.
Brenna: Welcome.
Thanks for coming over.
Mauro: No problem.
Look at this house.
Nice.
Brenna: Thank you.
Mauro: Got the e-mail.
You sent it to me.
You mentioned about your fireplace.
Brenna: Yeah, so, my husband and I recently moved in to this home.
We love all the character that it has, but we're looking for ways to modernize it a little bit.
So, thought we would start with the fireplace, replacing these doors.
And I know it's controversial, but we also want to paint the brick.
Mauro: Alright.
We can do that for you.
It's a neat project to be done, and it's not expensive, also.
But once the paint on the brick is done, you can never go back to your original looks.
Brenna: We know, and we're sure.
Mauro: Alright.
Cool.
Let's start by taking this door out.
We have two screws at the bottom, one on each side, and two at the top.
So I'm gonna start to unscrew this one here.
Now we're gonna bring this out.
There we go.
Alright.
Let's move it to the side there.
First, what we're gonna do is clean this area really well.
[ Vacuum running ] Now that the vacuum is done, it's good to have a wet rag and wipe the surface a little bit better.
Well, now the brick looks nice and clean, it's time to use masking tape to tape around the bricks and the hearth.
Make sure we follow up this brick line, okay?
Alright.
Yeah.
Make sure you press down the edges really firm.
Brenna: Make it look easy.
[ Both chuckle ] Brenna: Let's protect the floor now.
You don't need to be close because we're gonna put another tape on top of that.
Alright.
Let's do this.
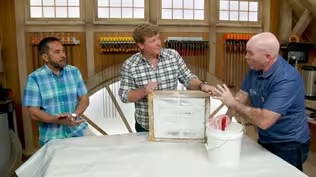
♪♪ Brenna: So, what kind of paint are we using today?
Mauro: We're gonna use a flat black, high heat-resistant paint.
This paint is specific with this kind of area exposed to the heat.
It can go from 1,200- to 1,400-degree heat resistance.
♪♪ And don't put a lot of pressure.
This paint is thin enough.
It might drip and run a little bit.
♪♪ And I'm going vertical because we want to make sure that we have a good coverage.
And I also want to make sure that we cover the mortar, as well.
Brenna: Hmm.
♪♪ And, so, I know we're painting the outside of the brick.
What about the inside?
Mauro: I know a lot of people paint the firebox.
I don't like to paint that because most of the time when you're gonna use the fireplace -- burning wood -- is fall and cold season, winter.
Brenna: Oh, so when all of our windows and doors will be closed.
Mauro: All windows and doors are closed.
And so once you start to burn the wood, some VOC might be lingering in here, and I don't want you guys to be exposed to that.
Brenna: Yeah, we definitely don't want that.
♪♪ So, why are we using brushes instead of rollers for the tile?
Mauro: Well, you notice that this paint is really thin.
Brenna: Yes.
Mauro: So by working with the brushes a couple times, we're gonna have a better coverage... and the paint is not gonna drip so much and run if we use a roller.
♪♪ ♪♪ ♪♪ ♪♪ Wow.
Look at this fireplace.
Brenna: It's amazing.
And we're all ready to go for a fire.
Mauro: Well, it will be ready for you tomorrow.
You know, one thing I liked -- we didn't paint the damper knob.
And it even has a little line of black right in the middle.
Kind of picked up the black from the surround.
Looks great.
The metal patina.
I love it.
Send me a picture once you fire it up.
I would love to see it.
In the meantime, enjoy this fireplace.
Brenna: Absolutely.
Mauro: Thanks for having me here.
Brenna: Thank you so much for your help.
Mauro: Thank you.
♪♪ Kevin: Hey, Jenn.
Jenn: Hey, Kevin.
I want you to meet my friend Lee Gilliam.
Kevin: Nice to meet you.
Lee: Nice to meet you.
Jenn: He's a fellow landscaper.
He's got a crew of guys, got a lot of tools.
And I've been getting so many e-mails about tool maintenance and what to do to prepare for the spring, so he came in and we're gonna talk about them all.
Kevin: Let's do it.
What are your weapons of choice you brought for us here?
Lee: Well, we have some hand pruners.
These are great for small shrubbery.
Jenn: Mm-hmm.
Kevin: So how small, roughly?
What point are we using these?
Lee: Like half-inch, if that.
Jenn: Yeah, as long as your hand can close it safely without getting hurt.
Kevin: Okay.
Jenn: But if you need more power... Lee: Yep, then we go up to the loppers, which has more torque... Kevin: Yeah.
Lee: ...and opens up to maybe an inch, if not more.
Kevin: Okay.
Lee: Then we can go to these shears.
And these work great for cleaning out perennial beds, you know, small stuff that's laying around, and as well as boxwoods and things like that.
Kevin: Little bit of shaping and cleaning up.
Jenn: Yeah, you could use those at your house.
Kevin: Not me.
My wife.
She's the boxwood queen, man.
She goes after those things.
Jenn: Keep it clean.
Kevin: Oh, it's good.
She loves it.
Therapeutic -- for me.
Lee: And if we need anything bigger, we can go with the open-end hand saw.
Kevin: This one happens to be the collapsible one.
Lee: Yep.
This one here if you need a little bit bigger.
Kevin: Comes with its own sheath.
That's awesome.
Jenn: Now, that is satisfying when you cut a branch.
Kevin: That's gonna get you cleaned up.
That's gonna get all of your perennials, your beds cleaned up and such.
Jenn: Well, there's a few more.
These are all very important, if you want to -- We're talking about the landscape beds and everything.
Right?
So, to begin, the edger.
Lee: Yes, want to start off with a nice edge on a bed, between the grass and the mulch, this does the trick right here.
Makes a nice clean edging.
Jenn: Yeah.
Like 3 to 4 inches deep.
You have a nice clean edge.
The mulch meets it.
And it prevents the grass from growing into the bed.
Kevin: My favorite part.
I love the crisp edges.
I really do love the crisp edges.
Jenn: So, after you crisp those edges, we have the cultivator.
Lee: Cultivator.
It's gonna fluff the beds up.
Make it look nice.
Get some oxygen in there.
And, also, we might not have to use so much mulch.
Kevin: The beds get fluffed, huh?
Lee: Exactly.
Jenn: Well, some people think you have to put 3 inches on every season.
And that's not true.
Like, fluff up what's there.
Like Lee said, give some oxygen to it, and then put less mulch.
Kevin: Gotcha.
Alright.
Jenn: Yeah.
Lee: Then we'll finish that off after that.
Thanks, Jenn.
Finish it off with a regular leaf rake and rake them all out.
Kevin: Last little twigs and leaves.
Jenn: Yeah, it keeps all the debris and stuff out.
Kevin: Beautiful.
Jenn: And then... Lee: We have spade shovel here.
This is if you want to do some planting.
Kevin: Springtime.
Best time for planting, right?
Lee: Exactly.
Kevin: Get them in.
So, if we see the point and we see the little spots for your boots, you know your digging width.
Lee: Correct.
This is called a spade shovel.
This works very well.
Jenn: And when all that labor's over, it's time to mulch.
Lee: Yes.
Jenn: So, these two items are very handy.
Lee: Yep.
This is the mulch pitchfork we use.
Moves a lot of material.
Easier on the back.
And easy, you know, to get the mulch out of there.
Kevin: Love it.
Jenn: You can get a big load on that.
Kevin: Love mulch weekends.
Jenn: And then when you get to the end of the pile -- You do love the smell of mulch, don't you?
Kevin: I do.
I love it.
The lawn and the beds, Lee.
Man, you're talking my language here.
Lee: Then we have the oversize dustpan.
Clean up the remaining of the mulch that you have left.
Kevin: Gotcha.
Cool.
Alright.
So, the tools we need for plant cleanup and then the tools we need for bed cleanup.
Two things we do every spring.
Lee: Correct.
Jenn: Well, so, back to the e-mails I've been getting.
People also want to know, what are the three really important, like, big machinery tools?
And I would say lawn mowers, string trimmers, and blowers.
Lee: Yes.
Jenn: So, Lee, I want you to show us how to do maintenance on some of the bigger tools people have been asking about.
Lee: Sounds good.
Jenn: Okay.
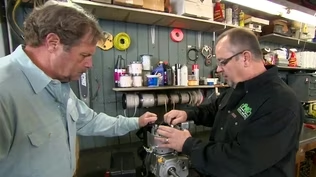
♪♪ Lee: Let's start with the lawn mower.
Sharpening the blades.
Jenn: One of the most important things, right?
Lee: Correct.
Jenn: Alright.
So, I want to point out, this is an electric mower.
So, if you had a gas mower, you wouldn't want to tip it down like this.
Lee: Correct.
Kevin: Gotcha.
Lee: And what I like to do is use a rag just for safety.
The blade could be still sharp.
This is using a 5/8 wrench.
We're just gonna loosen that up.
Take the bolt off.
Kevin: Pretty much gonna be the same, whether we've got a gas mower or electric mower.
Once we get under here, it's all gonna look familiar?
Lee: All the same.
Correct.
Kevin: Gotcha.
Lee: Flat washer and a bolt.
Jenn: Okay.
And that's it.
Lee: That's it.
Kevin: Get this out of your way.
Lee: Okay.
And then come in with a file and then just file it down.
Burring it off.
Just to get a nice cut on it and get a nice shine.
Jenn: Kind of like a kitchen knife?
Go the same direction?
Lee: Correct.
Again on both sides.
Just a few passes.
That should do the trick.
Jenn: It seems pretty simple.
Lee: Put it on the way we took it off.
Thank you.
Jenn: Mm-hmm.
Lee: Just snug that up.
Ready to go.
Jenn: Alright.
Okay, so, here we have the string trimmer.
Tell us how we maintain this.
Lee: Okay.
This one here, I just like to make sure we have enough line in it for the season.
And this is good for, you know, weed whacking the edges of the lawn, any of the walkways, things like that.
So how do you know when it's time to change the string?
Lee: When you hit it, no more line will come through.
Jenn: Okay.
How do you take off the bottom?
Lee: Okay.
On this particular one, we just pinch the inside.
Jenn: And, so, you should have three inches on either side.
So, there's two places to pinch on either side.
Lee: Correct.
Jenn: Okay.
Then it pops off.
Lee: Yes.
And this one here has plenty of line inside.
Jenn: Right.
So we'll leave that as-is.
But if it were down to, like, almost slipping off the spool, it would be time to get a new pack, put it in, and then you re-thread it.
Lee: Yes.
Correct.
Okay.
Jenn: Easy enough.
Lee: Mm-hmm.
So, now what we're gonna talk about are the blowers.
And with these, they have a decibel.
This one here has 70.
Kevin: Mm-hmm.
Jenn: This one has 59.
Kevin: So, why do I care about the decibel rating?
Jenn: It's a noise pollution.
So you really need to check with your local town, correct?
Each town is different, and it's a requirement.
And they tell you do not exceed, go above this decibel.
Kevin: So what worked last season might not work in a particular community if they've changed it on you.
Jenn: Correct.
Kevin: Cool.
Okay.
Jenn: And just to point out, the higher decibel is usually the gas blower.
Lee: Yes.
Jenn: Right?
Jenn: And the battery pack is lower.
Kevin: Hence that's 70, and this is 59.
Alright, well, it gets me fired up for spring.
I appreciate it.
Lee, nice to meet you.
Thanks for the info.
Lee: Thanks, Kevin.
Kevin: I'll give you my address.
Bring everything.
Lee: We'll be out there.
Jenn: Well bring the backpacks, alright?
Kevin: Bring the ones you push.
Bring those.
♪♪ Hey, Tommy.
Tom: Hey, Kevin.
How are ya?
Kevin: Alright.
Wow.
Look at this collection of stuff here.
Huh?
What's this?
Some sort of a washboard?
Tom: No, it's not a washboard.
I got these from my daughter-in-law, Diana, and my daughter Kate.
And they both have tub trays.
Kevin: Tub trays?
Tom: Tub trays.
So when they're sitting in the tub, they have a place to put their wine glass.
Kevin: What?!
That's a thing?
Tom: And a sponge or whatever.
A hand towel.
Kevin: [Laughing] Really?
Tom: I guess it's big.
Kevin: Okay.
Tom: Yeah, so, they both said that they like them to be a little bit deeper.
Kevin: Oh, yeah.
Tom: This way.
Kevin: There's nothing worse than a small tub tray.
Tom: Absolutely.
I mean, I guess they gotta put more wine on it.
Kevin: What the heck is this?
Tom: Alright.
So, I was thinking about the wine thing.
So, let's take the one here, Diana's.
If I put the wine on it, alright, that could spill.
Right?
Kevin: Mm!
Tom: Good slide.
And so I get a little jig to cut a hole.
Kevin: Ohh.
Tom: A place for the wine glass.
Then you could use a stem glass.
Put it in there.
And it won't fall.
Kevin: Heaven forbid.
Spill some wine in your tub.
Tom: Or you could just use a regular mug like that.
Kevin: I gotcha.
Tom: Put it on like that.
Kevin: So, you said this was daughter-in-law Diana's.
And this is Kate's right here?
Tom: That's Kate's.
Yeah.
Kevin: This one's seen some mileage.
Tom: [ Laughs ] I noticed that.
Kevin: What is going on?
Tom: Finish is gone on that one.
Kevin: Okay.
Tom: Alright.
Kevin: And this is the species you're thinking right here?
Tom: Yeah.
This is actually zebrawood.
It comes from Africa.
It's one of the largest trees in Africa, and it holds up fantastic to water.
So I figure -- what else but a tub tray?
Kevin: No zebras are gonna be hurt in this project.
Tom: No.
None.
None at all.
Kevin: Alright.
Well, how do you want to get started on the wine holder?
Let's just call it what it is.
Tom: Right.
Exactly.
Well, I want to cut some pieces so we can glue up a section, and then we can start making the slats.
[ Saw buzzing ] Alright.
I'm gonna cut two pieces, 15 inches.
Now let's take 'em to the table saw to true up the edges.
Zebrawood is extremely dense, so I want to make sure that the blade is sharp, not too high, and I push the board slowly through the saw so I don't get kickback.
While we're at the table saw, we might as well cut the half-inch slats.
Alright, now we're ready to glue up the boards for each end to make up the little table.
Alright.
Alright.
We'll let that set up for a while.
Kevin: Alright, what are you thinking here, Pops?
Tom: Alright.
Our slats are gonna go into a dado along here.
Kevin: Yeah.
Tom: I don't need a lot.
Just need a little shelf for that to go in.
That's gonna fit in there, and that will hold each piece.
Kevin: Gotcha.
Okay.
Tom: Alright?
I'm gonna do it in two passes.
To do that, I'm gonna use my trim router with a guide that I glued to the base.
Kevin: Hmm.
Tom: And the block is the same thickness as our side piece.
So when we're using the router, it rests on the base, it uses it as a straight edge, but it also holds the router from tipping back and forth.
Kevin: Clever.
I'm gonna cut some mortises in the pieces and then use some floating tenons to hold it all together.
So, now we get some glue, put it all together, and then see if we can get the other one together.
Gonna get some glue on there.
So, now we put our spacers in.
Just a fast-setting wood glue.
Now we get the tricky part.
Kevin: [ Laughs ] Save the best for last.
Tom: Gonna give it a little tap.
Alright, now we got to try to get the little pieces in there.
Then we'll put the clamp on it.
Now we're gonna cut our keyhole.
I don't have any double-sided tape, so I'm gonna use some painter's tape with some fast-setting glue.
Now I'm gonna do the activator.
Kevin: Hang on.
I'm on the line.
Tom: Okay.
There you go.
Right there.
So now we're ready to use the router.
And what I'm gonna do is, I've got a templating bit that will follow the edge of our template, and I'll make multiple passes with a half-inch straight-cutting bit.
Alright.
That looks pretty good.
Why don't you pass me that wineglass?
I want to see how it looks here.
Kevin: You're not going to trim it up?
Tom: I don't think I need to.
Kevin: Alright.
Look at that.
Tom: Fits in there good.
Kevin: Smooth cut.
Tom: Alright.
So that's good.
Will remove this, and we'll put the feet on the bottom, and then we're in business.
So, the nice thing about this, we're gonna screw it on there because these will hold the tray in the center of the tub.
So if they want to move them, they can loosen the screws and move them over -- whatever they want.
Kevin: Another 2 and 1/2 inches here.
Tom: Looks good.
Kevin: Right there.
Both: Center it.
Tom: Front and back.
Got that?
Kevin: Yep.
Okay.
Tom: Alright.
Good.
Kevin: You thinking maybe some oil?
Or you gonna leave it natural?
Tom: Well, I mean, it says it can be exposed to the water, but I think we should put a little beeswax finish on it.
Kevin: Oh, look at that.
Tom: Yeah.
Kevin: Pull that grain out.
Pulls out the zebra stripes.
Tom: Yeah, now the zebra -- you can see 'em.
Kevin: [ Laughs ] Tom: Once you put it on, you just rub it in, and then you, like, buff it.
Kevin: Wow.
That just makes it pop, doesn't it?
Tom: It does.
I love it.
Kevin: Alright.
So let's see.
What do we got here, Tommy?
Want to give it a try?
Tom: Oh, my gosh.
Kevin: Look at that, huh?!
Tom: Yeah.
I think it looks good.
Kevin: I got a bottle of red.
How about a test drive?
Tom: Well, I'll have a glass of wine with you, but I'm sure not getting in the tub with you.
Kevin: [Laughing] I wasn't asking you to!
Tom: Alright.
Nice.
Kevin: Look at that, huh?
Tom: I think they're gonna like it now.
Who's gonna get it?
The battle begins.
Kevin: Oh, boy.
Alright.
Well, happy bathing to whoever gets it.
That's a great project, Tommy.
Nice job.
Tom: Yeah, it came out good.
I like it.
Kevin: Alright, well, we got more coming up next time.
So until then, I'm Kevin O'Connor... Tom: And I'm Tom Silva.
Kevin: ...for "Ask This Old House."
Tom: Cheers.
♪♪ Kevin: Next time on "Ask This Old House"... Richard heads to the City of Brotherly Love to help a Philadelphia homeowner install a brand-new oven.
And can you imagine charging your electric vehicle without a plug?
Ross will reveal a new wireless innovation that could be coming soon to a garage near you.
Then, what's the buzz around pollinator gardens?
Jenn will explain why she loves them and how to plant one of your own.
All that on "Ask This Old House."


- Home and How To

Hit the road in a classic car for a tour through Great Britain with two antiques experts.


Support for PBS provided by:
Funding for Ask This Old House is provided by The Home Depot, Renewal By Andersen, and ChipDrop.