E17 | Shade Sail, Concrete Walkway | Ask This Old House
Season 22 Episode 17 | 23m 42sVideo has Closed Captions
Nathan installs a shade sail; Mark repairs a walkway; Celebrating Atlanta landscapers.
Nathan Gilbert helps a homeowner add shade to a pool area using a shade sail and unique anchor points; Ask This Old House spotlights the brothers of Jordan's Legacy Landscaping, a fourth-generation landscaping company in the Atlanta area; Mark McCullough helps a landlord make a cost-effective repair to her tenant's concrete walkway.
Problems playing video? | Closed Captioning Feedback
Problems playing video? | Closed Captioning Feedback
Funding for Ask This Old House is provided by The Home Depot, Renewal By Andersen, and ChipDrop.
Support provided by:


E17 | Shade Sail, Concrete Walkway | Ask This Old House
Season 22 Episode 17 | 23m 42sVideo has Closed Captions
Nathan Gilbert helps a homeowner add shade to a pool area using a shade sail and unique anchor points; Ask This Old House spotlights the brothers of Jordan's Legacy Landscaping, a fourth-generation landscaping company in the Atlanta area; Mark McCullough helps a landlord make a cost-effective repair to her tenant's concrete walkway.
Problems playing video? | Closed Captioning Feedback
How to Watch Ask This Old House
Ask This Old House is available to stream on pbs.org and the free PBS App, available on iPhone, Apple TV, Android TV, Android smartphones, Amazon Fire TV, Amazon Fire Tablet, Roku, Samsung Smart TV, and Vizio.
Keep Exploring


This Old House Insider Newsletter
Get This Old House exclusive stories, tips, and behind-the-scenes information delivered right to your inbox every month.Providing Support for PBS.org
Learn Moreabout PBS online sponsorship♪♪ -On "Ask This Old House," our experts travel across the country to answer questions about your house.
♪♪ Today, Nathan finds a solution for a sunny pool area that could use a little shade.
Plus, we highlight two brothers who are carrying on the legacy of their great-grandfather's fourth-generation landscaping business.
-Yeah, the loropetalums are very popular.
-Yep.
-And Mark helps a landlord make some safety improvements to her tenants' cracked concrete walkway.
Coming up next on "Ask This Old House."
♪♪ -Hey, Nathan.
-Hi, Sammi.
Nice to meet you.
-Nice to meet you.
-It's a beautiful spot you guys have here.
-Thank you so much.
I can't take any credit.
This was my in-laws' home before my own.
-Oh, really?
-Yes.
And luckily, now my children are growing up in the same home that my husband did.
-That is awesome.
And out back, you guys have a big pool?
-We do.
Want to come see it?
-Yeah.
-Okay.
Alright, so, this is our pool area.
-This is an awesome space.
-Yeah, it's really nice.
I love taking my kids out here swimming, enjoying it in the summertime.
-Oh, yeah.
-When the sun comes up and it gets really hot, we have no shade.
-And that sun is coming up right now.
And I'm guessing you get full sun all day long here.
-Full sun.
So even during, like, snacktime or lunchtime, it's really hard to find a shady spot.
Okay.
I feel like we're gravitating over to this corner here.
Is this where you think a nice shady spot would be?
-This would be perfect.
-Alright, well, I definitely have something in mind.
I'll grab some tools and materials, and we'll get started.
-Alright.
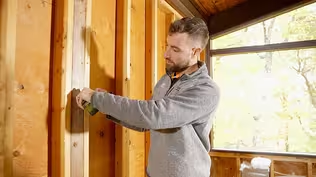
-Alright, so, what I think we should do is hang up one of these large shade sails.
They're lightweight, easy to install.
It's going to look great when we're done.
But we don't really have a lot of structure around that area.
We don't have any buildings that we can tie off of, so we need to create our own structure.
And the way that I want to do that is by using these planter barrels and some pressure-treated lumber.
I don't really want to put the posts fixed to your concrete apron.
I don't want to introduce holes, tack on down into that, and have water go in and split and crack over time.
I think this will be a great option because it'll be customizable.
If you guys need to move it, make it bigger, just take it down completely, you know, you're not fixing it to one spot forever.
To put this together, we're going to use the barrels we're going to put the 4x4 posts in, and then we're going to backfill with this rock here.
-I really, really like this rock.
-This is beautiful.
I think we should cap off with this.
This one's a little bit cheaper, so it'll be really great for weight, just to fill it up.
And then to attach the sail to the pressure-treated stock, picked up a bunch of stainless-steel hardware.
We have eyebolts, carabiners for the sides so we can take it off easy in the wintertime, and then also a 4x4 cap to dress up the top.
I think we get started by setting the posts in the barrel.
Excellent.
-Alright, what I'd like to do is cut a few pieces of this pressure-treated 2x12.
And what that is going to be is the base plate for our 4x4 to get attached to.
So, I'm going to cut a few pieces 11.25 so they'll easily fit in the bottom.
Alright, one more.
-Okay.
-So, we can put this aside.
You know, I find the center, and I do an offset.
Do this to all three.
-Mm.
-We'll make sure that we're nice and square on the bottom of the post.
So, you can pre-drill those.
[ Drill whirring ] Alright, now we're ready to drill our holes for our stainless-steel eyebolts that we're going to put through the top.
So what I'd like to do is come down 6 inches.
Now we want to try and get these as square as possible.
You sight one direction.
I'll sight the other.
-Oop.
-Perfect.
Now we can drop these in.
-Alright.
-So, now we're going to do washer and a nut.
-Okay.
-So, what I do is I'm going to start a couple of these screws.
We have that nice layout from earlier.
-Yep.
-So, what we're going to do is you're going to sight that.
-It looks good.
-Okay.
Gonna jump around a little bit.
-Like it?
-Looks good.
-Alright, let's start the second one.
-There we go.
-Alright, that's all set.
-Okay?
♪♪ Alright, so, this one is 14x14x14.
So it's got a pretty good amount of coverage.
So, what we're going to do is center this all the way around.
So, what I did is cut this stabilizer.
So, if you want to put that level on it.
-Okay.
And that's perfect.
-What's nice about this is it's a planter, so it already has holes drilled in it for drainage.
♪♪ -Hanging the sail.
♪♪ -Alright, nice.
-[ Gasping ] Oh!
This looks awesome!
-Perfect.
Plenty of shade right over that seat there in the pool.
-Yeah, I can sit, put my toes in.
-Watch the kids.
-Relax.
-Hang out.
-Yep.
-Beautiful spot.
Well, there's really not any homework to this, but some recommendations.
You know, if you see a severe storm coming in, or it's wintertime, you want to take it down.
You'll definitely prolong the life of it.
Other than that, you're all set.
-Alright.
Thank you so much.
-You're welcome.
♪♪ -As we travel across the country to tackle home-improvement projects, we often get the chance to work alongside talented tradespeople.
Well, not that long ago, we partnered with a landscaping company out of Georgia, run by Donald Jordan and David Jones, and we quickly learned that their passion for landscaping goes beyond the profession.
For them, it is very much a family affair.
-I'm Donald Jordan.
-And I'm David Jones.
-And we're fourth-generation landscapers.
-What I love most about my job -- I love that we're a family-owned business, and I get to work with my brother, and I get to do what I love to do most, which is landscaping.
-It's good to tip from them right now anyway.
[ Clippers clicking ] -The most rewarding part is being able to enjoy it with my brother.
And you know, having that excitement is great because not a lot of people get to work with their siblings the way that we do, and it just works out perfect for us.
-First, I wanted to play professional football, and then I just followed my grandfather around.
And you know, watching him do landscaping every day, it kind of inspired me to want to do the same thing.
So, this is an actual picture of my great-grandfather, Cleveland Roosevelt Jordan.
And he became my biggest inspiration.
I actually have this photo hanging in my man cave.
You know, when I'm getting dressed in the morning, I take a look at it and it's kind of like, you know, "Go do what you got to do."
♪♪ -Oh, my brother -- yeah, he's a jack-of-all-trades when it comes to landscaping, man.
But I think he really has his hands on rolling pine straw.
Nobody does it like him.
It's just so easy to him.
-Thank you.
-So everybody calls him the pine straw man because he just does it perfectly.
-David is best at pruning.
Give it a little haircut.
-He's best at pruning, he's best at design, freestyling.
-Freestyling, for us, it would be coming to a project, and, you know, the customer may have a set of thoughts or ideas that they may want, and then we get to the job, and sometimes rolls like, "Oh, man, I think I'm gonna -- think we're gonna do it like this.
What you thinking?"
Then, he's like, "Well, sit this way.
You want to sit, and let's see how that looking."
Then, you know, the customer always accepts what we do.
They love it because it's like a different approach.
♪♪ These gardenias smell lovely.
-Yeah, the loropetalums are very popular.
-Yep.
-This is a go-to for natural color.
You get green, you get a little pink, get a little burgundy color, all in one.
It's one of my favorites, man.
I just like the colors that it pops off, the big blooms that it gives.
-Yeah, everybody wants a pop of color and low maintenance.
That's the dream.
-My great-grandfather really paid a lot of attention, a lot of detail when it came to, uh, sculpting and pruning and trimming topiaries.
You would always see him in the garden, trimming, making animals out of them -- roosters.
He'd always give you a friendly wave.
It was definitely photo props for Easter, with the tulips.
Many family members came by to take nice photos in their nice dresses and, you know, suits.
It's my favorite landscape.
And it's part of the reason why we kind of fell in love with wanting to carry the torch.
Happy that we're continuing a legacy that he started.
I mean, that's where the legacy piece comes from within the business.
So we're paying homage to him, and we hope that we're making him proud.
-Yep.
-Coming here, you kind of get a little reminiscent feeling... -Oh, yeah.
-...of what it was like.
-So pretty.
-The next phase for the legacy -- we want to continue to build, we want to continue to expand, and we just want to continue to push the envelope and go as far as we can, and we can leave a legacy for our family.
Just making sure that, you know, we continue to grow -- excel and grow as far as we can -- we can go.
Hey.
Yo.
Looking good?
-It's all done.
-Alright.
-If you've got a contractor in your area who you think is worth celebrating, we'd love to hear about them.
So write in and let us know.
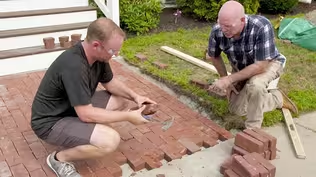
-So, I'm on my way to a hardscape project.
This one happens to be a repair.
And what happens up here in New England is, we have what we call the freeze -thaw cycle.
And when that occurs, a lot of rocks, stones, and boulders underneath our hardscape get pushed up and they get pushed up with such great force that they can actually crack the hardscape.
To prevent that, we always make sure that we do a good job with our prep work, which we can talk about later.
But if you do end up with a crack in the hardscape, we're going to be able to fix it.
♪♪ -Elsbeth?
-Hi, Mark.
Nice to meet you.
-My pleasure.
How are you doing?
-Good.
How are you?
-Alright.
Great.
-So, we bought this house a couple years ago.
It's an investment property.
-Okay.
-It's a two-family.
We currently occupy the top unit, and we're renting out the bottom one.
We hope one day to rent out both units and move into a forever home.
Until then, we have a very long to-do list for it.
-Right.
-We are finishing up getting the house painted.
We have a walkway up to our tenants' unit that has some pretty big cracks in it that we would like you to look at.
-Okay, why don't you show me the walkway?
-Right this way.
-Alright.
I know you're doing a lot of work.
I'm a landlord myself, so... -Oh, man, it doesn't end.
-Never ends.
-So, these are the two big cracks that we're concerned about.
We didn't really know where to start with the project, so... -Okay, a couple things that I noticed on my way over.
One of them, and most importantly, was these control joints that are cut into the walkway.
-Yep.
-Those are cut in right after the pour.
And the reason we do that is because up here in New England, we know this walkway is going to move with the seasons, especially the winter season.
-Yep.
-So we're actually just pre-cracking the walkway.
-Okay.
-What I noticed over here is you can see that the pre-cut they put in was not deep enough.
And that's why this pad snapped in this direction.
-Okay.
-And over here probably the same thing, except this one invited a lot more water in, which turned into ice, which activated the freeze-thaw.
And that's why you can see the damage over here is a little bit more than over here.
-Okay.
-But I do have a few tricks that we can utilize, and I think we're going to be able to match this walk perfectly.
-Perfect.
-Alright, let's get going.
-Great.
-Alright.
Alright, Elsbeth, the first thing we're going to do is make those cuts we were talking about.
Let's make sure we gear up with our safety stuff.
Of course, we have the dust mask.
We have eye protection.
We got to put our ears in.
[ Tool whirring ] This is going to be easy because I'm just going to take the tray on my saw and I'm going to ride it up against this kickboard that's going to give us the straight line.
-Okay.
-Just do me a favor and follow behind with this vacuum cleaner and collect the dust.
Why don't you cut this joint?
I've already marked it out.
So all you have to do is get that saw going and run it right through.
-Okay.
-And I'll get the dust.
-Oh.
-Excellent.
If we were doing this entire walkway, we'd probably go rent a jackhammer.
But because we have such a small section, we're actually going to have some more fun today with these sledgehammers.
-Alright.
-So, what you want to do is bend your knees.
-Alright.
-Hold that hammer as close as you can to the head.
And then, just like swinging an ax, over the top and down on the ground, and we'll pick this thing apart in no time.
-Sounds good.
-Ready to go?
-Yep.
-Right now.
♪♪ ♪♪ ♪♪ ♪♪ Elsbeth, look what I found.
See this rock right here?
-Yep.
This is the guy that did all the damage, right here.
-Okay.
-Any other big rocks we're going to want to take out, this is all pushing up on the bottom side of that walkway.
Alright, Elsbeth, what I always tell everybody, when we're doing masonry in the landscape, is the prep work is the most important.
A big factor in the prep work is going to be this gravel.
It's there for drainage, but it also absorbs the pressure of a rock being thrown up by the frost.
The gravel will absorb that pressure.
And then, when the frost goes away, the gravel fills back in and everything stays level.
-Mm-hmm.
-So, you can even spill it out in piles, because we're going to end up raking it through before we pave.
And I'll push it in here.
And tamp away.
And you're going to let the weight of the tamper do the work, just like that.
Excellent.
I'm going to add some water to the process.
-How come the water?
-The water just helps the stone slide into place when it's being beat down?
-Okay.
-Next move is the forms.
-Okay.
-And these are going to be very, very simple.
All we have is precut 2x4.
So I'm going to take mine, and I'm actually going to jam it into the edge of the concrete that we left, like that.
That's going to help it lock down.
I'm going to go to this edge over here.
So there's actually no need for a level, because I'm going from Point A to Point B.
-Okay.
Normally I would be very concerned about a pitch to drain the water.
But this 2x4 going to this edge into the back edge is going to give us that pitch automatically.
I'm level there.
I'm going to take a hammer.
Again, that's going to be the level of our concrete.
It's going to be level with existing.
Just in case we do get pressure, we'll put another stake right in.
And again, we're going to want to keep that the same height as the form.
-Yep.
-This is just number-9 wire.
And that's going to just keep the entire pad together.
-Okay.
-Now that that's down, we are ready to mix.
-Alright.
-These bags come pre-mixed, so they have the correct amount of Portland cement, they have the correct amount of lime, and they have the correct amount of aggregate.
So, Elsbeth, all we have to do is now add some water.
-Okay.
-Alright?
I always start out with 2 1/2 gallons, which is basically half a bucket.
-Okay.
-And then all I do is move the concrete around.
Like that.
-And how do we know how much water to add?
-I have to consider the consistency that I want.
If I want the concrete to be a little loose and fluid, I add more water.
But for what we're doing today, we're going to want it on the stiffer side.
-Okay.
Alright, Elsbeth, this one's ready to go.
-Alright.
♪♪ ♪♪ -Yep, go right up.
Okay.
So, now we're into the screeding part, and all we're going to do is take this 2x4.
We're going to go back and forth until we get to the old walk.
And if you see any low spots, let me know.
-Okay.
-Right on your edge, you're a little low.
So I'll take the excess in the front.
We'll go back do the same thing.
Excellent, excellent.
Now we're going to use our mag float.
It's short for magnesium float.
What it does is it takes out all the high spots, it fills in all the low spots, and it actually brings the cream up.
Alright, we're going to use the edger to peel the concrete off of the form.
Then, we're going to use the spacer to cut in our control joint.
And lastly, we're going to use a sponge to expose as much aggregate as possible.
And that's going to help us match the existing walkway.
Alright, Elsbeth, what do you think?
-Looks great.
-Okay.
Well, I'm going to leave you with a little bit of homework.
-Okay.
-See these forms?
-Yep.
-Wait 3 or 4 days.
Take those out.
Backfill.
We save some dirt.
-Mm-hmm.
-So make sure you use that for the backfill.
-Okay.
-And again, when we did that dab with the sponge... -Mm-hmm.
-...what that did was expose a little bit of the aggregate.
-Mm-hmm.
-We're going to need Mother Nature's help on that.
So a little bit of rain, a little bit of snow.
But after a year, this concrete should look exactly like that concrete.
-Great.
-Alright?
-Any salt this winter?
-So, I tell everybody, "Never, ever, ever use salt on any masonry products.
-Okay.
-What you want to use is brick sand.
That has zero salt in it.
You just throw it down.
It gives you the grip if you do have ice or anything like that.
But sweep it away in the spring, and you'll be good to go.
-Great.
-Alright?
-Alright.
-Thank you.
-Thank you so much for coming out, Mark.
-Alright.
Well, thanks for having me.
And if you have questions about your house, we'd love to hear from you.
So keep them coming.
Until next time, I'm Mark McCullough for "Ask This Old House."
Alright, left you with a little bit of homework.
-Not too bad.
-But not too bad.
-I can manage.
-Yeah.
-Next time on "Ask This Old House"... this homeowner can't get his grass to grow, but Lee has a solution.
Then, Ross walks us through the considerations you need to make before switching to heat pumps, and I team up with maker Sara Nadarajah of Rocky Canyon Rustic to build a replica high-end side table.
All that on "Ask This Old House."


- Home and How To

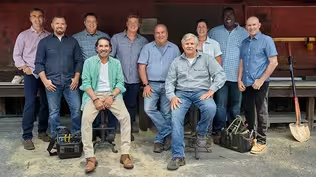
Hit the road in a classic car for a tour through Great Britain with two antiques experts.


Support for PBS provided by:
Funding for Ask This Old House is provided by The Home Depot, Renewal By Andersen, and ChipDrop.