
E4 | Sticking Front Door; Insulation | Ask This Old House
Season 25 Episode 4 | 23m 42sVideo has Closed Captions
Comparing home insulation options; fixing a sticking front door; evolution of thermostats.
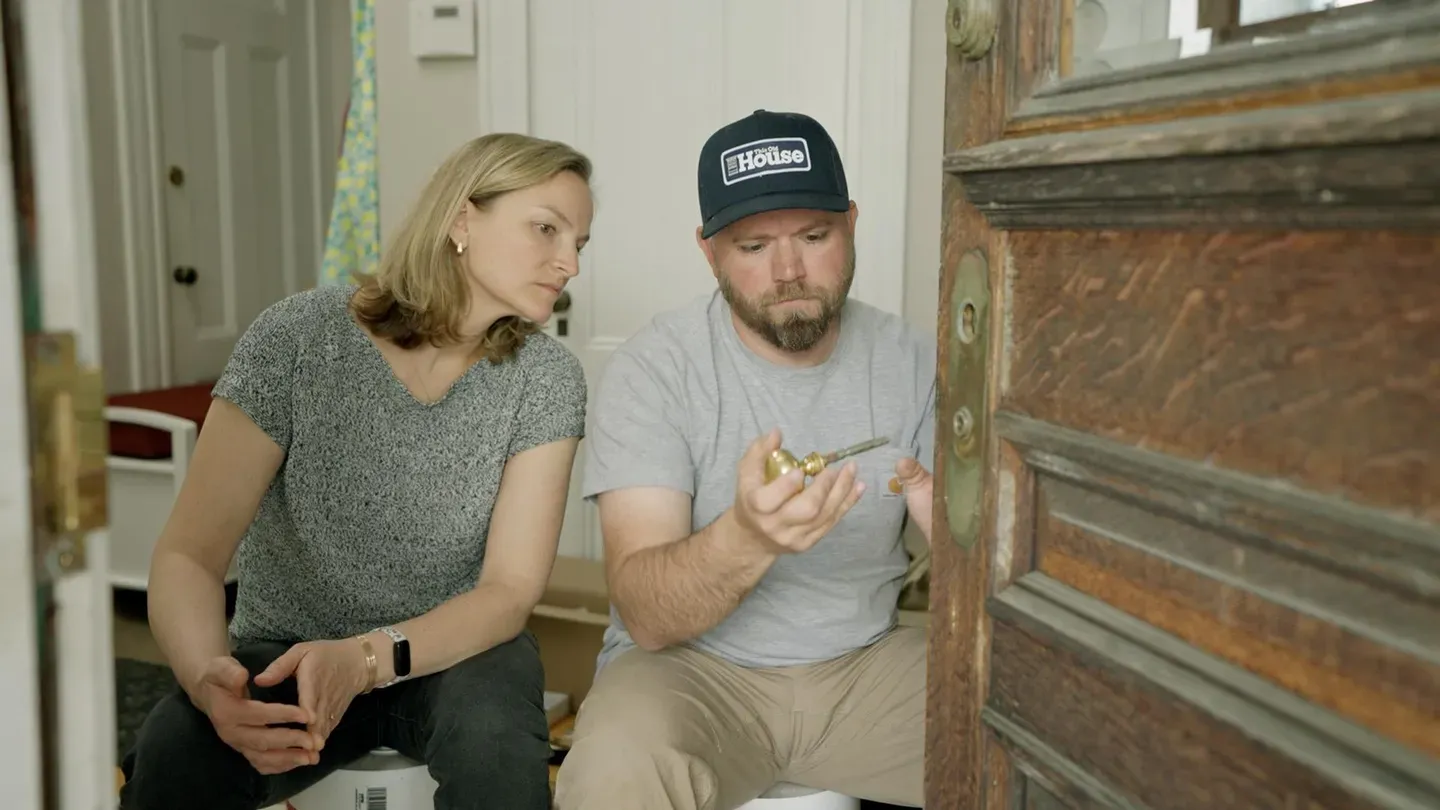
Richard Trethewey, Ross Trethewey, and Kevin O'Connor look back at clips to see how thermostats have evolved over the 25 years AskTOH has been on the air. Then, Ross compares common home insulation types, sharing which materials may work best for various situations. Nathan Gilbert helps a homeowner fix a sticking antique front door by replacing the worn hinges, lock hardware, and the door sweep.
Problems playing video? | Closed Captioning Feedback
Problems playing video? | Closed Captioning Feedback
Funding for Ask This Old House is provided by The Home Depot and Renewal By Andersen.
Support provided by:


E4 | Sticking Front Door; Insulation | Ask This Old House
Season 25 Episode 4 | 23m 42sVideo has Closed Captions
Richard Trethewey, Ross Trethewey, and Kevin O'Connor look back at clips to see how thermostats have evolved over the 25 years AskTOH has been on the air. Then, Ross compares common home insulation types, sharing which materials may work best for various situations. Nathan Gilbert helps a homeowner fix a sticking antique front door by replacing the worn hinges, lock hardware, and the door sweep.
Problems playing video? | Closed Captioning Feedback
Where to Watch Ask This Old House
Ask This Old House is available to stream on pbs.org and the PBS app.
Keep Exploring


This Old House Insider Newsletter
Get This Old House exclusive stories, tips, and behind-the-scenes information delivered right to your inbox every month.Providing Support for PBS.org
Learn Moreabout PBS online sponsorshipKevin: Our experts travel across the country to answer questions about your house.
Today, Ross breaks down the various types of insulation available and the pros and cons of each.
What do I pick for my house?
Ross: Yeah, it's a great question.
Kevin: Then, does your front door stick or have trouble staying closed?
Nathan helps a homeowner troubleshoot why her door isn't working properly.
[ Drill motor whirring ] Liz: Very smooth.
♪♪ Kevin: All that's coming up next on "Ask This Old House."
♪♪ ♪♪ Kevin: Hi, there.
I'm Kevin O'Connor, and welcome back to another episode of our 25th season of "Ask This Old House."
Over the past couple decades, many of you have written in with questions about how to best control your heating and cooling systems.
And our answers over those last two decades?
Well, they've evolved.
There was a time when just about every home in America had a thermostat that looked like this.
Richard: That is Old Faithful.
You can see this bulb right here, and there's mercury in here.
It was the greatest invention of its day, 'cause before it, you had to go down to the basement and shovel coal or throw wood in.
But most of the thermostats nowadays we find are digital.
This has got an up and down button here.
This is a touchscreen.
All you have left to do is to program the time.
Here's a manual.
It is no harder than a VCR.
Man: Great.
My VCR has been flashing 12:00 since I got here.
Richard: You're not alone.
Kevin: After all these years, I am still talking thermostats with the Tretheweys.
Richard: Absolutely.
Kevin: Nothing changes.
Richard: We have nothing else to say.
Ross: It never ends.
Kevin: You know what doesn't change, also, are the questions we get.
Like, why does it always come back to the thermostat?
Richard: Well, the thermostat is the one sort of control point where an occupant feels like they can try to make a difference, both with trying to be more comfortable or try to save some fuel, so this is the one place.
Now, there's a whole new generation of Wi-Fi-enabled thermostat.
And it might learn how you live in the building -- it has a motion sensor.
And it will allow you to communicate with a smartphone.
Ross: But that was 10 years ago.
Kevin: And so, what?
This is the newest generation?
Ross: That's the newest generation, yep.
They communicate with sensors like this.
Kevin: I presume these all represent the newest generation.
Ross: Yeah, these are the newest generation.
And a lot of them have really cool features, right?
Like geofencing.
So, by the GPS in your phone, it knows where you are in proximity to your house, so it knows if you've gone farther away.
Kevin: Where does the future take us, and what happens to the thermostat?
Ross: Yeah, I think in the future, I think the thermostat would go away.
You could have the thermostat be through your phone or through a tablet or through a voice assistant where you can control it and interact that way.
Kevin: But more importantly, like, if the thermostat goes away, what are we gonna talk about?
[ Laughter ] Richard: I don't know.
Kevin: 'Cause this is like the center of our relationship here.
[ Laughter ] Richard: There's still 7 out of 10 Americans hate their heating system.
We still have a lot of work to do.
Kevin: But they love you guys.
Richard: That's right.
I hope so.
Kevin: 6 out of 10.
[ Laughter ] 3 out of... Richard: Yeah.
Kevin: You know who doesn't love you?
This guy who wrote us a very simple question about 7 or 8 years ago -- John.
Richard: John?
Kevin: Yeah!
You -- Yeah, you remember John.
Ross: From New Jersey.
Kevin: Question comes to us from John in Flemington, New Jersey.
And he says, what is the perfect temperature to set the thermostat at in his house?
And I told him, "Well, that's easy.
68 for me, 72 for my wife."
Done.
[ Laughter ] Richard: Is it summer or winter?
Kevin: Uh, well, he didn't say.
Ross: Is it a forced-air system or a hydronic system?
Kevin: Well, he didn't tell me that, either.
Richard: We get this question all the time, and it invites a whole much longer conversation.
Kevin: Yeah, he just wanted to know what temperature to put his t-stat at, and you guys couldn't give an answer.
Richard: Thank goodness I have caller I.D.
Kevin: He wants to know!
[ Laughter ] Kevin: John, I apologize that they're continuing to disappoint you, but now you feel my pain.
Richard: Sorry, John.
♪♪ Kevin: Hey, Ross.
Ross: Hey, Kev.
Kevin: Lots of insulation choices.
Ross: Oh, yeah.
Kevin: You gonna walk us through them?
Ross: Oh, yeah.
Here we go.
We got a mock-up on each of these, but let's define each.
All right.
So, fiberglass.
Right?
We've been using it for a long, long time.
Kevin: Yeah.
Ross: It's actually glass fiber.
Right?
So people don't realize that.
It's actually a lot of times recycled glass or glass that's melted down and spun into these fibers.
And it's been used for many, many years.
Kevin: Okay.
Ross: Yep.
Next one would be cellulose.
So, this is ground-up newspaper or cardboard and typically blown in or sprayed into a wall cavity.
Kevin: Mm-hmm.
Ross: Right?
Then you get into your spray foams.
You got your open-cell and closed-cell.
These are both a two-part liquid, right?
So a type A and type B mixture comes together at the nozzle, and it creates a lot of heat, and it expands when it's blown into the entire joist bay.
Kevin: Operate and work differently, but we'll get back to that.
Ross: That's right.
Yep.
Kevin: Wood fiber.
Ross: Wood fiber.
Kevin: Relatively new, right?
Ross: Relatively new.
It's been used in Europe for many, many years of course.
But this right here is ground-up wood chips, like, usually leftover from the lumber mill.
And then, it's basically created a bat style or a blown-in or an exterior grade.
Kevin: And then another bat, which has been around longer.
Ross: Yeah.
So, this is actually made from rock, you know?
And so they actually melt this rock down and then spin it into a fiber, and that's where you get mineral wool.
Kevin: So, they all perform differently and do different things for us.
Let's walk through that.
I think most people think of insulation as helping to keep their house warm or cool in the summer.
So, really, that's sort of controlling heat transfer, which you guys measure.
Ross: R-value.
Yep.
So, the resistance, the heat flow, is R-value, and R-value per inch is what we're thinking about.
And most of these are all about the same, anywhere between 3 and 4, with the one exception being the closed-cell.
That's gonna be about 6 to 7 -- so about twice everything else you see here -- for an R-value per inch.
So if I have a really small wall cavity and I want the most R-value per inch, closed-cell is where I'm gonna start.
Kevin: Interesting that the rest of them perform similarly, in terms of R-value.
Ross: 3 to 4, that's right.
Kevin: The next thing that we control is air movement.
Houses can be drafty.
The wind can blow through these walls.
So how does this do on air movement?
Ross: Yeah.
So, these do tremendously well on air movement.
Kevin: Both of them.
Ross: Both of them, very, very good, especially when you get into thicker insulation, like 4 or 5 inches for this one and 2 inches for this one.
Does a really good job of stopping airflow and also starting -- This one starts vapor control.
Kevin: So, "vapor" meaning moisture in the air in the form of vapor.
Ross: That's right.
Kevin: It wants to move in and out, back and forth.
It can go through this?
Ross: That's vapor open.
Kevin: And it can't.
Ross: This is vapor closed.
Exactly.
Kevin: So, where do we want vapor closed?
Ross: So vapor closed would be, let's say you're in a cold climate, and let's say you have a attic system.
You have a ridge.
We have water vapor that's traveling up through that building.
It will get trapped at that ridge.
So we want to make sure that we don't have water vapor attaching to the back side of the sheathing.
Because if you think about it, if it's a cold day outside, you got water vapor going up through, it hits a cold surface, it's going to then condense.
And then we could get, you know, the dreaded mold growth and some other issues like that.
So we want to stop that condensation.
How do we do that?
That's with vapor control.
So that's one real superior benefit of closed cell versus open cell.
Kevin: So, now we know how effective they are.
What about cost?
Ross: Yeah, cost?
For sure, the lowest is gonna be fiberglass.
DIY-friendly, of course.
Lowest cost.
Been around a long, long time.
And you're gonna step up, you know, to your mineral walls, your dense-pack celluloses, then your wood fibers, and then into your spray foams.
So, your professional installations are going to be the most expensive, and that's gonna be with the spray-foam options.
Kevin: And between the two spray foams, because this is such a good job with the R-value.
I know we put this in sort of sparingly because it costs more than even the open.
Ross: It does.
Yeah.
Yeah.
So this -- Because it's giving you air control, vapor control, and it's giving you that high R-value, you know, twice about everything else, it's going to have the highest cost, for sure.
Kevin: Mm.
Ross: Yeah.
Kevin: Remember the good old days when it was just that?
Ross: That was it.
That was your only option.
Kevin: So, today, all these choices.
Ross: Yeah.
Kevin: What do I pick for my house?
Ross: Yeah.
It's a great question.
Right?
It really depends on so many things -- where you are in the country?
You're in hot climate or you're in a cold climate, right?
Are we talking about the attic, you know, in the roof rafters?
We talking about the wall?
We're talking about subslab.
You know, really -- Kevin: Old house, new house... Ross: Old house, new house.
You got to think about the wall assembly as a system.
And we don't always rely on each one of these to do one specific thing, right?
Air control, vapor control, could be handled by the outside.
And you could still use fiberglass in the inside.
You can seal it up.
You could use exterior rigid board on the outside.
And you know, so it really does depend.
You have to have a great team on your side.
General contractor, architect, engineer, someone that can help you sort through these options and think of it as a system.
The wall is a system.
You got to think about it holistically.
Kevin: All right.
Good information.
And just make sure that you're in aisle 6 with the insulation to answer all of our questions as we come through.
Ross: I'll meet you there.
♪♪ [ Knock on door ] Nathan: Hey, Liz.
Liz: Hey, Nathan.
Nathan: Nice to meet you.
Liz: Nice to meet you, too.
Nathan: This is an incredible spot.
How long have you been here?
Liz: I grew up in this house.
Nathan: You did?
Liz: I did, yes.
Nathan: Very cool.
Liz: This is an 1890 home.
And my father actually bought it in the '80s from the son of the original owner.
Nathan: No way.
Liz: So we're only the second family to own this house, which is pretty neat.
And I thought you might be interested to see... Nathan: Oh, I always enjoy the details.
Liz: We have some original photos of the house.
So this is from just after 1900.
Nathan: Yeah.
Liz: They were considering selling the home.
Nathan: That's incredible.
Liz: Created a listing, a handwritten listing.
Nathan: Oh, no way.
So only $6,800?
Liz: Yes.
Nathan: That's a very good deal.
Liz: Yeah.
Nathan: That's incredible.
Liz: So, yeah, it's a really -- it's an old house, and we love it.
Nathan: You guys have taken good care of it.
Liz: Yeah, we tried.
Nathan: So, this is the door you wrote me about?
Liz: It is.
Why don't you come in, and I can show you?
Nathan: Yeah.
So what's -- what's going on with it?
Liz: Well, what clued us in that there was a problem was actually, we were away for a weekend, came home, thought the door was locked, and my daughter came home and just kicked the door open, and it flew open.
Um, so we realized that something was wrong with the lock.
Nathan: Yeah.
Liz: We had originally had a locksmith come who helped us to figure out that the strike wasn't lining up anymore.
Nathan: Mm-hmm.
Liz: He dug that out to make it so that it would be functional again but told us that we had some bigger problems.
Um, in addition to the lock issue, we've had a hard time kind of opening and closing it for a long time.
And so we've been pretty hard on the door.
Sometimes, the handles will fall off.
At times, we've actually had a hard time opening it from the inside.
Nathan: Yep.
Liz: And what the locksmith told us was that we have a big problem with our hinges, is what he said might be behind all of it.
Nathan: Oh, absolutely.
Yeah.
First thing is, I can see these hinges.
It looks like there should've been a ball bearing here.
So, these knuckles have dropped down, creating this big gap.
And that's following all the way through the door.
I see a large gap at the top.
And now your hardware's not gonna line up.
Your strike plate has been affected, and it's not going to latch correctly.
So I think we need to work our way back over here and address these hinges first.
Liz: Okay.
Nathan: So we'll get some tools.
We'll get those swapped out.
Liz: Great.
Thank you.
Nathan: All right.
Let's get started by looking at what we're working with here, at your original hinges.
So, you have a solid brass hinge.
These are your leafs.
You have your knuckles, which the pin runs through.
You have really nice finials at the bottom and the top.
You have your screw holes with a selection of different style screws.
You have some straight slots and some Phillips in there.
What we need to do is essentially take this out and put it in your new hinge.
So, here's your new hinge.
Liz: Yeah.
Nathan: It's really nice.
Solid brass.
Liz: Beautiful.
Nathan: Called a 4x4.
So we're 4 inches tall, 4 inches wide.
We have the pin still running down the center.
We have our ball bearings there.
We have a little bit of a low-profile finial cap there, a little flat one, so I'm going to swap it out for a nice ball like this when we install it.
But I think first thing is, we take out the old one.
All right.
So now what I'm gonna do is actually jack up this door.
Watch.
I'm gonna pump this construction jack.
Watch that gap close.
And it's actually putting this left leaf where it should have been originally.
Liz: Mm-hmm.
Nathan: And you can see the spot where the old ball bearings would have been.
Liz: Great.
Nathan: All right.
So now we can pull that out.
[ Drill motor whirring ] Liz: So, will any of the holes line up, or will they all be new?
Nathan: So we're hoping that none of them are going to line up.
So as a good rule of thumb, I always like to take the hinge off, fill in all the old holes first.
[ Drill motor whirring ] Okay.
All right.
All right, let's dry-fit this new one.
All right, looks like my leaf is a little bit thicker than what the mortise is cut to receive.
I'm gonna clean that up.
I'm gonna make it a little bit deeper so that we can get this hinge nice and flush with the door and the jamb.
All right.
Yeah.
That's nice.
Nice and smooth down the side.
Liz: Great.
Nathan: Now let's turn our attention to the door side, make that a little shallower.
All right.
Thank you.
Liz: Great.
Nathan: So, the next thing we need to do is repair these old screw holes.
[ Drill motor whirring ] [ Blows ] So, I chucked up a 1/4-inch drill bit, and I'm going to drill a uniform-size hole and have a uniform-sized piece of material.
All right.
So I'm going to grab the little oak dowel here, and I'm just going to slide it into that hole.
And I don't mind if it's a little long.
I'll cut it off later.
Liz: Okay.
Does it matter what kind of wood you use?
So it doesn't matter that much?
Nathan: No, essentially, you're just filling the hole.
So you could use a hardwood or a softwood.
All right.
These are all cured, so we can take a chisel.
All right.
So I'm gonna take off these little button finials off the top and the bottom.
And one thing we want to look at is which way the pin is coming, which way is -- which is the top of this hinge.
So there's our top there.
Pull that pin all the way out.
If you ever wanted to take the door off, you'd simply pull your finials from the top and the bottom and then drive this pin up.
You could break the door apart, paint it, work on it, whatever you need to, but always just put that back from the top down into it.
So we have that nested down in there.
And then we're gonna put on our ball finials.
Decorative.
Liz: Yeah, those look great.
Nathan: All right.
Clean it up a little bit.
So, I have a self-centering drill bit which pairs nicely with the size screws that we're gonna use.
So we're gonna pre-drill.
All right.
So we're gonna use the brass screws that the kit came with.
It's a solid brass screw.
It'll be easy to strip it out.
So I dip the tip of the screw into this wood screw lubricant, and what it's gonna do is, reduce the friction.
So I'm gonna come in with my gun, and I'm gonna go extremely light as I get started.
[ Drill motor whirring ] All right.
That is one done.
We got two more to go.
Liz: Great.
♪♪ ♪♪ ♪♪ Nathan: Now that we're done with the hinges, we can switch our attention over to your lock set here.
So we're gonna start by removing this decorative faceplate, called an armor plate or a scalp plate, from the front here.
And most of this can be done by hand.
You really don't need to bring in any power tools.
And this will pop right off.
We have that cylinder set screw right there.
Just a few rotations.
So, a good rule of thumb when you're removing the cylinder is to use the key.
This is already pretty loose.
But if you put the key in two thirds and then you twist.
You can get it started until you can get your whole hand on it and then you can back it out.
Liz: Okay.
Nathan: All right.
So, we got that.
So, next, we can go after the knobs.
It's a good rule of thumb not to use power tools since we're taking this off, we're not putting it in.
I have a fancy little screwdriver that has essentially, like, not much torque to it.
And these should thread on.
Liz: We've had to tighten those a lot.
Nathan: Tighten them a lot?
Liz: The handles falling off.
Nathan: You're very familiar with them.
Liz: [ Laughing ] Yes.
Nathan: It happens.
All right.
Now we can remove this exterior knob that's still attached to the spindle here.
Liz: Mm-hmm.
Nathan: You can look, you see you have a lot of wear and tear on these threads here.
All right, now we can pull our trim plates off, our face plates.
So, for that, we have a straight slot screw.
Liz: Okay.
Nathan: And we can remove these two screws that are holding the lock body in.
Liz: Those screws are in good shape.
Nathan: Yeah, these actually have a nice bite, which is good to see.
Liz: The brass really ages well.
Nathan: It does.
It's my favorite.
All right.
All right, so we pop that out.
Liz: Wow.
Nathan: And then here is your lock box.
Liz: That's really big.
Nathan: Yeah.
All right.
Here's our new lock body, and we're ready to do a test fit on it.
It looks really good in the mortise.
Liz: Yeah.
Perfect fit.
And in this case, we're gonna use the same screw holes, right?
Nathan: Yep.
Same screw holes.
Liz: Great.
Nathan: And, you know, so I'm kind of putting everything together kind of loose.
I'm gonna assemble everything, and then I'm going to kind of plumb my faceplates.
Liz: Okay.
Nathan: And then we can kind of tighten everything up.
Liz: Okay.
[ Drill motor whirring ] Nathan: All right.
Next, we're going to finish this cylinder here.
So I'm gonna spin it.
Looks like I'm gonna have to come back a little bit.
That looks fair.
So, the key is not to overtighten this.
So we're just gonna spin clockwise until it stops.
Perfect.
All right.
So, now that that is set, we can put our armor plate.
So your door is opening and closing very well.
It's latching well.
But your strike plate has seen better days.
So I think it'd be nice to swap it out with the one that came with the kit.
Liz: Okay.
Nathan: All right.
So, this kit comes with a few different pieces.
It has a dust box, which we're gonna chisel and put in there.
It'll be a little more pleasing to look at.
Liz: Okay.
Nathan: It has a security strike which has a few different holes, big screws on the back, small screws on the front, and then we have machine screws that are going to hold the strike plate on in the middle.
So that'll get mounted.
And then, to cover everything, our strike plate.
Liz: Okay.
Nathan: I need to modify this mortise to receive the dust box, so I'm gonna start there.
[ Saw motor whirring ] Do a test fit.
Liz: Looks clean and even now.
Nathan: Yeah.
[ Drill motor whirring [ Drill motor whirring ] All right.
So, the last thing I want to look at is your weather stripping around the door.
So, you have this really nice V-shape, bronze weather stripping that's in really good shape, in my opinion.
But one thing I noticed inside, after we raised that door up, I'm noticing that your sweep, you know, kind of has seen better days.
It's been rubbing a while down here, so I'd like to swap that sweep out before I go.
All right.
That was pretty easy.
Liz: Great.
Nathan: So, what I want to do is, I want to just kiss the top of the threshold right here as I come down just where it meets the threshold.
I don't want to go too far.
I don't want to make something that's going to come down and then, if you have a taller rug in front, that it's gonna bind or drag on.
Liz: Gotcha.
Nathan: And then, you want to keep a nice -- nice, even weight behind it.
Yep.
[ Drill motor whirring ] Perfect.
[ Drill motor whirring ] All right, Liz, give it a try.
Liz: It looks amazing.
Very smooth, very smooth.
Nathan: Try that key out.
Liz: Oh, it looks great.
And... it locks.
Unlocked.
Nathan: Very nice.
Liz: This is great.
My daughter won't be able to kick it open, and... Nathan: No more kicking doors.
Liz: ...I won't have to throw my shoulder into it anymore.
Nathan: You're a lot safer.
Liz: It looks beautiful.
Thank you so much, Nathan.
Nathan: You're welcome.
Thanks for writing in.
Liz: Yes.
Thank you so much.
Take care.
Nathan: You too.
Kevin: Next time on "Ask This Old House"... Tommy explains how to install gutters correctly and what happens when they're installed incorrectly.
Tom: You can see the water sucking itself to the drip edge and running out the back.
Kevin: Then, Ross shares a quick and easy way to sync up mini splits using one controller.
And Mark helps a homeowner assess and repair the damage to his foundation skirt.
All that on "Ask This Old House."















Support for PBS provided by:
Funding for Ask This Old House is provided by The Home Depot and Renewal By Andersen.