
E5 | Cracked Foundation Skirting | Ask This Old House
Season 25 Episode 5 | 23m 42sVideo has Closed Captions
Easy mini-split upgrade; best of Boston accent; stucco foundation skirting installation.
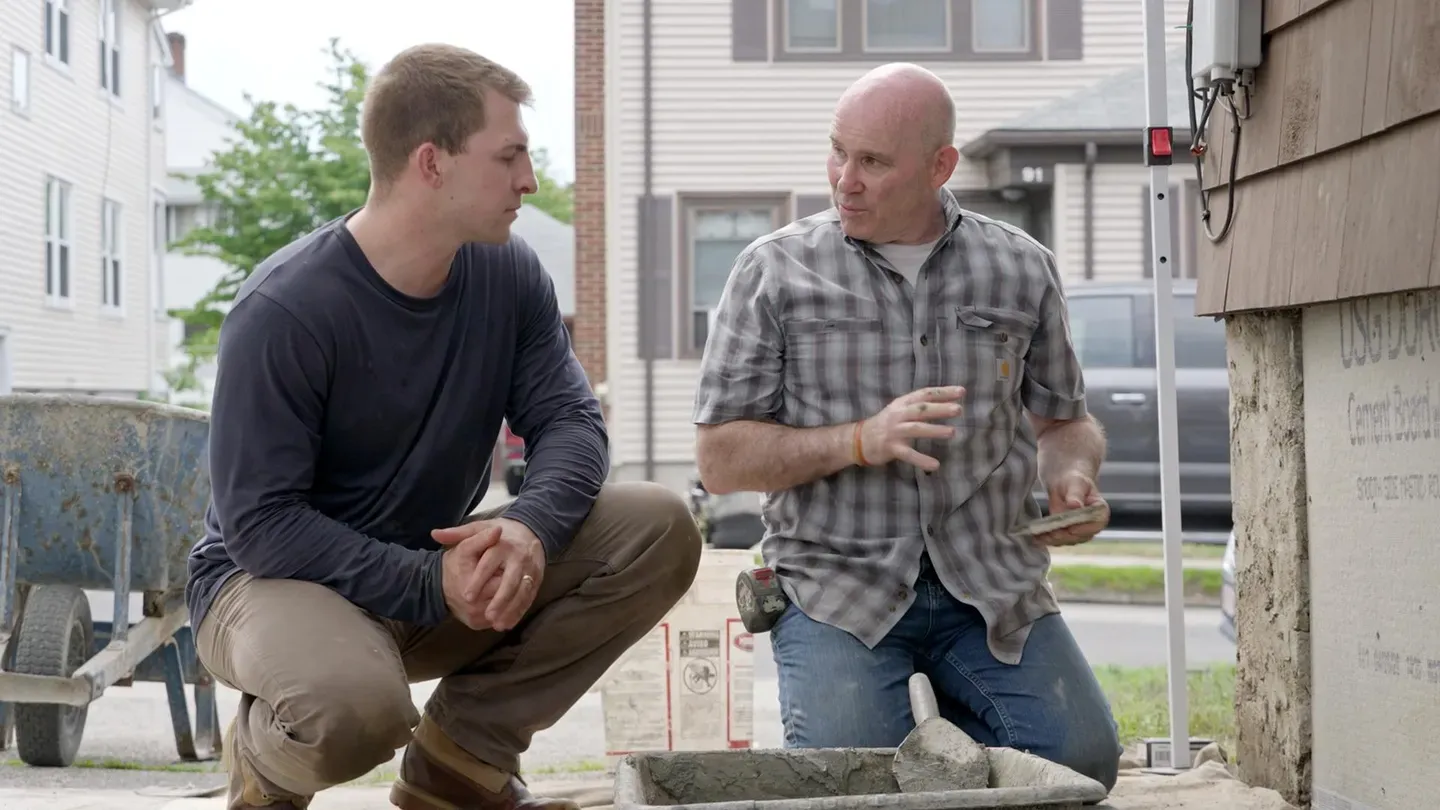
Tom Silva uses a water demonstration to explain common gutter mistakes. Ross Trethewey installs a Wi-Fi kit that turns an old mini-split into a smart, app-controlled unit. After, some of the team watches some throwback clips of when their Boston accents came out wicked strong. Then, Mark McCullough removes and re-installs stucco foundation skirting.
Problems playing video? | Closed Captioning Feedback
Problems playing video? | Closed Captioning Feedback
Funding for Ask This Old House is provided by The Home Depot and Renewal By Andersen.
Support provided by:


E5 | Cracked Foundation Skirting | Ask This Old House
Season 25 Episode 5 | 23m 42sVideo has Closed Captions
Tom Silva uses a water demonstration to explain common gutter mistakes. Ross Trethewey installs a Wi-Fi kit that turns an old mini-split into a smart, app-controlled unit. After, some of the team watches some throwback clips of when their Boston accents came out wicked strong. Then, Mark McCullough removes and re-installs stucco foundation skirting.
Problems playing video? | Closed Captioning Feedback
Where to Watch Ask This Old House
Ask This Old House is available to stream on pbs.org and the PBS app.
Keep Exploring


This Old House Insider Newsletter
Get This Old House exclusive stories, tips, and behind-the-scenes information delivered right to your inbox every month.Providing Support for PBS.org
Learn Moreabout PBS online sponsorshipKevin: Our experts travel across the country to answer questions about your house.
Today, Tommy explains how to install gutters correctly and what happens when they're installed incorrectly.
Tom: You can see the water coming down and running out the back.
Kevin: Then Ross shares a quick and easy way to sync up mini splits using one controller, and Mark helps a homeowner assess and repair the damage to his foundation skirt.
♪ All that's coming up next on "Ask This Old House."
♪ Tom: So the key, like I say, you want to make sure that the edge of the roof is out an inch and a half to two inches.
Kevin: Hey, Jenn, Hey, Tommy.
Jenn: Okay.
Kevin: Talking roofing?
Jenn: Yeah.
I'm trying to focus here.
Kevin: Yeah.
You should.
Jenn: I've got a problem.
Kevin: Boss man's talking.
Tom: You got a problem.
Jenn: I have a problem with one of my clients.
The water just goes in between the seam of the house and the gutter.
You want to see?
Kevin: Oh, my goodness.
That's a problem.
Pops does not like to see that.
Jenn: I need you.
Kevin: So we got a prop here.
Is that what you're going to be showing us?
What's proper and improper installation?
Tom: Yeah.
We're going to be talking about surface tension and adhesion of water.
And that's causing Jenn's problem.
Kevin: Our lucky day.
Jenn: Well, when you guys are ready to fix it for me, I'll be -- I'll be waiting.
So I got to go, I got to go.
Kevin: You're leaving me with the gutter guru all by himself.
Jenn: Gutter guy.
Kevin: Oh, my God, alright.
Jenn: Thank you, guys.
Tom: Alright.
So let's start with the gutter is -- is probably too high, but that's not causing the water to go behind it.
Kevin: By too high you mean... Tom: Up too high in the face.
A gutter appearance-wise... Kevin: Yeah.
Tom: If I took this tape measure and I laid it on the roof flat and it's parallel, you can see that the tape goes by that leading edge.
Kevin: Which you want it to.
Tom: You want it to.
So now, if you live in a climate where ice and snow melt, it can run right off and not rip the gutter away.
Kevin: Okay.
Tom: And if you look down here on the low pitch, there's a bigger space on the edge.
That's about 1/2 to 3/4 of an inch.
Kevin: Low pitch meaning that this is the downside of the gutter because the water is supposed to come to the downspout.
Tom: This is your outlet right here.
Kevin: Yeah.
Tom: And that pitch of that gutter should be 1/4 an inch to every four feet.
So if your house is 40 feet, you put the crown in the middle of the house 20 feet.
20 feet gives you about an inch and a quarter lower on this end than it is on the high end.
Kevin: Roger that.
Okay.
So that's done correctly here.
The gutter is down low enough.
Tom: Yeah.
Kevin: And then what else are we looking at?
Because you got different -- You got a different little setup here.
Tom: So if you look here at the overhang, it's an inch and a half.
And I want it to be inch and a half to inch and three quarters or even two inches.
Kevin: So I thought it was the drip edge that was actually controlling that water getting kicked off.
Tom: Well, a drip edge should control that if it's done right.
And right here is a little kicker.
That drip edge should be away from the fascia board, the thickness for me to get my fat little fingers in there.
Kevin: Yeah.
No, you're right.
They're definitely fat.
Tom: Oh, yeah.
[ Both laugh ] And there they are, but they're underneath, so you got it behind.
Tom: Right.
And then also you want the shingle starter strip and the shingle itself to be further out than the drip edge, another quarter to half an inch.
Kevin: So drip edge is out off the fascia sufficiently.
Shingles are overhanging the drip edge sufficiently.
This is the way it's supposed to be done.
Tom: That's the way it's supposed to be.
And unfortunately, you can't get roofers to understand that.
They say, oh no, it's got to be up tight like this.
The drip edge is tight to the fascia board, and the shingles have no overhang at all.
Kevin: So even though that drip edge has got a built-in kick, right, it's got a little seam there, even though that's there.
Tom: Here's a little piece of it right there.
You can see the kicker on the bottom.
Kevin: Yeah.
So as I think about that on a roof, that little edge... Tom: So they put that tight to the fascia board.
In a heavy rain, the bubble of the water is thicker than that space.
So when it comes down, the water sticks to the fascia board and runs down behind the gutter.
Kevin: So I see a hose at your feet.
Are you ready to prove that this should work properly and that should fail us?
Tom: Alright, so now it'll take a couple of seconds for the shingles to get wet and the water to come down to the edge.
So I'll make it rain.
Kevin: So I'm going to get down here for a better look and hope that you don't... Tom: I can't guarantee you won't get wet.
Kevin: ...spray me.
So on this side, the properly installed side, everything is kicked out enough that it is -- It's literally not touching the face or dropping right into the gutter.
Tom: Right.
And we're pouring a lot of water on that roof.
Kevin: And a little bit on me.
Tom: I'm trying to get you, but think of that water coming off the roof and where is it going?
It's not swinging out past the gutter.
It's dropping directly into the gutter in the center of the gutter where it should be.
Kevin: I can see that no problem.
And then on that side over there, sure enough.
Tom: You can see the water coming down, sucking itself to the shingles, sucking itself to the drip edge.
And every now and -- See, it's going right in and running out the back.
Kevin: So works on this side, doesn't work on that side.
And like you said, it doesn't work intermittently.
So sometimes it's actually fine.
But then other times that surface tension -- Tom: When it's raining 90% of the time it's windy and blowing and it blows the water to the -- against the house.
Kevin: Well, it's a -- it's a powerful demonstration.
Thank you, Tommy.
Tom: It's a big deal.
And it's very important to do it correct.
♪ Eric: Happy anniversary.
Thanks for coming to visit my house to replace these stairs.
We only got to do three because it took all day.
But I finished the job and went upstairs to finish the rest.
Thanks for helping us figure out how to do this, get confidence that we can fix our own house.
We've done lots of projects since then and we're still doing more.
♪ Ross: One of the common problems with mini splits is that they're controlled from a remote like this, so similar to a TV, you turn it on, you turn it off, you change the temperatures.
But what happens when you lose the remote?
Right?
Or you're not home.
You don't have control.
You don't have the ability to turn the temperature up or down.
Manufacturers now offer a Wi-Fi interface kit, also known as a dongle.
And what we're going to do today is we're going to install one of those to allow these mini splits to communicate with the app on your phone.
And by doing so, you have control of this unit from anywhere with your phone.
Alright?
It's actually really easy and a homeowner-friendly project.
♪ The first thing you need to do is check compatibility of the indoor unit and outdoor unit with the manufacturer to see if they offer a Wi-Fi interface kit.
In this case, I've checked and all the indoor units and outdoor units are compatible, so we're going to install a Wi-Fi interface kit.
I purchased it at The Supply House.
Whenever you're working with units like this, you need to make sure you kill electrical power.
So I've killed the breakers to these units so they're not active.
The next thing is to disassemble the unit.
And every manufacturer does this a little bit differently.
But for this one in particular, the first place you have to start is with the filter on top.
So we're going to remove the filter which just magnetizes down.
And this is also a great opportunity to clean that, wash it off.
And there's a little kickstand here to lock it in place.
So it's not going to fall back down.
So we're going to use a voltage tester like this to just make sure that the power is off on the unit.
And now I can remove the display control board.
It's held in place with a single screw.
So you remove that screw and then the display board slides to the left.
And by doing so then flips down.
And this is exposing the display board.
So this is the display that you see on the screen when it's illuminated.
Right over here is the Wi-Fi dongle port.
So we are going to connect that to right here and slide that into place.
With that connected, we're going to reassemble the unit exactly the way that we just disassembled the unit.
And now we can put the set screw back into place.
Okay.
And now the kickstand can come down.
So what you're going to do there is you're going to fold it in.
And with the kickstand folded in, you're going to fold this right back down.
With the filter reinstalled and power turned back on, the next thing to do is to download the app.
So you're going to download the app for the manufacturer.
And you're going to install and create an account.
So create a username, create a password.
And with that installed, now we can get into pairing.
♪ And the next thing we're going to do is then we're going to hold down the L.E.D.
button, which is going to allow it to go into A.P.
mode.
Okay.
We now have it in pairing mode.
The A.P.
means it's an access point.
We are communicating there.
I'm going to hit add device.
And I'm going to click the A.C.
unit that I want to pair with.
I'm going to select the Wi-Fi.
So the living room is now connected.
We're now going to connect to all the other units.
So each one will show up here on the screen.
We'll have -- Each one will have an individual connection.
Okay.
We've got the bedroom unit and the living room unit paired.
They're working.
I'm going to turn the living room unit on.
So the living room is now active.
And you can see that it's set for 74 degrees.
And you can see the Wi-Fi logo there.
That means it's communicating.
So you can use a remote like this to turn it on or turn it off.
And it's still going to be the last call that the unit receives.
So whether you use the app or whether you use the remote like this, I can turn it on or I can turn it off.
[ Beep ] [ Beep ] Both of them still work, so do not throw these away.
One thing to keep in mind is you're not allowed to do mixed modes.
So I can't have this unit in cooling with the bedroom unit in heating at the exact same time.
It won't work even with the app.
So what you want to do is make sure you have the same mode of operation, or the other unit is off when you're controlling it.
What you can do with the app is I have full control from the app at any moment in time, so as long as I have Internet connection, I can turn a unit on, off, change temperature.
I have peace of mind to know the status of my house and the systems that are in it.
The other thing to keep in mind is I can set schedules so I can, if I'm coming back from vacation or if I'm coming back from work, I can set things to pre-heat or pre-cool before I even get home.
So a lot of great features, all for a five-minute install.
Good luck on your project.
♪ Kevin: "Ask This Old House" travels all over the country, and we talk to people in every corner of the nation.
But our home base is in the Commonwealth of Massachusetts, where one accent reigns supreme.
The Boston accent.
Man: Taking -- Pin down that "cornah."
Mark: One in each "cornah."
Tom: Around the "cornah."
Lee: Let's start with the "lawnmowah."
Roger: Roofers, landscapers, carpenters.
Kevin: You guys don't hear it, do you?
Mark: Hear what?
Lee: Hear what?
Kevin: The accent.
Lee: What accent?
Kevin: The funny way you talk.
Roger: The hardest part of planting the tree is putting it in the perfect -- Jimmy: [ Boston accent ] This is the hardest part.
Roger: The hardest part.
Kevin: Some people think it's just dropping the "R," but then other times you guys add the "R" for some reason.
Tom: It's got drawers in it.
Really be nice "idear" but the problem is, is... The baking "soder" is like a fine stone... Lee: Mark, you don't hear it, right?
Mark: Unless I have something in my ear.
[ Laughter ] Tom: Careful of the nails.
Man: Through the rubber connector.
Mark: Flip that mortar up on the back side of your jointer.
Kevin: So there's a lot of places that would probably say get rid of it, right?
Appeal to a national audience, but they let you guys just do your thing.
Lee: I brought a side "cuttah."
Tom: Getting in and out of the car has got to be a little bit of a challenge, too.
Kevin: I think it makes you guys feel authentic.
Roger: Like an urban jungle back here.
Tom: They cut the joist a little bit too short.
Richard: I don't know what he said.
Can we get subtitles?
[ Laughs ] ♪ Mark: Will.
Will: Hey, Mark.
Mark: How are you doing?
Will: I'm good.
How are you?
Mark: I'm doing great.
Will: Thanks for coming out.
Mark: Alright.
Thanks for having me.
Will: So we bought the house about a year ago.
Mark: Okay.
Will: Been doing a bunch of work inside, did the bathroom, the floors, kitchen, um, now starting to tackle the outside.
And this is actually what I wrote you about right here.
Mark: Okay.
Will: The cracking in the foundation I don't think is a good thing.
Didn't know what to do, so I called you.
Mark: Alright, well, thanks for calling.
And I'll tell you what.
I see the problem right away.
So if you get down, Will, uh, any time I see this type of damage, I always tie it back to poor water management.
And that's what you have right here.
So you can see this downspout goes into this pan, but there's really no room for the water to really run.
So no water flow in the wintertime, the water builds up, turns to ice, and then just explodes that stucco veneer.
So if you could actually get me inside, I'd have a different vantage point.
And I bet we come up with a solution.
Will: Yeah, absolutely.
Wait till you see this.
Mark: Okay.
Can't wait.
Will: Right over here.
Alright, so this is the basement.
Mark: Okay.
Will: And over here is the crawl space that we could see from the outside.
Mark: Alright.
Alright.
So the first thing I'm going to notice here, Will, is that this is not a full foundation.
That's a foundation skirt.
So it's not structural.
Will: Okay.
Mark: You have a big concrete pier to the left, one to the right that's actually holding up the porch.
So that's a good thing.
Um, what I do see is a little bit of daylight.
That means water infiltration.
Will: Okay.
Mark: So that's not a great thing.
Um, but you can see the wire lath beyond.
Will: Yeah.
Mark: Another problem -- You can see the rust on that wire.
Will: Oh, yeah.
Mark: So that becomes very, very brittle and a weak point.
Will: Okay.
Mark: The slats that are holding up that wire, those are not in great condition either.
Um, how old's the house?
Will: The house is 100 years old.
Mark: Okay, so these slats are kind of showing its age.
Will: Okay.
Mark: Um, so we might want to replace those.
Will: Okay.
Do you think we can save anything that's up there or will we have to start fresh?
Mark: I think we're going to start fresh.
Again, I'm not seeing anything really great in here that we want to save.
So we'll go outside.
We'll do a full demo.
Will: Okay.
Mark: Alright?
Will: Awesome.
Mark: Okay, Will.
So the first thing we did today was put up these tents.
That's going to help us be protected from the sun.
Also going to protect the work.
Will: Awesome.
Mark: And then just due diligence, we want to put these drop cloths down, keep everything nice and neat.
But as far as the demo goes, what I think I'm going to do first is get one of these smaller hammers.
I'm going to try to get through the stucco and then we'll just roll this material off.
♪ There you go, Will.
♪ ♪ And, Will, I'm not huge on gloves, but anytime you're using wire, this stuff cuts and you don't even know it.
So I'm glad we're both wearing gloves.
Look at that.
Wow.
That's what we were hoping.
So you can see the different colors in between the stucco.
Will: Yeah.
Mark: So the lighter stucco has more lime.
The reason they would use that first -- because lime has stickability to it.
Will: Okay.
Mark: They let that set up for a few days.
And this dark material right here is what we call Portland cement.
Will: Okay.
Mark: Alright.
Let's keep going.
Okay, Will, so we've replaced the framing.
This time around, we use pressure-treated wood.
So it's going to stand up to the weather.
Will: Looks better already.
Mark: Sure does.
And what we had before is what they call a two-coat stucco system.
You can do a two-coat stucco system or a three-coat stucco system.
What we had was the two-coat.
This wire, this is what you used previously.
Will: Is this what was under there before?
Mark: So this was under there.
But the difference is this is galvanized.
So again this is going to stand up to the weather.
At the time of the original install they didn't have galvanized wire lath at their disposal, so they didn't use it.
Will: And are we going to use that again today?
Mark: So that's out.
Will: Got it.
Mark: But what we are going to use is a cement board system.
So if you want to run your hand across that board right there, you can feel the ridges and you can see the pores.
Will: Okay.
Mark: That's going to really grab our finished coat.
Will: What is cement board?
Mark: Cement board is just compressed cement.
So in the two-coat stucco system like we had before, you had a scratch coat and what they call a brown coat.
Labor-intensive, number one.
So it's expensive because of the labor.
It would take three days to cure the scratch coat, three days to cure the brown coat.
We're out of all that because this is already cured.
Will: Perfect.
Mark: So this is a grinder.
[ Whirring ] That's a diamond-tipped blade.
It's always used in masonry.
It goes through like butter, if you will.
And you can follow this hose all the way to what we call a HEPA vac.
It takes all the contaminants out of the air.
So you and I don't have to worry about that.
This cement board comes in interior grade.
Sometimes you'll see that on the bathroom floor or the kitchen.
They're going to use it for a backsplash.
This grade that we have in front of us is exterior grade.
So it's going to be perfect for our application.
This board wants to get tucked up under these shingles.
This row of shingles is padded out.
So if rainwater comes down and runs down the face of this shingle, it's going to kick the water away from our work.
This cement board comes with a very specific screw, and if you don't use this screw, this board can crumble.
Will: Okay.
Mark: So go with the manufacturer's suggestion.
Alright.
So, Will, watch this.
See my hand?
So a lot of dust.
So there are two reasons we want to wash this board off.
Obviously the dust that we just saw.
Will: Yep.
Mark: But don't forget this board wants to suck a lot of water out of our mix.
So before we put the mix on, we're going to hydrate this wall as we clean it.
So what we're going to do is take this sponge.
I have a bucket of water right here.
And we're going to hydrate the wall just like that.
Will: Perfect.
Mark: Yep.
And to my point, you can already see the -- the board taking the water in.
The way that I match color and mortar is I actually try to extract a piece of the original material and I'll analyze what they used.
We've talked about it before.
This is a lime-based mortar.
Will: Yep.
Mark: This is a Portland-based mortar.
Now, the outside face of this has been weathered over a 100-year period by Mother Nature.
Will: Okay.
Mark: And that's what we're going to try to replicate today.
Will: And can we use a dye to match the color?
Mark: So I'm not a big fan of dyeing the mortar.
The number-one reason for that is that it doesn't mimic the weathering that Mother Nature provides for us.
So we're going to go with original materials, let Mother Nature do her thing, and eventually we'll get the exact color match.
Will: Sounds great.
Mark: Alright.
So, Will, I'm going to take this trowel.
Will: Yep.
Mark: This is a long -- This is what we call a pool trowel.
The round edges are going to let me get into places that a square edge wouldn't let me get into.
Will: Got it.
Mark: Just wanted to let you know what's in this mix.
Will: Okay.
Mark: Portland cement, sand, water.
And we actually have a bonding agent already in the mix.
Will: Perfect.
And how does this differ than what you would use for bricks?
Mark: It's a great question.
This is way too loose to lay brick in, but it's going to be perfect for stucco because we want to push this stuff around, and loose mortar is going to let us do that.
Now, this is a fiber mesh tape.
It's actually fiberglass.
It's the same type of tape that's used in the cement board.
Will: Okay.
Mark: So very compatible.
So we know that this is a concrete pier over here.
We know this is cement board.
We know there's a joint there.
This tape is going to bridge that joint.
And if we do experience any movement over time, this is what's going to help us out.
This is going to save us.
Will: Great.
Mark: So I like to stick the tape on just as you see it.
And then I bury the tape.
Will: Nice.
Mark: Alright, Will, so final stage.
We've let this set up enough.
Uh, in between waiting for this to set up, we got a bunch of rain.
Will: Yep.
Mark: We're okay now though.
So all we're going to do is take our sponge and we're going to spin it just like this.
Will: And how much pressure do you want to apply?
Mark: Zero pressure.
Will: Okay.
Mark: Okay.
You really want to go light.
And you can see this right here, Will.
Will: Yep.
Mark: So that's a valley.
Will: Yeah.
Mark: And that's -- we're going to just keep spinning on that until we lose that valley.
Will: Cool.
Mark: We lost it.
I'm getting off it.
I'm moving over here.
See the valleys?
Will: Yep.
Mark: Now you don't.
Right?
Will: Yeah.
And now they're gone.
Mark: And now you're gone.
Looks good, Will.
Will: Really satisfying.
Mark: Yeah, I know.
I know.
Will: See the texture come up.
Mark: Yes.
I love the flatness, believe it or not.
That's my favorite part.
Because it's not so easy to get it as flat as it needs to be.
Will: Right.
Mark: It's looking great.
Will: Yep.
Mark: Alright, Will, what do you think?
Will: Looks outstanding.
What a difference.
Mark: Great.
Glad you're happy.
So we did correct a bunch of problems here.
Okay?
Not just the stucco.
Will: Okay.
Mark: The water pipe that's coming down the drain -- We redirected that into this pipe.
I know you're going to do a new driveway at one point.
These two gutters here and this pipe are going to go underground when the time arises.
Will: Okay.
Mark: You can see this was our original problem, this downspout over here.
Will: Mm-hmm.
Mark: All we did was a simple redirection.
That problem is corrected.
The only other little bit of homework that I'm going to have you do is hydrate this wall.
Will: Okay.
Mark: So tonight you're probably going to be all set, but tomorrow you're going to want to get out here and just dampen this wall as needed.
So throughout the day, if it looks dry, hit it with water.
Maybe do that the next day as well.
But other than that, you should be all set.
Will: Awesome.
Mark: Alright?
Will: Thank you, Mark.
Appreciate your help with this.
Mark: Yeah.
Right back at you.
You were great today.
♪ ♪ Kevin: Next time on "Ask This Old House"... Ross: We got some smart glass.
Man: Okay.
Wonderful.
Kevin: ...Ross presents a smart solution to a homeowner looking for some privacy in his bathroom.
Man: I'm excited.
This one right here.
Ross: Wall switch right there.
Man: Alright, here we go.
Look at that.
That's awesome.
Kevin: Then Jenn travels to the southwest to add some structural plants to a homeowner's landscape.
Woman: Wow, Jenn, this looks amazing.
Kevin: All that on "Ask This Old House."
















Support for PBS provided by:
Funding for Ask This Old House is provided by The Home Depot and Renewal By Andersen.