E7 | Seabees, Paint Galvanized Railing | Ask This Old House
Season 24 Episode 7 | 23m 42sVideo has Closed Captions
Nathan visits a Navy Seabees base; all about trailer hitches; repaint galvanized railing.
Nathan Gilbert travels to a Mississippi Navy Seabees base, where he learned carpentry as part of his naval training, to see how they are continuing to train the next generation of tradespeople; Tom Silva walks Kevin O'Connor through different types of trailer hitches, their uses, and what to consider for safe towing; Mauro Henrique helps a homeowner repaint her peeling galvanized stair railing.
Problems playing video? | Closed Captioning Feedback
Problems playing video? | Closed Captioning Feedback
Funding for Ask This Old House is provided by The Home Depot, Renewal By Andersen, and ChipDrop.
Support provided by:


E7 | Seabees, Paint Galvanized Railing | Ask This Old House
Season 24 Episode 7 | 23m 42sVideo has Closed Captions
Nathan Gilbert travels to a Mississippi Navy Seabees base, where he learned carpentry as part of his naval training, to see how they are continuing to train the next generation of tradespeople; Tom Silva walks Kevin O'Connor through different types of trailer hitches, their uses, and what to consider for safe towing; Mauro Henrique helps a homeowner repaint her peeling galvanized stair railing.
Problems playing video? | Closed Captioning Feedback
How to Watch Ask This Old House
Ask This Old House is available to stream on pbs.org and the free PBS App, available on iPhone, Apple TV, Android TV, Android smartphones, Amazon Fire TV, Amazon Fire Tablet, Roku, Samsung Smart TV, and Vizio.
Keep Exploring

This Old House Insider Newsletter
Get This Old House exclusive stories, tips, and behind-the-scenes information delivered right to your inbox every month.Providing Support for PBS.org
Learn Moreabout PBS online sponsorship♪♪ Kevin: On "Ask This Old House," Our experts travel across the country to answer questions about your house.
♪♪ Today, Nathan takes a trip down memory lane, visiting the Navy Seabees in Gulfport, Mississippi, to see what has changed since he left.
Then Tommy talks about hitches, the various parts, and how to properly attach them to a trailer... and Mauro helps a homeowner fix peeling paint on her galvanized steel railings... Mauro: See how nice and easy that goes?
Kevin: ...on "Ask This Old House."
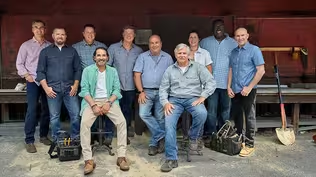
♪♪ Nathan: A major part of my training as a builder came from my time in the Navy Seabees.
I grew up listening to my father and grandfather tell stories about their time in the Seabees, and I knew when I got old enough I definitely wanted to enlist.
I spent five years in the Seabees, but today I'm heading back to Gulfport, Mississippi, to see how the Navy is training the next generation of tradespeople.
Good morning, ma'am.
Ana: Hey, good morning Nathan.
Nathan: Nice to meet you.
Ana: Nice to meet you as well.
Nathan: Master Chief.
Good to see you again.
Blue: Good to see you again, Nathan.
Nathan: Sir.
Nice to meet you.
Johncock: Nice to meet you.
Nathan: Well, it's good to be back.
I called Gulfport home from 2009 to 2014, and I got the opportunity to deploy three times -- Afghanistan, Djibouti, Africa, and Timor-Leste -- and each time I came back to Gulfport and I called it home.
I had a great time, but I needed to know -- has anything changed with the Seabees?
Ana: Absolutely not.
Seabees are still globally deployed all over the world to some of the same places that you just mentioned.
And, you know, our forces are really the construction arm for the Navy.
We're able to do horizontal construction, vertical construction, specialized construction, even some underwater construction anywhere that the nation needs us to do it, whether that's humanitarian relief, disaster relief, or doing some expeditionary construction to support the maneuver of our forces.
Nathan: It's funny, you know, you talked about the training and how perfect it is.
That actually followed along with me in life.
After leaving the Seabees, I was really well prepared for the trades, right?
Right back into it, doing carpentry with my father back home.
But a lot of my friends that were Seabees got out as well, and all entered the trades.
So I think it's paying dividends later for the civilian life.
Ana: Absolutely.
Blue: Yeah.
Nathan: So how are the sailors doing today?
Johncock: Oh, sailors are doing great.
Two parts of the schoolhouse.
Sailor finishes boot camp, they come to NCTC Gulfport to learn their initial construction skill sets.
Here we focus on builder and steelworker.
And then also later in their career, they'll come back to really hit a journeyman level skill training in their craft.
Nathan: Oh, very nice.
And so Seabee, we all know it.
But what does the CB stand for?
Blue: CB initially stood for Construction Battalion.
Nathan: Mhm.
Blue: But we've been in the Navy, did a play on words.
"C," as in the sea.
Nathan: Yeah.
Blue: And we put the bee on it, so we're Seabees.
Nathan: Creating that iconic logo.
Blue: Yes.
Nathan: Yes.
And another important thing, the discipline.
How's the discipline here at the A School?
Blue: The Seabee chiefs, we are responsible for good order and discipline and we're making sure it's maintained at every level.
Nathan.
I'm glad to hear it, but I also want to see it.
Do you have anyone that could show me around?
Johncock: I do.
Let me introduce you to Senior Chief Bryant.
He can show you around the campus.
Nathan: Nice to meet you, Senior Chief.
Bryant: Nice to meet you, Nathan.
Nathan: Head out and go take a look?
Bryant: Absolutely.
Nathan: Alright.
Thank you, everyone, for your time.
♪♪ Bryant: Alright, Nathan, welcome back to A School.
Nathan: It's good to be back.
Bryant: So, as Commander Johncock was talking about before, the students will come here.
And really, what we're trying to focus on is that foundational level knowledge starting at the basics of math, moving into some terms and definitions, going over concrete and masonry, floors, walls and stairs, and moving on to next phases where students can actually apply those skills that they've learned in the classroom.
Nathan: So it's really operating like a modern-day trade school.
The kids are getting the exposure in the classroom and then in the lab.
Bryant: It is, all the way through.
Nathan: What kind of skill set are you seeing sailors show up with these days?
Bryant: For the most part, zero.
Nathan: Uh-oh.
Bryant: They come in with none.
And really, that's where we have our training geared towards, for students who have no background knowledge in the trades.
We start them at the bottom and bring them all the way up.
Nathan: Awesome.
Can we check out our classroom?
Bryant: Absolutely.
Let's go.
Nathan: Alright.
Bryant: Good afternoon, Mr.
Coombe.
Man: Good afternoon, sir.
Bryant: Hey, how's it going?
Mr.
Coombe, this is Nathan.
Nathan: Nice to meet you.
Bryant: Mr.
Coombe is our lead instructor, and BU Henry is our instructor supervisor.
Nathan: Nice to meet you guys.
What are you guys learning today?
John: Today they're in the classroom setting, learning some concrete.
Nathan: Alright.
Concrete.
John: Yes, sir.
Nathan: What do you guys like more -- the time in the classroom or the time in the lab?
Together: Lab time, sir.
Nathan: Very good, I agree.
John: This class is pretty lucky because they get to actually place some permanent concrete here at the schoolhouse that's going to be here for years to come.
Nathan: Oh, awesome.
John: So after they're done with that, we'll move on to a masonry lab and they'll go out and place some block and then get into some light framing.
Nathan: That sounds good.
Can I take a look at the lab?
John: Yes, sir.
Let's go.
Nathan: Alright.
Nice to meet you guys.
Together: Thank you, sir.
Nathan: Hooyah.
Together: Hooyah!
Bryant: Alright, Nathan, welcome back to the B phase lab.
When we were in the classroom, we talked about forming and reinforcing.
You can see a mock up here that the students can come in, take a look at it, and understand what it's supposed to look like when it's fully constructed.
Nathan: Looking good.
And this group's well on their way over here, huh?
John: Oh.
Yes, sir.
So once they complete A phase and move over here to our B phase labs, where the foundations they just learned how to construct are already here placed for them.
So they'll move in, they'll learn how to build the lines out, as well as start framing out a floor.
So from there, they'll move on to their walls.
Four students per house.
There'll be two windows and two doors.
Nathan: And where do they go from here?
John: From there they'll do a little bit of shingle work, some rolled asphalt, and they'll move on to the interior phase.
Nathan: It sounds like the best part.
John: Yes, sir.
♪♪ Nathan: So how many students are going through the school every year?
Bryant: We push through about 4,000 students a year of Army, Navy and Air Force at the entry and advanced level.
Nathan: That's a lot.
Bryant: Yeah.
Nathan: So I'm sure you know there's a huge hole in the skilled trades.
There's a lot of kids that are needed and a lot of old people getting out, and they need that young force to come in.
And I know that you're setting these kids up not only for the success in the military, but also success later on if they choose to join the trades.
Bryant: Absolutely.
Nathan: And I know we could use them.
Bryant: Yeah.
Nathan: So, thank you for everything.
Bryant: Thank you very much.
Nathan: Good to meet you and good to be back.
Bryant: Glad to have you back.
Blue: One more thing.
Nathan: What is this?
Blue: Hey.
So we want to -- We've served together.
Nathan: Oh, yes.
Absolutely, Master Chief.
Blue: We just wanted to highlight some things.
Nathan: Oh, yeah.
Blue: Crews' book from 74.
Nathan: Oh, yeah.
Blue: And who is this fella right here?
Nathan: Oh, geez.
That looks like a BU3 Gilbert right there.
Oh, that's awesome.
Blue: So, man, it was a pleasure serving with you.
Nathan: It was a pleasure to see you.
Blue: And thank you for coming back and highlighting what we do in the Seabees.
Nathan: Thank you, Master Chief.
Good to see you again.
Blue: You too, brother.
Bye.
Nathan: Take care.
Bye, guys.
Bryant: Bye.
Kevin: Oh, Pops, look at you.
You are in your happy place, aren't you?
Tom: I love towing trailers.
Kevin: You are trailering something all the time.
Every time I see you, you're dragging something behind you.
Tom: So trailers are so great.
You take everything you want.
Even if you don't need it, you got it with you.
Kevin: Alright.
So I'm not much of a trailer guy.
Uh, I suspect a lot of people maybe try, don't really know.
Walk us through what I need to know to trailer something.
Tom: Well, if you're going to trailer something, let's say you're going to rent a trailer and you want to be able to carry some stuff, move some furniture, whatever.
Kevin: Yeah.
Tom: First thing you have to know is what size the trailer is and what its capabilities are.
And on the trailer, you'll see one of these, and this is what hooks to the vehicle.
Kevin: Okay.
Tom: Alright?
So basically this one here is rated right here.
The ball size is 1-7/8", and it has a capacity of 2,000 pounds.
Kevin: And is that 2,000 pounds the weight of the trailer or is it the weight of the trailer when you put all your stuff in it?
Tom: It's the weight of the trailer with everything that you put in it total.
Kevin: Okay.
Tom: Alright?
Kevin: So when you've got something like this, says here tongue, is this called a tongue?
Tom: Yeah.
Kevin: So when you've got a tongue, the tongue will tell you because it's on the trailer... Tom: Yeah.
Kevin: ...what do you need, and it's going to tell you this ball size?
Tom: It's going to tell you the ball size.
Kevin: So 1-7/8".
Tom: 1-7/8".
So now we take -- This would be on your truck.
You put that down, and you lock it in.
Alright, now the trailer is connected to the vehicle.
Kevin: Okay.
Tom: So now pull that off.
Kevin: How's that?
Tom: I got a little cross section right there.
I'll show you what it's like.
Kevin: Oh!
Does Richard know you made a cutaway?
Tom: [ Chuckles ] Yeah.
No.
Alright.
Kevin: So this one here says two inches.
Tom: This is two inches.
So this is an inch and 7/8 ball.
So when I put this in there and lock it down.
Kevin: Oops.
Hang on.
Yeah.
Tom: Alright.
It's too floppy.
Believe it or not, you'll hear it and feel it when you're towing the vehicle.
Kevin: Small ball problem.
Tom: Yep.
So take it out, and put this right size in.
Lock it in.
Now that's in there good.
So it rotates, turns when you're going to turn the trailer, but it doesn't come out.
Kevin: Very nice.
Tom: Pick that up, and obviously... Kevin: Yes.
Tom: ...you know... Kevin: Big ball problem.
Tom: ...that you can't use that.
Kevin: Not going to work.
Okay.
Tom: So it's a no brainer.
Once you get the trailer that you're going to either rent or buy, you establish the fact that it needs a 2-5/16".
Kevin: 2-5/16".
Very nice.
Tom: Right.
Kevin: Okay.
And then so the balls, these are threaded with nuts and washers.
Tom: And a lock washer.
Very important that you have a lock washer.
Kevin: They come and go off of this thing.
Now this one here has got balls and they're welded to it.
I presume the idea here is that one... What's this called?
Tom: The shaft.
Kevin: Shaft.
So one shaft gets you three balls and just spin it.
Tom: And a hook to whatever you want to do with it.
Kevin: So shaft goes into -- What's the thing on the...?
Tom: The receiver, yep.
Kevin: The receiver.
Different dimensions here?
Tom: Yeah.
Different dimensions.
There's different dimensions that you want to make sure you match that up with whatever vehicle you have.
And then basically again you want to match the ball size just by rotating it and lock it in place with a pin.
Kevin: So in this case, the ball is sitting in line or right flat on the shaft.
Tom: Yep.
And you want to know that size, but you really want to know how high the trailer is off the ground.
And when I say the trailer, you want to know how high the trailer is when you set it at the place that it wants to be.
You don't want the trailer to be level.
You want it to be up just a little bit.
Then once it's set, you lower or raise the trailer, lay it, roll it down to get it where you want it to be.
Then you take and you measure from under here to the ground.
That's the height that you have to match with your receiver and your shaft.
Kevin: And do I want them to be aligned?
Is this a no no?
Tom: That's a no no, and this is a no no.
This and no.
Yeah.
Wave to each other.
Basically, if it's up and straight, the trailer is going to pull better.
Kevin: Right.
Tom: If it's down, it's going to really roll when you go over 50.
Kevin: So something like this, you could have a trailer that could be properly in line but higher than you have for your truck.
Tom: Right.
Kevin: That's what these are for?
Tom: So what you have to do is get a drop like this or a lift.
Kevin: Oh, so these little curves right here get you what?
To raise it up or lower it down?
Tom: Raise it up.
Another one right here goes down.
Alright?
So if that was the height from the ground to the truck or so on down the line, or this was the height that you needed from the ground.
And they have a lot, a lot of different variables in between all of these -- higher or lower or closer.
Kevin: You flipped yours over.
Can I flip this over as well?
Tom: Absolutely.
Kevin: So this could be used as a drop or a rise?
Tom: Exactly.
Kevin: Very nice.
Okay.
Wow.
That's clever.
A lot to know.
Tom: Yeah.
Now, this one right here has got the three balls.
It's adjustable so you can spin it to the one that you want.
Kevin: Oh.
Tom: Okay?
So you don't have to worry about changing the ball.
Okay, now the other thing is, is it's also adjustable up and down.
Kevin: I'll hold it for you.
Tom: So if I pull this pin... Now watch your fingers there 'cause you normally want to do this on the vehicle.
Kevin: Right.
Tom: Okay.
So now you can raise that up, or you can bring it down, or I can flip it over... Kevin: Over.
Tom: ...and get it up higher... Kevin: Up here.
Tom: ...or lower.
Kevin: Down here.
Tom: Right.
And so that you don't walk into it... We got to flip it back down.
Kevin: Right down.
Tom: Oh.
Right down.
It'll flip right under, and it will hide right under your vehicle and you won't run into it with your leg.
Kevin: Oh.
Have you ever done that?
Tom: Oh, yeah.
Many times.
Many times.
And it hurts.
Kevin: Oh, so this is the mack daddy right here?
Tom: Yep, yep.
Kevin: One thing could eliminate six or seven of these things.
Tom: Right.
And if you tow a lot, then you want something like this, because you don't want to take the time to basically change the ball to fit a different size trailer.
Kevin: Beautiful.
Tom: Now, the other thing you have to start thinking about is how you're going to activate the lights on the trailer.
Kevin: So the lights that I want on the trailer, I presume the running lights and brakes so that the guy behind you... Tom: Yeah, you definitely need to have running lights, but you definitely want brake lights because you don't want anybody running into you, and directional.
So you have to look about what kind of plug comes with the trailer.
Kevin: Uh-huh.
Tom: Sometimes it might be simply like this, four pins, or you might get one like this, which is seven pins.
Alright?
Now the four pins are going to give you the basics -- right, left, lights, and brake lights.
Kevin: And the seven pins?
Tom: The seven pins are going to give you right, left, ground, it's going to give you a braking capability because the trailer requires brakes.
You're going to need power to go back to power the brakes.
Kevin: So brakes on the trailer wheels in addition to brakes on the pickup wheels.
Tom: Yeah, and the trailer could have brakes on all four wheels or just on the front two wheels.
Kevin: Tap the brake pedal, it's going to activate those.
Tom: Right, and you adjust the brake controller in the truck in relationship to the weight of the trailer.
So if the trailer is empty, it's light, then your brake controller is way off.
But if you load it up and you got 5,000 pounds pushing the truck when you want to stop the car, you want to make sure that you get help by the brakes.
Kevin: Yeah, yeah, yeah.
Makes sense.
Tom: Alright?
Kevin: Okay.
Tom: So that's all important.
Kevin: Beautiful.
So... Tom: Oh, yeah.
One more thing.
So when I tow a lot to Florida, I may tow my boat, and I want to be able to lock the trailer to the vehicle when I stay over at night.
I don't want anybody taking the trailer and unhooking it.
So basically, this is a lock.
You can put this pin through in place of this pin.
That stays on it.
And then you have this mechanism right here.
Take a little key, put it in there.
Turn the lock, and they can't take this out.
They can't remove the boat.
Kevin: So this never comes off of the car.
Tom: Right.
Kevin: The trailer can't -- Ahh.
Clever.
Tom: Yeah.
Yeah.
So it just makes it a little harder.
If they really want it, I suppose they'd take it.
Kevin: Got it.
Tom: Yeah.
Kevin: Wow.
So this one really helps.
Um, it begs the question, what's this mack daddy right here?
Tom: Alright, so if you tow a lot and you tow heavy trailers... Kevin: Like you.
Tom: Yeah, well, basically, when you drive over the road, you can feel the trailer in there.
And if you're on a bumpy road, it can be jerky.
Kevin: Okay.
Tom: So you want something that's going to smooth that out.
This bad boy right here has torsion suspension in it.
Alright?
Kevin: Oh, wow.
Tom: So when the truck goes up, this goes down.
This rotates, and there's a cushion in there to soften that jerkiness.
Kevin: Wow.
So this smooths out your ride.
Tom: It smooths out the ride.
Kevin: And then obviously it gives us the option for two different sized ball size.
Tom: Yeah.
Kevin: And we can stick the stem in different heights.
So low, medium to high.
Tom: Yeah.
You can adjust your height.
Kevin: So we got to tow this out of here.
I can only imagine which one you're going to choose.
Tom: Oh, we're going to put this one on because we want to be comfortable on our way back.
Kevin: Alright, I got it.
Tom: It's a little heavy.
Kevin: Oh, I don't got it.
Tom: Yeah.
See?
Kevin: Two people.
It's a two-man-er.
♪♪ Dawn: Hi.
Mauro: Hi, Dawn.
Dawn: Yeah.
So glad you could come over, Mauro.
Mauro: Nice to meet you.
Alright, let's talk about... Is this the railings you wrote me about?
Dawn: It is.
Mauro: Okay.
Dawn: We had it installed about five years ago.
He galvanized and then painted it.
Things were really great for about a year, but then we started noticing blisters and then the paint started blowing off.
Mauro: Did you ever contact the manufacturer about this?
Dawn: We tried, but he had gone out of business.
Do you have any ideas as to why it did this?
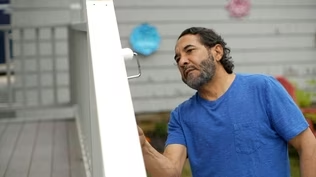
Mauro: Well, galvanized steel is an excellent option for railings, especially for the outdoors.
But there's one thing -- I think it happened here -- it was not prepped right, or they might be using the wrong paint for that.
There's only one way we can fix this up.
We're going to have to strip down the whole thing, clean it really well, and then apply the right paint on it.
It's going to be a little bit of work, but we can do it.
Are you ready to go?
Dawn: Yes.
Let's do it.
Mauro: Got some tools.
You and I go to work.
Dawn: Okay.
♪♪ Mauro: Well, we're all prepped.
We got the hats.
Now it's time to prep the stairs.
We're going to use the drop cloths to protect the landing and the steps.
And I also have this plastic with tape and also a cutter that we're going to put against the wall there to protect it, and also on both sides of the stairs.
♪♪ Alright.
Here's what we have we.
Have different tools, different sizes, okay?
We're going to get with this little putty knife.
All we have to do is push this right underneath the paint and take us as much as you can.
See how nice and easy that goes?
Look.
Dawn: Wow.
It's going to come off easier than I thought.
Mauro: I hope the whole thing is like this.
Dawn: So once we do that, what's next?
Mauro: Alright.
For the ones that we can use this putty knife, it's fine to do it, but for the harder surface, we might have to scrape.
Okay, let's go to work.
Dawn: Sounds good.
Mauro: Let's take this small one.
I'll take the big one.
♪♪ ♪♪ Alright.
Very good tip for you.
For the balusters, one easy way to remove the paint faster is breaking the edges first.
Just like this.
Alright.
Now look at this.
Dawn: Wouldn't it be easier just to use a sander on this?
Mauro: Well, it would be easier, but, you know, we got a much easier way to do it with just a putty knife.
Uh, and also, sander will damage the zinc coating on this metal.
♪♪ Dawn: So is there an easier way to get some of these sticky parts off?
Mauro: Yes, you can have your, uh, your tool here, and just give it a little tap and comes right off.
Alright?
Check this out.
♪♪ ♪♪ Alright, Dawn, this looks really good.
On to the next.
♪♪ Oh, I think we're all set.
Let's clean up, pick up the drop cloths, and get ready for the next step.
Dawn: What is the next step?
Mauro: The next step is clean it up, and what we have here is denatured alcohol, a light scrub pad to remove any residue, and we'll be ready to paint.
Just soak it in.
Just go very light.
Just like that.
Dawn: Why do you use denatured alcohol?
Mauro: Because it cleans better and evaporates and dries faster.
[ Gentle scraping ] Next step, we're going to apply one coat of primer.
Dawn: Why are you going to prime?
Dawn: Well, I like to do three coats process -- one primer and two finish coats.
I also add an extra protection.
Okay?
Dawn: Would you ever consider spraying?
Mauro: I would in another situation, but when I look at the front of the house, you got a beautiful garden on both sides of the stairs, and the stairs are attached to the house.
A lot of protection to do at this time protecting those beautiful flowers, not a good idea.
But we're also going to use a quarter-inch nap that will give us a nice and smooth finish throughout the process.
Let's do it.
Dawn: Sounds good.
Mauro: Alright.
I want you to carry that.
We're going to start from the top.
Here's what we're going to do.
We're going to put enough paint on your roller.
Alright.
And then you're just going to go nice and smooth in one long stroke.
Don't stop and go.
Just go all the way up there and then come back.
If you see a spot that you missed, just go up there and fill it in.
Dawn: Okay.
Mauro: And even the small areas like this you can do with the brush.
♪♪ See, when you see a drip like that... Dawn: Yes.
Mauro: ...just roll it up, all the way down.
That's good.
♪♪ Alright.
Primer is all set.
It needs about an hour to dry.
We'll come back, and we'll apply the first coat.
Dawn: Why is it such a strange color?
Mauro: Well, it looks like green, but once we put on, it will become black.
Dawn: But what kind of paint are we using?
Mauro: We're going to use a DTM acrylic enamel.
Dawn: What does DTM stand for?
Mauro: DTM stands for Direct To Metal.
And the finish that we're going to use -- semi-gloss.
[ Chuckles ] You still don't believe this is going to turn black.
Right?
Dawn: I'm a doubter.
♪♪ Mauro: This is gonna look so nice.
Dawn: Yeah.
Mauro: Well, Dawn, what do you think?
Dawn: It's beautiful.
And I'm so glad it's black.
Mauro: Well, it's black, and we have two coats.
It's going to dry really nice, so you can enjoy and you can use the front door anytime after paint is dry.
Dawn: So when will I have to repaint it?
Mauro: Only when you decide to change the color.
Dawn: Oh, that's a relief.
Well, thank you so much for coming.
I never could have done it myself.
Mauro: It' my pleasure.
Looks good.
I was happy to help you out with this project.
It's nice and clean.
Enjoy.
And we'll see you on the next one.
Dawn: Thank you.
♪♪ ♪♪ Kevin: Next time on "Ask This Old House," Lee helps a homeowner regrade their lawn.
Man: She loves this.
Kevin: Then, do you lack a green thumb when it comes to houseplants?
Jenn gives some suggestions on low-maintenance plants... and Nathan helps a homeowner swap their hollow-core doors for solid ones.
♪♪ All that on "Ask This Old House."


- Home and How To

Hit the road in a classic car for a tour through Great Britain with two antiques experts.


Support for PBS provided by:
Funding for Ask This Old House is provided by The Home Depot, Renewal By Andersen, and ChipDrop.