E8 | Regrade Lawn, Solid Core Doors | Ask This Old House
Season 24 Episode 8 | 23m 42sVideo has Closed Captions
Regrading a yard; houseplants for any light level; replacing hollow core doors to solid.
Lee Gilliam helps a couple regrade their backyard to prevent water pooling and demonstrates ways to improve their lawn's health. Jenn Nawada showcases houseplants that thrive in direct sun, partial sun, or low light - proving there's a perfect plant for any space. Nathan Gilbert helps a homeowner replace his hollow core doors to solid core for improved durability, aesthetics, and soundproofing.
Problems playing video? | Closed Captioning Feedback
Problems playing video? | Closed Captioning Feedback
Funding for Ask This Old House is provided by The Home Depot, Renewal By Andersen, and ChipDrop.
Support provided by:


E8 | Regrade Lawn, Solid Core Doors | Ask This Old House
Season 24 Episode 8 | 23m 42sVideo has Closed Captions
Lee Gilliam helps a couple regrade their backyard to prevent water pooling and demonstrates ways to improve their lawn's health. Jenn Nawada showcases houseplants that thrive in direct sun, partial sun, or low light - proving there's a perfect plant for any space. Nathan Gilbert helps a homeowner replace his hollow core doors to solid core for improved durability, aesthetics, and soundproofing.
Problems playing video? | Closed Captioning Feedback
How to Watch Ask This Old House
Ask This Old House is available to stream on pbs.org and the free PBS App, available on iPhone, Apple TV, Android TV, Android smartphones, Amazon Fire TV, Amazon Fire Tablet, Roku, Samsung Smart TV, and Vizio.
Keep Exploring


This Old House Insider Newsletter
Get This Old House exclusive stories, tips, and behind-the-scenes information delivered right to your inbox every month.Providing Support for PBS.org
Learn Moreabout PBS online sponsorship♪♪ Kevin: On "Ask This Old House," our experts travel across the country to answer questions about your house.
♪♪ Today, Lee helps a homeowner regrade their lawn.
Matt: She loves this.
Kevin: Then, do you lack a green thumb when it comes to houseplants?
Jenn gives some suggestions on low-maintenance plants.
And Nathan helps a homeowner swap their hollow-core doors for solid ones.
♪♪ On "Ask This Old House."
♪♪ Lee: Hi, guys.
How you doing?
I'm Lee.
Matt: Hey.
It's Matt.
Nice to meet you.
Lee: Matt, nice to meet you, Matt.
How are you?
Brooke: Hi.
Brooke.
Nice to meet you.
And this is Violet.
Lee: Hi, Violet.
How are you today?
Yeah?
Brooke: Good.
Lee: Treats in there?
Matt: Got some snacks.
Lee: We got an e-mail, something about your yard.
Talk to me.
What's going on?
Matt: Yeah.
So, um, you can see we have a lot of, like, sloping and sort of uneven spots.
We've got some mud patches, and we got a lot of water pooling, like right around here, especially in the winter.
And with our daughter and our dogs, we spend a lot of time out here.
So we'd love to know what you can do to help us out.
Lee: Okay.
I'm looking at it right now.
Like, it's uneven.
So we could level that off.
And I think we should maybe clean it up, the thatching, let some oxygen get in there.
And then I also see some mossy areas.
So I think the pH is off, so we can try to fix that.
And then I'm looking at the canopy and I think it's probably shady in here.
Matt: Yeah, we get a lot of shade.
Lee: Grass likes a lot of sun.
So I think in the future we should probably prune this back.
But for now let's try to get, you know, what we need to do today and go from there, alright?
Matt: Okay.
Yeah.
I think that sounds great.
Lee: Alright, let's go to work.
Matt: Okay.
Lee: Alright.
Good.
♪♪ So, I got some rakes here.
And what we got to do is thatch out the lawn.
If you see in the lawn, it's got a lot of -- a lot of, like, sticks and leaves and all that stuff.
So we want to open that all up.
And I want the lawn to just breathe.
Okay?
So I'm going to hand you that one there.
What I want you to do is I like to go like a motion like this.
And see how that is?
Look at that.
Brooke: Okay.
So like making X's kind of?
Lee: Correct, and try to go backwards.
So we're bringing it back with us but we're opening it up.
Get that in there like that.
See how it's opening up?
Brooke: Yeah.
Lee: That's what we want.
This is choking out the lawn.
Look at this.
See?
Brooke: That's so crazy.
Lee: Yeah, look at that.
That's choking out your lawn.
Brooke: Choking out?
Is that what you call it?
Lee: Choking out, not getting any daylight in there.
So we want to clean all that up.
But there is an easier way.
Brooke: There is?
Lee: Yes.
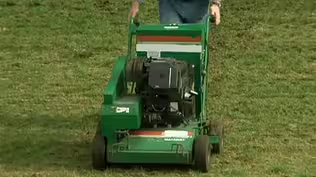
So there's a machine called a dethatcher.
And that will run up and down.
And it will do this better than what we're doing it.
Brooke: Alright.
Sounds good.
Lee: Alright.
Let's go get that.
This is a dethatcher, and you can rent these.
And here are the tines right here.
And they'll beat up the lawn and do what we want to do.
Save our arms, work a little smarter, not so hard.
Brooke: Yeah, I like that.
Lee: Alright.
We'll pull this off the truck and we'll get going.
Brooke: Good.
♪♪ ♪♪ ♪♪ Lee: What do you think?
Brooke: Beautiful table.
I love the color choices we have here.
Lee: Got some nice choices.
Brooke: Yeah.
Lee: So, over here, the first one, we're going to start off with some loam.
Brooke: Loam.
Lee: This is what we need for the base.
So we're going to put this down and we're going to get all the ruts done and make it all level.
And then over here... Brooke: Fancy rocks.
Lee: Yes, it looks like rocks, doesn't it?
But this is a limestone.
This is the lime we need to put down.
And then I have over here -- Brooke: Going to blue.
Lee: Look at this, huh?
Brooke: And this is grass seed?
Lee: This is grass seed.
The blue is a grass seed.
Brooke: Does it normally come in blue?
Lee: It does not.
This company coats the seed with the blue and it helps hold the moisture in the seed.
Brooke: Very cool.
Lee: But what I have here is I have a fescue and I have a Kentucky blue.
It's like a sun and shade mix because we got a little bit of shade.
Brooke: A lot of shade.
Lee: Yeah, I know.
And then over here we have starter fertilizer hat will help jump-start the seed.
And then a little trick I do is we cover it up with peat moss and that incubates it, keeps it nice and warm and holds the moisture.
So the seed will germinate.
Brooke: We forgot this bad boy.
Lee: Okay.
That is playground chips.
Brooke: Ah.
Lee: Okay?
We can't get everything coated with the lawn because it's got some shady areas and things like that.
So I said let's make a little playground area, and it's tumbled.
It's really good for the baby.
So she won't get any splinters or anything like that.
Brooke: Oh, perfect.
Yeah.
I love that idea.
Lee: I think we're ready.
Any other questions?
Brooke: No.
Lee: What do you think?
Brooke: Let's get started?
Lee: Alright.
Let's go.
Brooke: Alright.
Lee: To get started, we're going to level out the low and high spots in the yard with loam.
Shake it out.
Nice.
♪♪ Matt, now we're going to do some -- push it around.
Go from the top of it.
Just push it.
Matt: How do you tell when it's at sort of the level that you're looking for?
Lee: A little eyeball on it.
You know, you can see the lows and the valleys, but try this.
This is a leveling rake.
Let me have that one.
Try that.
Lay that on top.
Matt: Oh, look at that.
Lee: See how that -- It finds the level of the existing lawn.
Matt: Is it better to push or pull?
Lee: Both, back and forth.
See how it's finding the level?
Matt: Oh, yeah.
Nice.
Lee: Real nice job.
Sweat equity, my friend.
Sweat equity.
It's gonna pay off.
It's gonna look great.
Any chunks like this, just break them up.
Use the knife.
The forks.
That's it.
That's pretty good.
Matt: Rocks and stuff like that -- Do we have to worry about any of that, or is that...?
Lee: Yeah.
If you see one or two, throw them off to the side.
Yeah.
Perfect.
So now we're going to do is add some lime.
Matt: And what does lime do for the soil?
Lee: Lime is going to bring up pH.
Sweeten it up a little bit.
This level goes up and it will cascade out.
Just keep a nice steady pace.
Perfect.
Nice job.
Real nice job.
Let's increase it a little bit more.
We're around 10, so let's go to about 20.
Let's double it up.
22.
♪♪ Nice.
Here we go, Violet.
So here's your bucket, okay?
See the grass seed inside?
Can you throw some of that on the grass for me?
Good girl, good girl.
Nice job.
Matt: Good job!
Lee: Nice job.
In a small area like this, I'd rather do it by hand.
Matt: Yeah.
Lee: You can control it better.
♪♪ Matt: There you go.
Keep going.
Lee: Good job.
Matt: [ Laughs ] Lee: How's she doing?
Matt: She loves this.
Lee: I'm gonna give you a little bit more.
Matt: Okay.
Violet, we're gonna get a little bit more, okay?
Lee: Violet, you ready?
Here we go.
Look at that.
Matt: Ooh!
Lee: Get it?
♪♪ This is a leaf rake.
I don't want to pick up any of the material.
What I want to do is flip the rake upside down.
Okay?
And all I want to do is I want the seed to try to get contact with the soil.
So all's we're going to do is go like this.
That's pretty much it.
Matt: So just really lightly.
Lee: Yeah.
Really lightly topping it off.
Finishing it off.
Matt: Now, is this sort of put the seed sort of under the top layer of soil?
Lee: Exactly.
That's what you want.
But then we're gonna -- I got one more step we're going to do and then that will finalize it.
♪♪ We're going to throw some peat moss down, okay?
Matt: Alright.
Lee: And this is going to cover the seed.
But I need you to keep it wet after we get it down because it's kind of light and fluffy.
So I don't want the wind to blow it off.
So all's I'm gonna do is throw it down like this, and we're gonna cover the yard.
Try to keep it low, because -- See how dusty it is?
Matt: Yeah.
Lee: Yeah, and we got a windy day today.
Matt: And then do you rake this also, or is this -- Lee: Nope.
This is it.
This is the final step.
Matt: Oh, okay.
Cool.
Lee: All's we're going to do is water it.
All's we got left is to spread those playground chips.
Matt: Just push them all over the place here.
Brooke: Good job.
Matt: This will be nice for when you're on your swing.
Lee: Okay.
I think Violet's going to do the watering.
What do you guys think?
Brooke: I love it.
I'm so excited.
It's so level now.
Lee: Yeah.
Water every day.
Alright?
If you can get twice a day, that'd be great.
We'll see you soon.
Brooke: Thank you so much.
Lee: We'll talk to you guys.
Brooke: Violet, can you say thank you?
Lee: Bye, Violet.
We'll see you later.
Violet: Bye-bye.
Lee: Bye-bye.
Matt: Say bye-bye.
Brooke: Watch out.
♪♪ ♪♪ Kevin: Hey, Jenn.
Jenn: Hey, Kevin.
Kevin: More beautiful plants and a beautiful place.
What are we talking about today?
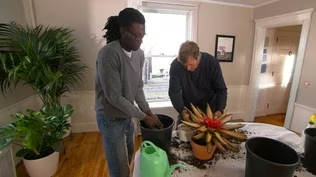
Jenn: We are talking about low-maintenance, high-light to low-light plants.
Kevin: I like the low-maintenance.
I got that, and then high-light to low-light is how much sunlight they need?
Jenn: Correct.
And so these are really all great beginner plants.
If you go to the nursery or your home center, just these are perfect ones to start with.
Kevin: So what are they?
Jenn: So these are high-light plants, meaning like bright sunlight.
They want six hours of light.
We've got a cactus here.
This one is a zebra plant, and this one is aloe.
Kevin: Beautiful.
Okay.
And then moving down the line what have we got?
Jenn: This one is a ponytail palm.
And this one is a croton.
And they both require and do like a lot of light but not direct sunlight.
So indirect sunlight.
Kevin: So maybe these are sitting on the windowsill getting blasted.
Maybe these are pulled inside on the dining room table or kitchen counter.
Jenn: Exactly.
Exactly.
They'll be happy, happy, happy there.
Kevin: But do they still want like that 6 to 8 hours of -- if you can get it?
Jenn: Yeah, it would make for a healthy plant.
Kevin: Alright.
So does that mean that these are sort of the lower light ones here?
Jenn: These are the lower light.
You know, you're in your college dorm room or... Kevin: I wish.
Oh, I wish.
Jenn: I know.
Me too.
Low-light plants.
This is a philodendron.
This is a ZZ plant.
This is a snake plant.
And that is a pothos.
Kevin: I don't know how you remember all these names.
Jenn: Well, it's kind of fun.
But -- And that's the thing.
Like, turn it into a game, get to know your plants, but -- Kevin: So when you say lower light, if that's direct, six hours or more, if that's indirect but bright six hours or more.
Where are we on the spectrum here?
Jenn: I would say between two and four hours.
Kevin: That's it?
Jenn: Yeah.
So they could really handle that very well.
You could put it in a corner.
Just it wants a little light.
Couple hours is good.
Kevin: Cool.
Alright, so in terms of keeping them alive, I got the sunlight part.
Talk to me about soil and watering and fertilizer.
Like, what do I have to think about?
Jenn: Great, great questions.
Okay, so for the full sun plants, the cactus and the zebra and the aloe, they like to be watered, but the water should drain through.
So when you're thinking of soil, you're going to want a chunky soil.
You want it to be very drainable.
You don't want any water to be retained in there.
Kevin: And in terms of draining, something like this, where you've got the pot, um, hole in the very bottom and you can see it pooling in the little tray.
You can dump it out.
What do you do if it's in a basin?
I presume this does not have holes in the bottom.
Jenn: Yeah.
This one does not have holes in the bottom.
Kevin: So what do you do in that case if you want -- Jenn: That's a great question because here's what I do.
I keep it in its original pot that it came in from the nursery, water it, let everything drain right out and then put it back in because you don't want it sitting in standing water.
You're just going to invite rot.
Kevin: Okay.
High-lights.
Without the direct sun, what do they get for water?
Jenn: So, the indirect sun and all the way down here, they all have a more organic soil matter.
Kevin: All of these?
Jenn: All of these.
Kevin: Okay.
Jenn: So this is going to be -- need -- in need of water before these because the sun is going to pull from them.
Right?
It'll evaporate.
Kevin: Makes sense.
Jenn: So I would say these are going to need water next.
And then these four you could probably water once a week.
Kevin: Am I trying to keep them moist?
Am I letting them dry out?
Is it... Jenn: You want to stick your finger in for a test.
You know, if the first inch is dry, then it's time for water.
Kevin: Oh, yeah.
Okay.
And so that's how you tell right there.
Jenn: Yep.
Kevin: [ Whispering ] This one needs water.
Jenn: [ Laughs ] Kevin: Okay.
And do they need fertilizer?
And if so, different amounts or different kinds based on...?
Jenn: Different amounts that you could use a water-soluble fertilizer for all of these.
Kevin: So it makes a concentrate in water.
Jenn: Yeah.
So you could read on the bottle okay, I have this size plant.
How many drops you put it in the watering can?
You water it, make sure it's a sufficient amount of water for the pot.
And they're all different ones.
Cactus, succulents are going to require different fertilizer than the rest of these.
So, you know, but it's written on the box water-soluble.
Easy.
Kevin: Alright.
Big question.
Jenn: Yeah?
Kevin: Guy like me gonna keep these alive in my house?
You looking at my thumbs?
Jenn: I think you might be okay with these.
Kevin: Alright, that's good to know.
Thank you, Jenn.
Jenn: You're welcome.
Kevin: It really needs water.
Jenn: Alright, let's go do it right now.
Kevin: How are you alive?
You're so dry.
♪♪ ♪♪ Nathan: Hey, Henrik.
Nice to meet you.
Let's go inside and take a look.
Henrik: Absolutely.
Welcome.
Nathan: Alright.
This is a beautiful home.
Henrik: Thank you so much.
Nathan: Have you been here long?
Henrik: Yes, about a year or so.
So, my wife and I have been doing a lot of renovation.
Mostly painting and then also including the doors and updating the hardware.
And we've come to realize that we really would like to explore exchanging or changing these hollow-core doors to something more solid for two main reasons.
One, just the feel of it, have something that feels a bit more solid.
And the second one is really around sound insulation if it's -- if it would reduce the sound coming obviously from the bathroom here.
We have an office/guest room here.
And also my daughter's bedroom is around the corner.
Nathan: So any sound-dampening would be a pro, right?
Henrik: Absolutely.
Nathan: Alright.
So you already called it out.
You got a hollow-core door here.
This is a six-panel.
We could go with a solid-core door.
We can go with a solid-wood door.
I think a solid core would be the way to go.
I'm happy to see you have three hinges on these interior doors, so that'll support the weight.
Well, um, I think we could even change the design if we wanted to.
You could go with a one-panel, a two-panel.
Definitely easy to swap out.
Want to show me the other door?
Henrik: Yep.
Absolutely.
So, this is the last door to my daughter's bedroom.
Nathan: Alright, let's take a look.
So we have the same hollow core.
[ Hollow thunk ] This is a six-panel.
Um, let's start off by measuring the door.
And there's kind of two different ways to approach it.
Right?
So I throw my tape on here and this is about 29 3/4.
In my terms I'd probably call this a 2-6 -- 2'6", 2-6 for the width.
And for the height for me, I'm going to call this a 6-6.
So I got a 2-6, 6-6 door.
But you could also work off of inches as well.
So there are some options when you go to buy a door.
You can get just the door slab itself, or you can get a door already hung on the jamb.
But if I get a prehung door, I'm going to have to pull the trim off both sides, right?
I'm going to be throwing away a perfectly good jamb.
Then I have to put the jamb in, shim it, trim it, paint it.
So there's a lot of extra work here just to change the door slab.
Would you want to change the style of this door at all?
Yeah, we've been thinking about the single-panel.
Single panel, one long single panel -- That would look sharp.
Alright.
To get started, I'm going to drive these pins out.
We're going to take this door over to the workbench.
Henrik: Let's do it.
Nathan: Alright.
Alright.
Let's get started by removing this handle here.
And then I'll take the hinges off.
So if you take that, just loosen those screws up and we'll put those parts aside.
♪♪ Let's pull that out.
♪♪ ♪♪ And alright, here's your door slab -- 2-6, 6-6, single panel, shaker style, solid core.
It's exactly what we needed.
Here's the old one.
Let's toss that on top.
So, I know that you have the bottom down there and I have the top up here.
So that's important to keep that in mind.
And as we look to the side here, you can see our old hinge locations.
Now that we have these stacked on top and they're flush, I'm going to transfer that mark down to there.
Henrik: Yep.
Nathan: And then over here, we'll bore this hole for the the lock set.
So we can kind of make a reference mark here.
Alright.
Let's remove this old one.
Just want to make sure we go back in the same spot as the old door because we want to reuse that existing Strike plate that's on the jamb side, so I'm setting up this jig here.
From the top down, I have about 43 3/16 to the top of my bore.
And then for the back set, we have -- check on the side here -- we got 2 3/8 for our back set, and that's the distance from the edge of the door to the center of the hole.
So what we're going to do, it's a hole saw.
But this is a pretty thick door -- inch and 3/8.
So we're going to go through as far as we can until the pilot pops out on the other side.
Henrik: Yep.
Nathan: And then we're going to flip it over and finish the cut from the other side so we don't get much blowout.
And we're going to do our best to stay nice and square.
Alright, I'm going to use a 1" hole saw bit to drill a hole here in the door for our latch bolt.
[ Drill whirring ] [ Vacuum whirring ] [ Drill whirring ] I'm gonna take this speed square here and I'm just going to line up the edge of that hinge there.
To make our lives a lot easier when we got to mortise these hinges into the door, I have a quick little door buck that I made outside.
So what we're going to do is bring the door over.
You're going to drop it in.
Come a little bit closer to me, because we're going to want these cedar shims to pinch on the high point of this door.
Take that, that, wedge that down into place.
And now we can work right here ways tight, instead of trying to work in front of our face.
Um, so for the hinges, you have a 3 1/2" hinge.
I have this little jig here.
It's actually a pretty affordable one, comes with different plates, so you can do different style hinges, different sizes, but really easy to use.
Has these little tabs here.
Push that against the edge.
And then we're going to go centered off of our reference mark, so a little bit on that side and that side.
So if you hold that right there for a second... [ Drill whirring ] [ Vacuum whirring ] Alright.
Nice fit.
Henrik: Perfect.
Nathan: Nice and flush.
Alright.
We'll do the next one.
[ Tools whirring ] Alright.
So here is one side of the hinge.
We're going to use this self-centering drill bit.
And we're just going to go right in the middle.
[ Drill whirring ] Push down, drill a hole.
Henrik: Okay.
Thank you.
Nathan: Grab your next hinge off that pile.
If you want to keep going, I'll follow behind you with the hinges.
Roll that up to you.
I'll go down.
I'll drive the pins in.
I'll start at the bottom.
Okay.
[ Tapping ] Right there.
Perfect.
Nice.
Henrik: Awesome.
Nathan: Alright.
Alright, now, let's put on our handle set here.
So let's start with this latch.
Okay.
So we have our locking handle set here.
So that's going to go on that side, right?
Henrik: Yep.
Nathan: Okay.
Inside there.
So, we always started by hand just to make sure that we get those threads in contact and we're not going to cross-thread anything.
Alright, I'll let you do the honors.
Henrik: Okay.
Perfect.
Nathan: Alright.
Let's give this one a test.
[ Door closes ] Nice.
Easy open, easy close, reveals are all good.
But a little bit of homework for you, alright?
Henrik: Okay.
Nathan: So they come with a coat of primer, but we did a little bit of woodworking around it.
So prime any of the cuts that we made and then two coats of finish and you're good to go.
Henrik: Perfect.
Two coats it is.
Nathan: Good luck.
Henrik: Thank you so much.
Everything looks amazing.
Nathan: You're welcome.
You're welcome.
♪♪ ♪♪ NARRATOR: Next time on "Ask This Old House," looking for ways to organize your garage?
Nathan helps a homeowner install overhead storage.
Then Heath shows how to install a three-way smart switch.
HEATH: We wanna pay attention to what wire is connected to this screw.
NARRATOR: And Richard gives a lesson on water heater maintenance by replacing an anode rod.
ROBERT: This awful one's even better than this one.
NARRATOR: All that on "Ask This Old House."


- Home and How To

Hit the road in a classic car for a tour through Great Britain with two antiques experts.


Support for PBS provided by:
Funding for Ask This Old House is provided by The Home Depot, Renewal By Andersen, and ChipDrop.