Game On - Chessboard
Season 16 Episode 1604 | 26m 44sVideo has Closed Captions
It's your move with this fun gameboard. Stow the pieces with some built-in storage.
It's your move with this fun gameboard. Stow the pieces with some built-in storage. Then learn how to make a set of distinctive pieces to play with.
Problems playing video? | Closed Captioning Feedback
Problems playing video? | Closed Captioning Feedback
Woodsmith Shop is presented by your local public television station.
Game On - Chessboard
Season 16 Episode 1604 | 26m 44sVideo has Closed Captions
It's your move with this fun gameboard. Stow the pieces with some built-in storage. Then learn how to make a set of distinctive pieces to play with.
Problems playing video? | Closed Captioning Feedback
Where to Watch Woodsmith Shop
Woodsmith Shop is available to stream on pbs.org and the PBS app.
Providing Support for PBS.org
Learn Moreabout PBS online sponsorship[ Power saw whirring ] [ Mid-tempo music plays ] It's time for a little fun on "The Woodsmith Shop."
For today's project, we're building a chess board.
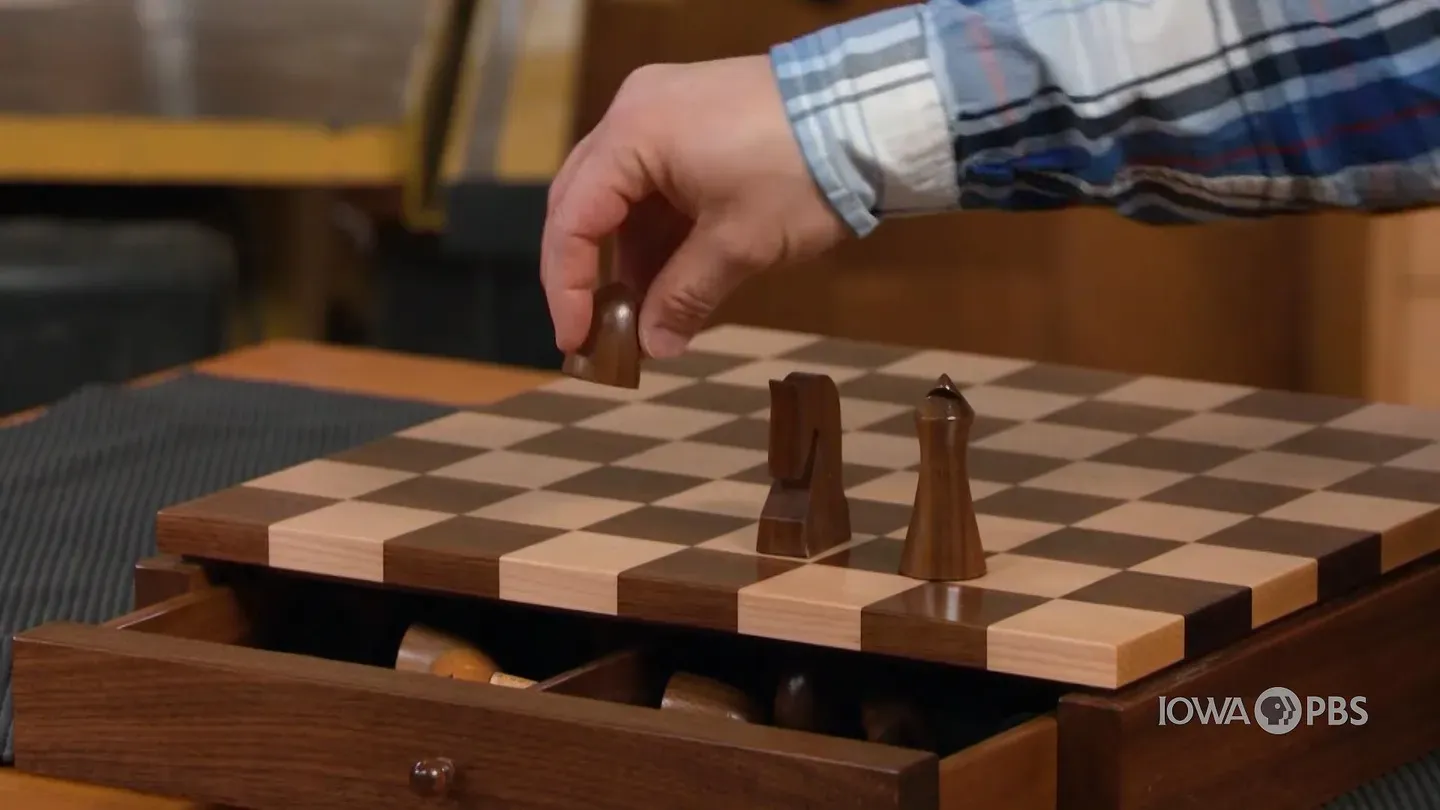
This chess board has a little bit more going for it than just a game surface.
We're making this one out of solid wood, no veneer here, but we've also included a modern-looking base and a drawer inside for the chess pieces.
Now, speaking of the chess pieces, we decided to make them ourselves.
That way, you'll have a custom set that matches your chess board.
Is going to be a little bit of turning involved.
But it's a great way to build those skills at the lathe.
It's all coming up on "The Woodsmith Shop."
Announcer: Major funding for "The Woodsmith Shop" has been provided by... Old Masters -- offering wood stains and finishes for the woodworking enthusiast and professional.
And by... Kreg -- from the first cut to the final assembly, providing woodworkers with products that help to simplify woodworking challenges.
Kreg.
Additional funding provided by... Tightbond Wood Glues -- the pro's advantage.
And by... ♪♪ ♪♪ [ Mid-tempo music plays ] ♪♪ ♪♪ You know, Chris, I think building a chess set is something that a lot of woodworkers aspire to, but a lot of them can get intimidated by all the parts and getting everything lined up, so can you walk us through kind of how you designed this and made it simple to build?
Yeah.
Well, there are a lot of parts to this.
But it is not intimidating, and it's not that hard to do.
So, three parts to our chess set.
First part -- that is going to be the base.
And the base here is a bit of precision joinery, but there aren't that many parts to it.
It's simple because this is a minimalist-styled chess set, so we're really making a break from the past and going for the clean, industrial, post-war look.
So we have a nice, simple frame.
There's a drawer here with two compartments to house all the pieces.
Floating on top of that frame and drawer is our chess board.
One thing I like about this chess set is, rather than veneer, it is all solid wood.
And to me, that has a more substantial feel, a more substantial look.
And I just like knowing no veneer, no superficiality.
It's all solid.
And on top of the chess board, we have all these pieces.
You know, what I like about these pieces and how you design them is they're very simple and they're very clean, and they don't require a ton of work to get them made.
For example, something like this knight is a simple, couple-minute job at the band saw, just some little cutting.
Now, the rest of these pieces do require some turning.
And even if you're not a super proficient turner, you'll be one [Chuckles] at the end of this.
But they're very simple to turn.
A lot of them have different steps involved -- turning, some cutting, maybe some cutting first and then turning them.
But once you get done with all the pieces, you'll have a nice-looking set.
Absolutely.
So you're definitely gonna learn some things making this chess set.
But it's very achievable, and it's a heck of a lot of fun.
And you'll be proud of your chess set when you're playing with a friend on some winter's night.
And you'll find this chess set where?
Our website -- WoodsmithShop.com.
So, Chris, I think you're gonna get us started with the base.
All right.
Today, we're building the minimalist chess set from Woodsmith.
So, where to start?
We have a drawer.
We'll hold off on that.
There's the chess-board top.
What we're gonna do first is deal with this bottom structure.
This bottom structure consists of two sides, a back, a sub-top, and a little piece of edging for the sub-top.
So, what we're gonna do first is we're gonna deal with our sides.
The operations that we need to do for the sides are... there is a stopped groove that is cut back here, which will house a tenon that's cut on the back here.
Also, we have a long groove that's cut, which will house a tenon that's formed on our sub-top.
After we're done with those two router-table operations, we'll go to the table saw, and I'm gonna cut a large rabbet on the inside of each of these sides.
And that rabbet is what houses our drawer.
So let's go to the router table and we'll start with this stopped groove.
Well, I've got the router table all set up to cut the stopped grooves that will house the tenons from the back.
There's a 1/4-inch router bed set up in this router table, and I've got a pair of lines set up on my fence.
And those are gonna help me out.
Because we're dealing with a right- and left-handed part, we need to make mirror images.
So my first task is going to be to drop my side onto the router bit, and then I'll push it all the way through using this scrap piece of MDF as a backer, which will help keep my side perpendicular to the fence.
Now, our second piece is going to be a little simpler.
I'll simply push that directly into the bit, stopping it at that line.
And so two mirror-image parts.
And when we're done with that, we'll have our two stopped grooves for the back, and we'll switch bits out, and we'll begin to work on a stopped groove for the sub-top.
So, what I have done, just as we did before, I've put a couple of lines on the face of the fence, and those are to help me reference where I need to drop and where I need to lift on these parts.
So, on this side here, I need to start back here and stop about here.
So, what I'm going to be doing on this first side is I'm going to plunge-cut at a line 1 3/4 inch.
And then I'll push my part to about this point, when I get to this line.
At that point, the bit will be inside this groove and I'll be able to take the whole part off.
The next step in creating our sides is going to be to make the large rabbet on the interior face of each of the sides.
And I'm going to do that in two steps.
The first step -- I'm going to run this part across, flat, over this dado blade, which is set 3/4 inch from the fence, 1/4 inch up.
And what that's going to do is establish a nice, clean ledge on our rabbet.
And that ledge is where the drawer rides.
Once I've done that, I'll put a sacrificial fence on the table saw, raise my blade up, and remove the rest of the stock.
Well, next up, we need to make the back of our case.
And what we need to do to make the back is to cut tenons on each end.
Those tenons are going to fit into this stopped groove.
After we get the tenons made, we're gonna need to cut a shoulder on the bottom of each of those tenons to allow a little bit of clearance for the stopped groove.
What we're going to do now is we're going to put in a plow on the top-inside edge of our back, and that plow will accept the tongue from the sub-top.
And to do that, that I've got an 1/8-inch bit in place, and I've got it set for a little over 1/4 inch in height.
Well, the last part for us to make in completing our case is the sub-top, and as you can see, I've drilled a lot of holes on this piece of plywood.
There's a counterbore and a through hole.
And what those are for is so that we can attach the chess board on top of this with some screws.
And the screws will have enough room to float so we can make amends to seasonal movement of the wood.
What I need to do right now is cut a rabbet on three sides of the sub-top, which will fit into those 1/8-inch grooves that we previously made our sides and our back.
Well, it's time to use a little glue.
I've got two sides, a back, and a sub-top, so we'll go ahead and get those glued together.
Afterwards, the next steps are going to be to add a small piece of trim on the front of our sub-top, and we're gonna cut a rabbet all the way around our case for a nice reveal when the chess board is applied.
It's time to start working on the drawer, which will contain the chess pieces.
The drawer itself is pretty simple.
It mimics the same construction techniques that we previously used on making the case.
So, let's start with the front of the drawer.
It has grooves cut here and here and here to accept tenons on these two sides and on the center divider.
The sides each have a groove cut in the back, which will accept a tenon from the back of the drawer.
And then there's a groove and a tenon for this divider to nest into the back.
The bottom of the drawer actually just sits in a simple rabbet, and the advantage of doing that is that gives us a little more depth for our chess pieces.
So, we're gonna start with the front of the drawer, and I'll show you how I have things set up.
As before, I have two layout lines -- one in front of and one in back of the router bit.
I have an 1/8-inch router bit in the machine right now.
So what I'll do, on one side, is I will drop my part onto the router bit and push all the way through.
On the other side, I'll go ahead and start my cut by pushing into it, and then I'll stop before it exits the other side, registering against that layout line.
And that'll take care of the two grooves for the tenons of my sides.
I'll then reset the height of my router bit, pull the fence back, and we'll take care of the center groove for the divider.
Well, as long as I've got that 1/8-inch router bit in our router table, I think I'm gonna go ahead and take care of the grooves on the sides, which will house the tenons from the back.
When I'm done with that, I'll take care of the groove in the back, which accepts the tenon from the center divider.
So, you know the drill of how we do this.
Pretty easy.
All right, next up, 3/8x1/8-inch tenons milled on the ends of the sides, and those are going to go into the front of our drawer.
So I've got a 1/2-inch router bit set up in the router table, up about 1/4 inch, out about 3/8.
And we should be all set.
Next up, we are cutting tenons on the back.
These tenons will go into the sides.
I've left my router bit the same height, but I've moved the fence forward so we only have 3/16 of exposure.
The center divider has a tenon that's centered on each end.
So when you take a little bit off of each side, of each end, I've got my router bit set up to take 1/16 inch of depth by about 3/16 deep, and that should leave me with a 1/8-inch wide centered tenon.
It's time to go ahead and cut the rabbet, which will seat the 1/4-inch plywood that forms the bottom of our drawer for all the old parts and pieces.
So, I've got a 1/4-inch rotter bit set up in my table here, and it's exposed 3/16 inch out, 1/4-inch deep -- same thickness as the plywood.
And I have some marks, front and back, like we've been doing.
So what I need to do is to carefully go ahead and start my cut inside from the end and then end it before it comes out the other side.
And I'll have to do that on most every part.
So this is one of those times where you want to pay attention, make some pencil marks, and don't screw up.
Well, here are our drawer parts, ready to glue up.
♪♪ ♪♪ And there we go.
So now it's just a matter of giving the glue a little time to dry.
And I think we'll be ready to put a knob on the front, make the chess board top, and turn all the different pieces.
The second stage in our chess-board project is making that playing surface.
Now, it's gonna consist of 64 different individual squares, but that's not how we're gonna get there.
Instead, what we're gonna do is work with longer strips of wood and start gluing those together and then cutting them apart.
But before we get ahead of ourselves, what you want to do is make sure that you have four strips of your two contrasting materials.
We're using hard maple for the lighter-colored squares and black walnut for the darker-colored squares.
The important thing here is that the strips are exactly the same width, so you want to rip your boards all at the same time.
And then you also want to make sure that they're planed to a consistent thickness.
This is gonna make flattening the playing surface a lot easier as we go along.
All right.
There we go.
We don't need a lot of clamping pressure.
We just need to bring the boards tight together so that we don't have any gaps between them and the joints are nice and flush.
We'll let this sit for about 45 minutes to an hour, then we'll head over to the table saw to do the next step.
I scraped off the remaining glue once that was dry and sanded the panel so that I have nice, clean, smooth surfaces on each side.
Now what we need to do is take our stripey panel here and turn it into something that looks a lot more like a chess board.
So the first thing to do is -- I used a miter gauge and squared up one end of the panel.
That evened out all the joints.
Now I need to cross-cut this panel into a series of smaller strips going against the grain.
What I want to do is set up the rip fence so that the strips that I'm creating are exactly the same width as the rip strips were.
So I'm using just a cut-off piece from the panel here as a physical gauge to set that rip fence.
Then we're gonna head back over to the workbench and do another glue-up.
When making rip cuts with a table saw, we all know that we should be using a push block.
However, push blocks tend to be an afterthought.
Usually, they're a piece of scrap that we've made into a push block.
Well, Bill O'Sullivan upped his game and made his ultimate push block.
Let me show it to you.
His push block is made out of a couple of layers of plywood, and the main handle has a sliding dovetail cut into it.
Onto that sliding dovetail, we have two different cleats.
The first cleat rides along the top of the work surface, and that's renewable.
That way, once it gets chewed up, if you cut into it, he can slide that off -- that sliding dovetail -- and put a new one on there.
And the back runner acts like a cleat.
And that's what pushes the work piece through the blade.
And that is affixed onto the sliding dovetail, and it has a knob that's installed into a threaded insert.
That way, you can adjust the depth for different thicknesses of material that you might be working with.
Overall, it's a push block that's gonna last a lifetime, and it's gonna give you safe, clean, accurate cuts.
[ Table saw whirring ] ♪♪ All right, after our session at the table saw, what we have is a series of eight cross-grain strips now.
So to go from this to a chess board, all we need to do is start alternating every other strip by just flipping it end-for-end.
What's important here when you're doing that is that your lower-right square is a light-colored square in order to be a regulation chess board.
Now we're ready to glue this together.
Now, in addition to keeping the surface flush as I tighten the clamps, I want to make sure that the edges of this panel are flush, as well, because otherwise we're going to have -- these glue lines are gonna be out of alignment and it's gonna look visually distracting.
All right, we'll let that set up and then clean it up and get ready to do some final details on here.
[ Sander whirring ] All right, going from a glued-up checkerboard to a finished game set here involved just a few final details.
What we did over at the router table is to install a chamfer bit, and we put just a slight chamfer on the edge of the board.
This did a couple of things for me.
First, and probably more importantly, is that it gives us a nice, crisp facet on here.
So once the finish goes on, that's gonna catch the light and add another level of visual interest.
The other thing that it did is I had a couple of little pieces of tear-out where the strips were cut apart, and that chamfer very neatly removed those items.
Now, the playing surface is attached to the case that Chris made with some round-head screws.
I think Chris talked about this earlier.
The round-head screws allow the top to expand and contract with seasonal changes in humidity, but still have a solid grip on the case itself.
So, with the top all put together, we can slide the drawer in.
And there you have it.
Now, at this stage, what you could do is find some really cool chess pieces, buy them, and you can start playing.
But you'll notice in the plans available at WoodsmithShop.com, we have the drawings for making your own chess pieces at the lathe, and Logan's gonna talk about that.
-So, now, with the base of the chess board complete, the only thing left to do is to take care of the chess pieces.
Now, of course, you could order a set, but this set here has some pretty basic turning, and it's pretty easy to make.
Now, there are a few oddities, the first being the pawns.
If you look at them from the top, they're kind of an oblong football shape.
But it's easy to do.
We'll spend a little time at the lathe, then cut them apart and glue them back together.
Next is the rook.
This is a nice, straight piece, very easy to turn, but the top of it does have the little cross detail with the hole to give it that castle look.
So I'll show you how to make that in a minute.
But first, I think we're gonna start with this guy.
That's the knight.
The knight requires no turning, but it does require a little bit of time at the band saw.
So let's go and head over there and start with the knight.
So, the first thing we need to do is size our stock for our knight, and I've done that here.
And I've also went ahead and printed off a pattern out of the plans and mounted it on top of the stock.
You'll see on the pattern, there's an area for a hole that's gonna define the horse's neck.
Now, I've went ahead and pre-drilled that already.
So now, at this point, we can go and cut this to shape.
I'm going to start by making the outside cuts of the knight, and that will create the shape of the horse's head.
Once that's done, I'm gonna go ahead and tape on some of those waste pieces and apply a second pattern for the front profile.
Then we'll make those cuts, and then it'll just be some fine-tuning with sandpaper to smooth it out and get it ready for a finish.
So, now that the knight is cut to shape, all it needs is a little sanding to finish it up.
We can concentrate on the other pieces.
The first one we're gonna do is the rook.
Like I mentioned before, this little castle detail here is made in two different steps.
If you follow the plans, it says, "First, drill a hole in the center with either a Forstner bit or a brad-point bit.
The problem with that is it leaves just a little bit of a dimple on the inside, and that's fine.
But I think I can get away without having that dimple just by making that hole here at the lathe.
So what I've done is I've started with my blank here, and I've created the kerf to make that castle top.
And I did that over at the table saw.
I used a miter gauge with an auxiliary fence and simply stood the blank on end and used the spring clamp to hold it to the fence.
Then I made a kerf, rotated the blank 90 degrees, and made another kerf.
That's left me with that nice little cross on the end that's centered.
Now we just have to get it mounted in the lathe, centered.
Okay.
There we go.
So now I'll just use a spindle roughing gouge to rough this down and around, then I'll use a parting tool to define some of my measurements, the first being the narrow point right below the top and then the shape of the top, and then smooth everything out, pull the tail stock away, and come in with a parting tool and a spindle gouge to create that recess.
Okay, so now that the rook is done, we can turn our concentration to the pawns.
Now, the pawns are super easy turning.
All we have to do is turn this blank round, dome at the top in basically a half bead, but we're gonna leave the square base.
And then we'll head over to the table saw and remove the center kerf of waste.
And then we'll slice it apart, glue it back together, and Bob's your uncle.
So the first thing I've done is cut the visor slit in here.
Now, I just did that at the table saw, and I've marked the center on this end, kind of the same way we did with the rook.
We'll just go ahead and stick that in the chuck.
Slide the tail stock in.
And I'll leave the tail stock in here while I am roughing this.
But as soon as I start doing that dome on the top, I'll go ahead and slide this out of the way.
♪♪ ♪♪ Here we go.
So I know I said I was gonna cut these apart at the table saw, but the band saw was a couple of steps closer, and it gave me a pretty nice cut.
So now all I have to do is smooth them out, then apply a little glue on the mating surfaces, and we can use a spring clamp... to hold it together as that helmet dries.
Now all I have to do is do that 15 more times.
We'll have a completed chess set.
One of the advantages of building a small project like today's chess set is be able to focus on some key woodworking skills -- gluing up small pieces, building a smooth-sliding drawer.
But you can also try your hand at some fun things, too, like making the chess pieces themselves.
Of course, if you don't have a lathe or that's not your thing, you can feel free to buy a chess set to go with the game board.
If you want to build your own, the plans are at our website -- WoodsmithShop.com.
And with everything all set up, it's your move.
♪♪ ♪♪ ♪♪ If you'd like to get more video tips and techniques, sign up for the free Weekly Woodsmith eTip.
Every week, you'll receive an e-mail with a video tip to get more out of your table saw, router table, and more.
Sign up at WoodsmithShop.com.
Everything in today's show comes from the newly expanded "Woodsmith Guild Edition" with shop projects, plans, tips, and techniques.
To get a free preview issue of the "Woodsmith Guild Edition" and a free "Woodsmith" book, go to WoodsmithShop.com.
In addition, past seasons of "The Woodsmith Shop" are available on DVD, or you can watch them online from your computer, tablet, or mobile device.
For more information, go to WoodsmithShop.com.
Announcer: Major funding for "The Woodsmith Shop" has been provided by... Old Masters -- offering wood stains and finishes for the woodworking enthusiast and professional.
And by... Kreg -- from the first cut to the final assembly, providing woodworkers with products that help to simplify woodworking challenges.
Kreg.
Additional funding provided by... Titebond Wood Glues -- the pro's advantage.
And by... ♪♪ ♪♪


- Home and How To

Hit the road in a classic car for a tour through Great Britain with two antiques experts.


 New Episode


Support for PBS provided by:
Woodsmith Shop is presented by your local public television station.