Acute and Obtuse Angles - Jill Turner - Fourth Grade
6/8/2020 | 57m 13sVideo has Closed Captions
Students will learn all about lines and angles and how they apply to real-life situations.
Students will learn all about lines and angles and make observations about how they apply to real-life situations.
Problems playing video? | Closed Captioning Feedback
Problems playing video? | Closed Captioning Feedback
NJTV Learning Live is a local public television program presented by NJ PBS
Acute and Obtuse Angles - Jill Turner - Fourth Grade
6/8/2020 | 57m 13sVideo has Closed Captions
Students will learn all about lines and angles and make observations about how they apply to real-life situations.
Problems playing video? | Closed Captioning Feedback
Where to Watch NJTV Learning Live
NJTV Learning Live is available to stream on pbs.org and the PBS app.
Providing Support for PBS.org
Learn Moreabout PBS online sponsorshipMore from This Collection
NJTV Learning Live is a class for fourth graders taught by NJ public school teachers.
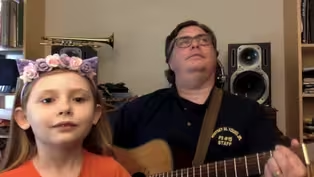
Songs for the Campfire or Couch - Ed Stroh - Fourth Grade
Video has Closed Captions
Students will learn about the history of campfire singing and engage in group singing. (56m 47s)
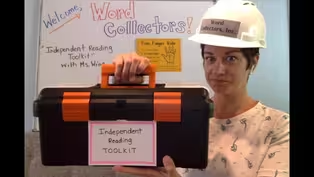
Independent Reading Toolkit - Lauren Wing - Fourth Grade
Video has Closed Captions
Students will practice three independent reading strategies. (55m 25s)

Just the Facts! - Zoila Correa - Fourth Grade
Video has Closed Captions
This lesson explores factors & multiples building upon students’ understanding of arrays. (56m 20s)
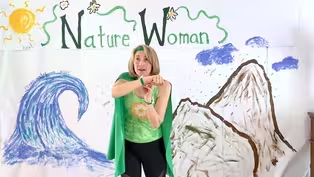
Erosion Avengers - Jill Falk - Fourth Grade
Video has Closed Captions
Mrs. Falk uses her imagination to transform herself into a superhero, Nature Woman! (56m 36s)
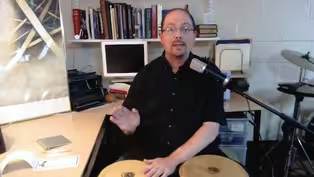
How Do Sounds Become Music - Domenico Zarro - Fourth Grade
Video has Closed Captions
Students will explore the elements of rhythm and beats to understand how music is created. (55m 1s)
Natural Disasters - Michael DeMaio - Fourth Grade
Video has Closed Captions
Follow along as Mr. DeMaio teaches you about incredible types of natural disasters. (55m 10s)
Area & Perimeter Word Problems -Tara Casalunovo-Fourth Grade
Video has Closed Captions
In this math lesson, students will learn how to solve area and perimeter word problems. (56m 5s)
My Dream, Your Dream, Our Dream -Pedro Trivella-Fourth Grade
Video has Closed Captions
This bilingual lesson prepares students to be successful members of our diverse society. (56m 13s)
Producers vs. Consumers - Chase Wesley - Fourth Grade
Video has Closed Captions
This lesson introduces the differences between consumers and producers. (57m 6s)
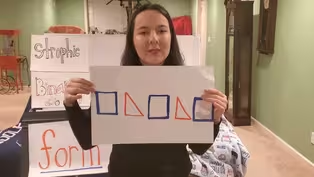
Song Form - Chloe Norell - Fourth Grade
Video has Closed Captions
Students will learn about song form and explore these forms through analysis and dance. (57m 48s)

Become a Geometry PRO! - Lauren Proda - Fourth Grade
Video has Closed Captions
Students will learn about the properties of triangles, squares, and rectangles. (57m 8s)
Rooms in a House (ESL) - Cassandra Shannon - Fourth Grade
Video has Closed Captions
In this lesson, students will learn the vocabulary associated with the rooms in a house. (55m 14s)
Providing Support for PBS.org
Learn Moreabout PBS online sponsorship- Hi fourth graders.
My name is Ms.
Turner and I'm here with Riley and Brinkley and we are so excited that you decided to join us for today's lesson.
Since we'll be together for the next hour here are some facts about me.
I teach at Old Mill School in Wall Township.
I love my school and my class.
I miss them so much, but we are making the most of everything over video chatting.
I have two dogs named Riley and Brinkley.
They will be my helpers today.
I love sea otters.
I love them so much that I wrote a book about them.
It's called "Close At Heart: A Sea Otter Story."
I also traveled to Monterey, California last year and got to see sea otters in real life.
Perhaps most importantly, what all of my students know about me is that my favorite subject is math.
- [Children] Yay!
- I tell all my students on the very first day of school, that it's all part of my evil plan (sinister music) to make you love math as much as I do.
So, since you're my students for the next hour it's my sincere hope that I can make you love math a little more than you already do.
I love how math really is all over the place.
(upbeat music) Math is on paper.
(upbeat music) And math takes up space.
(upbeat music) I see subtraction when Brinkley eats his food.
(upbeat music) I see addition when together things get glued.
(upbeat music) I see multiplication in equal groups of fruit.
(upbeat music) I see speed when my dogs run their favorite route.
(upbeat music) I see comparisons with my sea glass jars.
(upbeat music) I see distance when I look up at the stars.
(upbeat music) I see an array when my cupcakes cool.
(upbeat music) I see my math in and also out of school.
(upbeat music) Did I mention I like to rhyme?
I love rhyming.
As I mentioned before, my favorite subject is math 'cause so much of math really comes down to making observations about the world around you 'cause math really is everywhere.
Now for today's lesson I've put my thinking cap on and thought, what' a really fun and interactive lesson I might wanna teach you all?
What's something that we really see in the world around us that you would enjoy learning?
And then it came to me, geometry.
Shapes are everywhere, angles are everywhere.
And it's my hope that by the end of today's lesson you start seeing math popping out absolutely everywhere at you.
So for today's lesson we're going to focus on lines, angles, shapes and the world around us.
Here are some materials you'll need for today's activities.
For this lesson you will need a piece of paper, a pencil and these are really the only two items that you do need, but if you also have scissors and a protractor those could come in handy for later on.
But the two main items that you need are a piece of paper and a pencil.
Collect these items.
Brinkley will let you know when 20 seconds are left.
(upbeat music) - [Child] 20, 19, 18, 17, 16, 15, 14, 13, 12, 11, 10 nine, eight, seven, six five, four, three, two, one.
(upbeat music) - So, with geometry let's start at the very beginning, as basic as it gets, a point.
A point looks just like a period.
It's meant to show one little part in space, one little thing.
Now when you take one point and another point and put them together you get a line segment.
Now, so we have this one line right now, one point, one point.
But let's say right now we hae this line and another line.
Those lines together create an angle.
Angles are when two lines segments meet and they are measured in degrees.
We just mentioned that angles are made up of line segments, which they are, but sometimes they're also made up of rays.
Now rays are just like line segments except they have the arrows at the end.
When you think of rays think of the rays of a sun.
These arrows show that those lines could continue moving on and on and on and on without ever stopping.
Let's watch this in reverse and back and forth for a little bit.
Keep an eye on the angle by the point.
What do you notice about the angle as the lines get smaller and bigger?
Even when those lines move on and on and on the angle remains the same right here.
So, we're going to learn a little bit more about the different kinds of angles based off of what we see about them.
Based off how big or small an angle can be they get different names.
Angles are all around us.
Here are some different objects that show different kinds of angles.
Let's see what things you notice are similar and different about these objects.
A piece of pizza, wiring on a fence, a spider's web, a window, a Ferris wheel, an easel, a clock, tongs, another clock.
So take a moment and look at these objects.
Which angles look similar?
Which look different?
Let's start with this pizza here.
We see this pizza has four corners, four angles.
What other angles on the screen look similar to this pizza?
Ah, yes, with this pizza it also looks similar to the wiring on the fence.
Even though it looks like it's a diamond shape if we tilt it we see those corners are also square like the pizza.
Which other ones also look square like the pizza and the wiring?
Nope, that one's too big.
This one here on the Ferris wheel is too small.
Oh yeah, the clock one right there, it does look similar.
It also makes that certain kind of an angle like the square corner.
Too small we said for that one.
And this one, we have the window, very good thinking.
Now let's focus on this spider web.
What do you notice about this angle?
Yeah, it's really big.
It's much bigger than the square corners we had over here.
Which one of these also looks bigger than those square corners that we could say is similar to this spider web line?
Yeah, the clock right underneath it.
It does also look similar, excellent idea, excellent thinking.
And then the three that we have left these angles are all very small.
So you did a great job making observations about angles that look similar.
We thought that these pictures looked similar because they all had square corners.
Those square corners actually are all called right angles.
Right angles are angles that are exactly 90 degrees.
To make a right angle stick one arm straight up in the air and the other one right to your side.
This should form a shape that looks like an L, which is exactly what a right angle is.
Next, we saw that these angles were all smaller than those right angles.
These angles are actually called acute angles.
A fun way to remember them is 'cause they're just so cute and tiny just like little babies or little puppies or kittens for the cat lovers out there.
See, it's just such a cute angle.
(child giggling) The technical definition of acute angles is not just that they're cute, it's that they're angles that are less than 90 degrees.
Now, to make an acute angle go back to that right angle.
Remember, an acute angle is less than 90 degrees.
So bring your top arm, this one, down so it's less.
Anywhere from here all the way up to just before that right angle is an acute angle.
And finally, our last group that we categorized together were these angles that we recognized as bigger than right angles.
The technical name for these angles is obtuse angles.
Now these angles are angles that are more than 90 degrees.
Alright, now go back to that right angle.
For an obtuse angle, remember it's bigger than 90 degrees, so bring your arm straight down.
It could be anywhere in this range to form an obtuse angle.
A straight angle is when it's exactly straight across like this, making a straight angle, 180 degrees.
So anywhere between a straight angle and right angle is an obtuse angle.
These pictures weren't featured in our sort, but I did wanna show you that these are examples of straight angles.
They're basically lines.
They just go from one side to the other.
They form a straight line and that makes them exactly 180 degrees.
So we see here the line on the basketball court, the horizon line or a ruler all form those straight angles.
Now you might be wondering what exactly is a degree?
How do we figure out how many degrees something is?
If somethings 90, more than, less than, what determines that?
Well, the truth is it all goes back to a circle.
A circle is made up of 360 parts and each one of those little teeny tiny parts is called a degree.
As more degrees are added, remember, there's 360 that all go up into a circle and 360 of them complete the circle.
A circle is 360 degrees.
Right here, this shows a 90 degree angle in the circle.
This is because one-fourth of the circle is covered up.
One-fourth of 360 degrees is 90 degrees.
Now here, one half of the circle is filled up.
It looks like two 90 degree angles from before.
What is one-half of 360 degrees?
That's 180, this is our straight angle.
So a straight angle is 180 degrees.
We just saw that a circle is made up of 360 degrees.
A circle is made up of that because circles have all those little parts inside of them and the bigger the angle is the more degrees.
The more degrees the bigger the angle.
That's as far as I can go right now.
But you may have also heard of terms like 180.
We saw that a straight angle is 180 degrees, but you may have also heard that term 180 degrees in terms that weren't just in a line.
Have you heard of it terms of skateboarding?
Or dancing?
Or figure skating?
It's kind of like doing a flip.
If you're standing in one direction, to do a 180 it's just to turn the opposite direction.
So stand up with me now, let's do a 180.
Alright, and back again.
Now to do a 360 that's a complete circle.
So right now everyone, what would a 360 look like?
Let's do a circle.
Yeah, let's turn around.
Alright, let's make a 360 the other way.
We went in a circle the whole way around.
When you're doing 180 you going half of the circle.
When you're doing 360 you are doing a complete circle.
So angles aren't just for things on paper.
Angles can be movements that you can do in sports and dancing and all sorts of things in life.
When Brinkley gets excited he loves to do a 360 and sometimes he even does two.
When we start to incorporate more things like singing and movement into activities it actually helps your brain remember it better than as if we were just saying the words.
So what we're going to do is we're going to incorporate some songs and movement, but I don't wanna just include me.
I think I'm gonna call up some of my friends to help out.
(phone dialing) Hi fourth graders.
- Hi.
- Hi Ms.
Turner.
- We're here with fourth graders all across New Jersey today and we're learning about lines and angles.
Do you wanna help us teach them a song to help us remember the different kinds of angles?
- Yes.
- Yeah, sure.
- Okay, great.
Friends at home you can stand up, jump in and start singing and dancing whenever you feel comfortable.
("YMCA" by The Village People) (all clapping) ♪ Right angle, it is 90 degrees ♪ ♪ We say acute angle, less than 90 degrees ♪ ♪ We say obtuse angle, more than 90 degrees ♪ ♪ And the straight angle's 180 ♪ Right angle, it is 90 degrees ♪ ♪ We say acute angle, less than 90 degrees ♪ ♪ We say obtuse angle, more than 90 degrees ♪ ♪ And a straight angle's 180 (all clapping) ♪ The name of the angles are right, acute, obtuse ♪ ♪ The name of the angles are right, acute, obtuse ♪ ♪ A straight angle is 180 degrees ♪ ♪ Now everybody sing with me ♪ Right, acute, obtuse ♪ The name of the angles are right, acute, obtuse ♪ ♪ A straight angle is 180 degrees ♪ ♪ Now let's start from the beginning ♪ - Thank you so much fourth graders for helping me.
I'll see you later.
- [Students] Bye.
- [Ms.
Turner] It's time for a pup quiz.
(Brinkley barking) Complete the sentence.
The names of the angles are right, acute and what?
Obtuse, excellent work.
True or false, this angle that the arrow is pointing to on the pizza is a right angle.
False.
A right angle is a square corner.
This angle is smaller than that, making it an acute angle.
Which picture shows an obtuse angle?
A, the lines on the field.
B, the fan.
Or C, the hands on the clock.
B, the fan, is an obtuse angle because it is larger than 90 degrees, a square corner.
(upbeat music) This is a protractor.
We see at the bottom, we could measure length because it has inches and centimeters, but what makes it a protractor and not a ruler is that it has this part of it, which helps for us to measure angles.
So before we actually get started with measuring angles let's make some observations about our protractor.
We noticed before that we have the inches and the centimeters, but let's look at these numbers on the side.
This line right here doesn't have a number, but it represents zero.
'Cause if a line was just all facing here it would be zero degrees.
We see as we make our way around the protractor on either side, we see on this one, on the inside, counts up from 10, 20, 30, 40, 50, 60, 70 all the way to after 170, which would be 180 degrees because that is a straight angle.
On the outside it also shows numbers going in the reverse order.
Why do you think that might be?
It's helpful because you can draw or measure an angle that faces in this direction, but you could also draw or measure an angle that faces in this direction.
So protractors can be used to draw or measure angles facing in either direction.
You just need to make sure you know which direction they're facing and make sure you look carefully at the numbers.
So let's start off with measuring some angles.
This one spot right down here is where I'm going to put my dot to show that's where I'm starting off.
Now I'm gonna mark a little point over here too 'cause this is gonna be my baseline that I have, my first line for my angle that I'll fill in later on.
But right now, I can fill in my angle using 10, 20, 30, 40, any of those spots right there.
So let's say I want my angle to be a right angle.
I want it to be 90 degrees, which is right in the middle right there.
I can put my dot right there and now I'm going to connect my dots.
I'll use the ruler edge of my protractor.
It helps to be very careful an precise, so I should have a sharpened pencil to help with that.
And I'm going to connect these two lines.
And let's see, I have a nice square corner just like we know right angles have.
It shows 90 degrees.
When you have a right angle you can put a little square in the corner to show it's a right angle, 'cause it's a square corner.
Let's try a different angle.
Let's say right now I wanna try an acute angle.
So I'm gonna draw my, let's see, I'll go over here.
I'm gonna mark my spot right here.
Do I have to only use these numbers right here?
So I also have these numbers on the other side.
That's 'cause I could draw an acute facing in this direction, but I could also draw an acute angle facing in this direction.
So I have my line in the middle, or my vertex of where those points will meet and then I'll put my dot right there to show my baseline.
Let's say I want this to be a nice little acute angle.
Let's make it nice and teeny tiny.
How 'bout we'll do 32 degrees.
We'll get very precise with those.
So now I have my three points that I'm going to connect.
There we go.
Since this isn't a right angle, I could mark a little point like that.
I do have a curve to actually shows it's an angle.
And I could put it is 32 degrees.
We use that little degrees symbol for measurement of angles, to show the label.
Now I feel like it's only fitting that we show an obtuse angle next since we have done right and acute.
So I'm gonna put my spot in the middle.
I'm going to put, I'll have it facing this way this time.
So, since I'm starting it this way I'm starting at zero, so I'm gonna look at my inside numbers.
Let's say I want this to be 120 degrees.
Where do you think I'm gonna put that other dot?
Yeah, if I put it right, imagine that, visualize that angle.
That would be an acute angle.
I know 120 is more than 90 so it has to be obtuse.
So I'm looking at these inside angles and if you are thinking right here excellent job.
So now I connect my lines.
There we go and my angle is 120 degrees.
I will mark that to show it.
Now I'm gonna challenge myself a little bit.
I'm going to make a random angle.
Let's see, maybe I'll go with an acute angle.
So I'm gonna draw, start with my nice straight line and I'm not gonna measure it.
I'm just gonna draw a random angle.
So there, I have that angle right there.
I could make a prediction.
I can see it's definitely bigger than the 32 degrees.
Definitely smaller than 90 degrees, so it might be somewhere in the middle there.
Make a prediction.
About how much do you estimate that this angle is?
How many degrees do you think it is?
I'm thinking somewhere in the 50, 40 range too.
So right now I'm going to put my little dot right here at that zero degrees mark.
And it lined up just perfectly.
I don't want it to be down like that.
I want this line that I drew to be just even with that, just like that is perfect.
That way I can see it's even over here on my zero degree line and even over here.
Now I'm gonna follow it up and, oh, yeah, I see 55, 56, 57.
So this angle is 57 degrees.
So we can use this tool, the protractor, to both create angles and to measure angles.
It's time for a pup quiz.
(Brinkley barking) Measure the angle.
This angle is 90 degrees.
It forms a right angle.
If you also got 90 degrees awesome job to you.
Measure the angle.
This angle is 120 degrees.
Since it faces and opens up to the left and is an obtuse angle, you would look to the numbers on the outside and measure 120 degrees.
If it were 60 degrees, it should be an acute angle, but from looking at it we can tell it is an obtuse angle.
Measure the angle.
This angle is 80 degrees.
It opens up to the right, which shows we should use the inside numbers that count up from zero.
Super job, great work.
(upbeat music) So now we're focusing on lines a little bit more.
Let's take a look at some lines in real life situations.
The lines on a crosswalk, lines on stairs, lines on a window, lines on a net, a railroad crossing, books, spider web and the lines in the middle of a road.
So take a few moments and make some observations about these lines.
Which pictures do you think have similar qualities?
Which pictures do you think have different qualities?
Let's start focusing on this one with this crosswalk.
Which other pictures do you think are similar to the crosswalk?
I agree, the books do kind of look similar 'cause we notice with this one the lines are all straight here.
They're kind of like slanting sideways Ls.
There's straight lines right across.
They kind of remind me of those straight angles that we saw before.
These books also have those straight lines.
Let's see, but that's very different from this railroad crossing where the lines seem to meet.
So I'm gonna stick that one over here 'cause that's very different.
Do you see any other pictures that also look like the books and the crosswalk?
Yes, I agree.
This one here that has the two lines in the middle of the road that we often see do also look like these lines right here.
Okay, now let's take a look at some more.
I notice that this spider web had some interesting lines.
There are lines, hmm, it seems very different from this one to me.
Do you also agree with that?
Yes, on this one we see lots of right corners and right angles.
Just like this one, we see right angles there too.
We do see a right angle on this one as well, but they're not all right angles.
Some of them are kind of intersecting in different ways and crossing over in different ways.
So, I wanna make my right angles ones over here.
And then these three all seem to have lines that do cross each other, but they are not meeting always at right angles like these ones are.
This one does, the railroad crossing does have right angles, but not all of them.
So here we have three different categories.
We have one section with lines that don't seem to meet or cross.
We have lines that cross at random angles and we have lines that cross just at right angles.
When we first looked at these lines we noticed that they all had straight lines that didn't cross over each other.
The name that we give these kinds of lines is parallel lines.
Parallel lines are two lines that will never meet.
You could think of lines like we see here on the side of the road.
Or the road itself has parallel lines that will never ever meet.
Or a railroad track, as far as that railroad track goes or a sidewalk goes, if they were to continue going on and on and on, those lines would never ever cross.
To show parallel lines stick both of your hands up straight in the air.
This kind of looks like the two Ls in the word parallel.
This shows how these two lines go on and on and on and would never ever cross.
When we looked at these items we saw that these all have lines that cross over each other.
I know I have some of the lines that we mentioned that have right angles, but technically those lines also crossed over each other.
The name that we give these kind of lines is intersecting lines.
Intersecting lines are two lines that cross over each other.
The lines on this net cross over each other.
The lines on this windowpane cross over each other.
The lines on the spider web cross over each other, on the railroad tracks and on the stairwell.
So you see these are filled with intersecting lines.
To show intersecting lines you can form an X with your arms.
This shows these two lines are intersecting or crossing over each other.
Now we're focusing just on those lines that we noticed that when they crossed over they formed right angles.
These are called perpendicular lines.
Perpendicular lines are two lines that cross and form a 90 degree angle.
We see that with the net, with the window panes and with this middle section of the railroad tracks.
To show perpendicular lines put one of your arms up and down and the other side to side.
This creates a T with your arms showing that these two lines make right angles.
Brinkley have been doing a lot of thinking about parallel lines, two lines that go up and down or side to side and never ever meet.
Oh, come on back, Brinkley, sit.
Thank you.
So, we were out for a walk and we couldn't help but notice parallel lines just about every single place we looked.
One of the biggest places being on the sidewalk.
Let's show ya.
Come, Brinkley.
(upbeat music) Brinkley, sit.
As Brinkley and I walked on the sidewalk there was the yellow curb and the other side of the sidewalk and they never ever met, the lines kept going.
This sidewalk eventually stops when it hits the street perpendicular to that, but if it kept on going these same lines would be going on and on forever 'cause parallel lines never meet.
If we didn't parallel lines for sidewalks that would make for some very interesting sidewalks.
Time to stand up and move around and get to know some more movements that help us remember lines and angles.
- [All] Lines and angles.
♪ Lines and angles, angles and lines ♪ ♪ Get your groove on and Imma get mine ♪ ♪ Lines and angles, angles and lines ♪ ♪ Let me see that angle looking mighty fine ♪ ♪ Two lines on the same plane, whatcha call 'em?
♪ ♪ Can you tell they never intersect ♪ ♪ Yo, that means they're parallel ♪ ♪ Some lines meet at right angles, they're so particular ♪ ♪ Like when I do the robot, yo, I'm all perpendicular ♪ ♪ Intersecting lines is what you call it when they cross ♪ ♪ When I cross my arms like this I feel like I'm a boss ♪ ♪ He's a boss, alright, what's with these lines?
♪ ♪ Here we go ♪ Parallel lines, parallel lines ♪ ♪ Perpendicular lines, perpendicular lines ♪ ♪ Intersecting lines, intersecting lines ♪ ♪ Now rewind that one more time ♪ ♪ Let's go ♪ Right angle, right angle ♪ Acute angle, acute angle ♪ Obtuse angle, obtuse angle ♪ Straight angle, straight angle ♪ ♪ Full rotation, full rotation ♪ Parallel lines, parallel lines ♪ ♪ Perpendicular lines, perpendicular lines ♪ ♪ Intersecting lines, intersecting lines ♪ ♪ Oh, ha-ha, woo ♪ Lines and angles, angles and lines ♪ ♪ Get your groove on and Imma get mine ♪ ♪ Lines and angles, angles and lines ♪ ♪ Let me see that angle, looking mighty fine ♪ ♪ Lines and angles, angles and lines ♪ ♪ Get your groove on and Imma get mine ♪ ♪ Lines and angles, angles and lines ♪ ♪ Let me see that angle, looking mighty fine ♪ ♪ Looking mighty fine - Hold on, let's take a selfie in a straight line and let me get it from this angle.
Wait a minute, get parallel to me.
- I'm a boss.
- I know, I know you love being a boss.
(camera clicking) - [Ms.
Turner] It's time for a pup quiz.
(Brinkley barking) We're taking this pup quiz on the road.
Here in the town of Math City we have Rounding Road, Subtraction Street, Angle Avenue, Word Problem Way and Division Drive.
Math City is filled with all different types of angles and lines.
Which roads do you think are parallel to each other?
Rounding Road, Subtraction Street and Angle Avenue are all parallel to each other.
Those lines are equal distances apart and if they were to continue on and on they would not eventually meet.
They would continue staying afar apart just like railroad tracks and sidewalks.
Which roads are perpendicular to each other?
Word Problem Way is perpendicular to Rounding Road, Subtraction Street and Angle Avenue because when Word Problem Way crosses through those three lines it creates right angles.
Which roads intersect each other?
Word Problem Way intersects Rounding Road, Subtraction Street and Angle Avenue because it crosses through them.
Division Drive also crosses through Rounding Road, Subtraction Street and Angle Avenue because it doesn't have to cross at a right angle.
Intersecting lines just means that those lines cross over each other.
But remember, Rounding Road, Subtraction Street and Angle Avenue do not intersect each other because they are parallel lines.
(upbeat music) A few weeks ago I showed you our blueberry garden and we talked about how that garden bed related to area and perimeter.
Well, now we have a new garden bed and let's look at this garden bed and think, how does this now relate to lines and angles?
We see each corner is a right angle and it has two pairs of parallel lines.
It forms a rectangle 'cause those are qualities that rectangles have.
Now, we have to figure out what's going to go inside of our garden bed and we have all of our plants and our seeds.
How do you think angles and lines might come into play when we're organizing our garden?
Hmm, let me show you.
In our garden we arranged our plants in parallel lines.
This helped to keep things organized and also helped us to use the most amount of plants in our space.
We did the same thing here with our seeds, except the seeds are underground.
So, you can kind of see where we were digging to plant those seeds, but we used parallel lines here as well.
Lines help us wait our turn at the store and are seen when we walk door to door.
Lines help us to safely cross the street and can be found right at your feet.
Lines help us to travel place to place in New Jersey and to outer space.
(upbeat music) When we first started I asked for you to have a piece of paper.
Now is the time we are going to use that.
So, since my piece of paper is a rectangle I need to turn into a square 'cause we will actually be creating right now origami.
Origami is the art of paper folding.
Do you have any guesses as to what we might be making?
If your piece of paper is already a square you can skip this first step.
So, the way we're going to turn our rectangles into squares is we're going to line up the edges, so bring the opposite corner to the side.
We want this right angle of the piece of paper to kind of be cut in half.
Make sure that's right lined up and we're going to crease along the side right there, perfect.
There we go.
So your piece of paper should look kind of like this right now.
Before it was a rectangle and then we took the corner to match it up with the opposite side over here, whoops, and then we creased the edges.
So take a moment and make your paper look like this.
Now what we're gonna do, if you have scissors you can just cut off this edge right here, but if you don't then what we can do is we can take this rectangle and we're gonna fold it to this other side.
So it's kind of like lying right on top of the triangle we just created.
And you can take, I'm gonna try to get this as exact as possible.
You can take your fingernail and you can crease along it.
Let's make it really sharp.
And now we will flip it over.
Take this rectangle and we're gonna flip it in the opposite direction and we're going to put our fingernail along it to crease it again.
And now let's do that a few more times just to really get that crease in.
We're trying to let that paper know we want to cut it off.
Alright, you can feel it, we're getting ready soon.
So what we're gonna do now is we're going to just try to make that first little cut and gently pull so it goes along that line just like that, just gently pulling.
Notice my fingers aren't super close and kind of like away.
Just pulling nice and gently.
There we go, I'm very happy with that.
And it's okay if it's not perfect 'cause perfect doesn't really exist.
So, I have a shape that resembles a square now.
So if you have a square right now you can match up the opposite corners to form a shape like that.
And if you are just making your square with me with your rectangular piece of paper we can stick it just like that.
So I'll give you a minute to form this triangle.
Alright, so the next step in our origami that we are going to do is we are going to match up this corner to this corner.
That way we're folding our triangle in half.
And try to get that, try to be precise.
There we go.
I'm gonna fold it there, there we go.
And then we will open it back up again.
So we folded it in half for our corners to meet and then you unfold it again.
Alright, now you can flip your piece of paper over so that way this is facing upward right now.
And for our next step is we are going to put maybe like a finger or two in there.
So along this line right here you can place a finger or two.
And right there, doesn't have to be right against your angle, we're not making a right angle.
You're kind of making a different kind of like obtuse angle right here.
You can make it kind of go just like that.
So that way there was a finger or two next to this middle line and then you folded your piece of paper at an angle.
And we'll do the same with the other side.
I'll put my two fingers on the other side, kind of mark that little spot.
And I don't want them right against my fingers.
I want them a little bit away.
Very good.
So you should have these two triangles kind of going off.
Yours could be bigger than mine, smaller than mine, whatever you have is perfectly wonderful.
And our next step that we're going to do is you're going to take this little end, this little tip of the corner and you're going to fold it up.
We'll do roughly about an inch there.
I guess about two fingers worth for me.
Any guesses as to what we're creating yet?
That's right, we're creating a dog.
Go figure, dogs, not very surprising for me.
So, we need to give our dog a face.
So, you can grab your pencil now and you can make a little line going downward like that, like a little curve, and you can shade in your dog nose.
(dogs barking) And there go my dogs, so please hold.
Alright, we're back.
So let's continue coloring in our dog nose.
And our puppy dog needs some eyes.
Whenever I do eyes I always love giving them little eyebrows like that that kind of go off to the side.
I just think it gives a cute little expression.
So here we have our dog.
So now, of course I have a reason for us creating origami right now.
So let's take a look at your origami.
What observations can we make about lines and angles?
Can you find any acute angles?
Any angles that are less than 90 degrees?
Ah yes, I see some as well.
On the ear right here it is less than 90 degrees.
I can tell because if you grab your spare piece of paper that we had from before, we know that this is a right angle.
So if when we put it on top of something else and it's smaller than the right angle.
You can kind of like look through the paper and see, well, we'll put it underneath, maybe that'll be.
Yeah, there we go.
I'll stick it underneath.
I'm lining up the baselines together and you see how it's smaller than the right angle?
That tells me it's an acute angle.
It's smaller than 90 degrees.
Since I have my protractor here let's measure it.
So I'm lining up my base angle right in the middle right there.
And I see that it goes to zero, 10, 20, 30, 40.
It's between 40 and 50 and it seems to be right in the middle right there at 45.
But, you know what?
I'm gonna mark out my 45 degree angle.
So 45 degrees, there we go.
What do you think about this angle right here?
Do you think it's right, acute or obtuse?
Yeah, it looks pretty close to a right angle.
So let's grab that piece of paper.
I'm not sure if it's quite that, but let's get our piece of paper and check.
So I'm gonna line up the side.
You do the same with yours.
Oh, see how it's a little bigger than my right angle?
What does that tell us?
Yeah, it must be an obtuse angle, so let's measure it.
So we're expecting our angle to be greater than 90 degrees.
So I'm lining up the middle right there.
I'm lining up the zero and we're all along the way.
And we're gonna start at the zero.
So, before I started at the zero 'cause my angle was facing this way.
My angle is facing this way so I'm gonna use the outside numbers.
10, 20, 30, 40, 50, 60, 70, 80, 90, oh, it's almost 100, but not quite.
It's right there at that 99 point.
So this angle here would be 99 degrees.
Alright, that one ended up being an obtuse angle.
Do we see any other acute angles?
Yep, these ones right up here, good eye.
Those ones do line up to be less than 90 degrees 'cause if I were to put my piece of paper, I have my square corner right here, right on top I see, you can kind of see it goes through.
It's along that, it's smaller than my 90 degree angle.
So if I were to measure it would be 10, 20, 30, between 30 and 40.
So this one would end up being, yeah, just about 35 there.
So that one was also an acute angle.
Do you see any right angles?
Yes, good eye, we do see a few ones.
One's kind of hiding, one is very apparent.
So that right angle is 90 degrees and right here, that one, it lines up just perfectly with our piece of paper.
It's 90 degrees right there.
So that tells us, I'll put a little, on his nose, I'll put one of those little square corners that we put for 90 degree angles.
And the one that's kind of hiding is, well, we see this line that we folded earlier on and then we folded that in half.
That kind of intersects right perfectly with there and it marks up just perfectly with our piece of paper to show that 90 degrees.
So these ones right here.
I'll kind of draw a little faint line right there.
Those are 90 degree angles as well.
Do you see any other obtuse angles?
Besides the ones that we discovered before.
Very nice, we do see some other obtuse angles.
You could probably infer because this one is an obtuse angle this one one would also be an obtuse angle.
And I would agree with that.
But, if you keep the ear down, there's a little obtuse angle hanging out right there.
So let's get our protractor.
And do you see how, for this angle right here, which way is it facing?
Yeah, it's facing this way.
So I'm gonna start at my zero here.
10, 20, 30, 40, 50, 60, 70, 80, 90, 100, 110, 120.
Let's see, I'll make sure, oop, I got off a little bit.
It's just more than 120, 121, 122.
Oh, oop, my nose flopped a little bit.
So that one right there is 122 degrees.
Now, how you folded your puppy origami may be different than how I folded mine, which means your angles could be different.
So to finish off our puppy dog origami we are going to look at the angles that you have.
So if you have a protractor you can actually measure the angles like we were doing over here.
If you don't what you could do is you can use your piece of paper as a tool to figure out if an angle is larger or smaller than a right angle and that tells if it's an acute or obtuse angle.
So let's say for this over here, I can tell when I measure up my square corner right here, I can tell this is bigger.
So instead of writing an actual measurement in here I'll just write the word obtuse.
And then for these ones over here I can tell they're going to be acute angles.
So if you don't have a protractor you can write the word acute in that corner.
Or if you do have a protractor you could measure it.
So let's spend a little time finishing up all of our angles and see if you also notice anything about the lines.
(upbeat music) Now that we spent some time with our angles let's take a look at some of our lines.
Do you notice any parallel lines on this puppy dog origami?
Over here by the triangle I see if I put my fingers here, and you can put yours on this spot too of your origami, they meet so that shows they're not parallel.
These two, nope, they meet.
These two, let's see, if I were to continue my lines on and on and on, oops, my fingers eventually meet.
Ah, but I do spy some parallel lines.
These ones right here, they run up an down.
They're in the same direction like those train tracks and those other pictures we saw for parallel lines.
They would never ever meet.
Good eye.
Do you notice any perpendicular lines in our origami?
Remember, these are lines that when they intersect they form a right angle.
These ones right here since they form this right angle here.
When these two lines intersect they form perpendicular lines.
Good thinking.
So in origami when you are folding paper you are creating lines and angles.
Great job working hard and identifying the lines and angles in our origami dog.
So now, I want you to turn your origami over to the other side where we kind of have a blank canvas to really show what we've learned about lines and angles.
Now, to show your lines and angles if you happen to have a protractor, a ruler or a straight edge you can use that.
If you were like me and you had to cut off this piece of paper, we can actually use this as a straight edge.
For example, right now, let's start by just drawing a line.
So I'm going to put my paper nice and even and then run my paper right against this other piece of paper just as if it's a ruler.
It's not going to be quite exact, but it'll be pretty close.
So there I have my straight line.
Let's draw a parallel line on top of it.
So I have my paper right exactly on top trying to make it look like those two Ls in word parallel.
Nice and slowly right against that piece of paper and there we are.
Let's say right now we wanna draw some parallel lines going upwards.
Draw one pair of parallel lines, one line and then another.
Now, what we're going to do with this is we're going to try to draw some parallel lines, perpendicular lines, an acute angle, a right angle an obtuse angle and we're going to turn it into a picture.
So I'm going to start drawing my picture and you can do the same with yours.
And you can use your straight edge or your piece of paper as your ruler for your angles.
(upbeat music) No worries if you're not finished yet.
We'll have some time later to continue working on your drawing, but I wanted to show you that I have some pairs of parallel lines by the tree and the house.
I have a right angle where the tree meets the sidewalk.
I have an acute angle on the roof of my house and my obtuse angle is this very large mountain in the back.
Obtuse angles can be kinds of tricky to draw.
Oh, and some perpendicular lines where the tree meets the sidewalk as well.
Now, I didn't just include lines I do have some curved lines like for the tree and Brinkley and the snow on the mountain.
So later on for your homework you can continue your drawing and try to include all of these elements in your drawing.
I hope you have a lot of fun coming up with your drawing ideas.
Hi fourth graders, thank you so much for joining us for this hour of learning today.
Here's a recap of what we did today.
We learned about angles and lines.
We learned some new hand motions and songs.
♪ Right angle, it is 90 degrees ♪ ♪ We say acute angle, less than 90 degrees ♪ ♪ We say obtuse angle, more than 90 degrees ♪ ♪ And the straight angle's 180 We folded some origami and measured some angles.
(upbeat music) But most importantly, we saw that angles and lines are all around us all the time.
(upbeat music) So once again, thank you so much for joining us for this hour of learning.
Riley, Brinkley and I had an awesome time with you all and we hope that you enjoyed your time and learned some new things about math and the world around us.
I also wanna give a huge thank you to the real MVPs, Riley and Brinkley, for being awesome and making things just a little bit more fun.
So we hope you have a great day.
Have a wonderful summer and keep an eye out for math wherever you go.
You never know, it's all around you all the time.
As a thank you for Riley and Brinkley they're getting some biscuits that have parallel lines on them.
So, here ya go, Brinkley, good boy.
And Riley.
Bye everyone.
(upbeat music)


- Home and How To

Hit the road in a classic car for a tour through Great Britain with two antiques experts.
 New Episode


 New Episode


Support for PBS provided by:
NJTV Learning Live is a local public television program presented by NJ PBS