Lovely Landscapes - Natalie Steckel - Third Grade
6/1/2020 | 57m 51sVideo has Closed Captions
In this interactive art lesson, students will learn the four parts of a landscape.
In this interactive art lesson, students will learn the four parts of a landscape, be introduced to works of art created by professional artists, and create their own landscape.
Problems playing video? | Closed Captioning Feedback
Problems playing video? | Closed Captioning Feedback
NJTV Learning Live is a local public television program presented by NJ PBS
Lovely Landscapes - Natalie Steckel - Third Grade
6/1/2020 | 57m 51sVideo has Closed Captions
In this interactive art lesson, students will learn the four parts of a landscape, be introduced to works of art created by professional artists, and create their own landscape.
Problems playing video? | Closed Captioning Feedback
Where to Watch NJTV Learning Live
NJTV Learning Live is available to stream on pbs.org and the PBS app.
Providing Support for PBS.org
Learn Moreabout PBS online sponsorshipMore from This Collection
NJTV Learning Live is a class for third graders taught by NJ public school teachers.
Writing Rocks - Nikki Silva- Third Grade
Video has Closed Captions
Students learn how to become stronger writers by varying sentences and adding details. (58m 43s)

Biodiversity in Barnegat Bay - Dunlea & Williams-Third Grade
Video has Closed Captions
We’ll see and explore all the amazing creatures that call Barnegat Bay home. (57m 31s)
PE LIVE! - Gregory Bradley - Third Grade
Video has Closed Captions
Students will do a well-rounded workout including cardio, tae bo, and yoga in this lesson. (57m 1s)
Word Detectives: Context Clues - Janice Alvarez -Third Grade
Video has Closed Captions
In this lesson, students will use context clues to determine the meaning of unknown words. (57m 36s)
Introduction to Fractions - Krysten Paone-Hurd - Third Grade
Video has Closed Captions
Students will learn the basics of fractions when it comes to “a piece of the whole". (57m 58s)
Punctuation Power! - Jennifer Ostrega - Third Grade
Video has Closed Captions
Students will learn how to demonstrate command of standard English punctuation marks. (58m 18s)
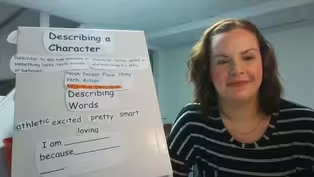
FAST Characterization - Rosemary Matar - Third Grade
Video has Closed Captions
Students will learn how to describe a character using the FAST characterization method. (57m 43s)

Area & Perimeter - Jill Turner - Third Grade
Video has Closed Captions
Students will learn about area and perimeter and apply them to real-life situations. (58m 1s)
You Guessed It!- Haritha Tottempudi - Third Grade
Video has Closed Captions
Students will learn how to infer using a fiction and nonfiction text. (57m 3s)

Sweat, Hydration, and Phys. Ed. - Kyle Muckley - Third Grade
Video has Closed Captions
Students will learn about their bodies and the benefits of physical activity. (55m 24s)
Ready, Set, Draw your Narrative - Alan Trotty - Third Grade
Video has Closed Captions
Students will draw a life event and transform it into a narrative writing piece. (58m 32s)
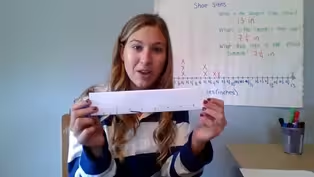
Analyzing Shoe Sizes on Line Plots-Lori Genovesi-Third Grade
Video has Closed Captions
Students will measure different shoes in their homes and analyze the data on a line plot. (58m 40s)
Providing Support for PBS.org
Learn Moreabout PBS online sponsorship- Hello amazing artists of New Jersey.
I'm so excited to be here with you today.
My name is Mrs Steckel, and I'm an art teacher in the Phillipsburg school district, in Warren County, New Jersey.
I have an amazing lesson plan for you today.
First, we're going to learn a little bit about landscape art.
Then, we're going to learn about one of my favorite artists named Heather Galler and lastly, we're going to get to create some beautiful artwork of our own.
Are you ready?
Follow me.
Come on in.
I'm so glad that you could be here with me today to learn all about landscapes, today's lesson will focus on four main parts, we will be learning about the foreground, the middle ground, and the background, as well as the horizon line in a landscape piece of art.
Are you ready to go?
Let's dive in.
So, you've heard me mentioned the word, landscape, a few times, but you might be wondering, what is a landscape?
A landscape is a type of art that shows nature and outside scenery.
Landscapes can have trees, hills, rivers, and even buildings like houses, apartments or barns in them.
Landscapes have four main parts that we will learn about on the next slide.
Here are a few examples of landscape paintings.
Let's talk about the four parts of a landscape painting or drawing.
First up is the horizon line.
The horizon line is the line where the earth, Looks like it meets the sky, in a landscape piece of art.
Next is the foreground, which is the space closest to you in the image.
Everything in the foreground is drawn bigger and with more detail because it's closest to you.
Then comes the middle ground which is the space between the foreground and the background in the middle ground the objects begin to appear a little bit smaller because they're getting further away from you.
Lastly is the background which is a space in the picture that is furthest away from you, and has little details.
Can you find the four parts of a landscape in this photograph?
Give it a try.
Let's see how you did.
Upfront is the foreground, then comes the middle ground and the horizon line and last, the background.
How did you do?
Now, let's take a look at our inspiration artist of the day, Heather Galler.
Heather Galler is a New York artist who has been working for more than 23 years as an artist.
She has become well known for her large murals and her fun, bright, style with lots of repeated colors and patterns.
Heather Galler is considered a folk artist.
A folk artist is someone who uses simple artistic techniques, and usually uses bright colors, and sometimes they're known for their child-like work.
I think you'll really enjoy looking at some of her artwork on the next slide.
Let's check it out.
Here are two of Heather's paintings.
What do you notice about them?
Can you find the four parts of a landscape in each of these paintings?
Let's check out another example of one of Heather Galler's landscape pieces of art.
Maybe when you look at Heather Galler's artwork, you notice the bright colors.
Or perhaps you noticed the repeated lines, shapes, and patterns.
Aren't they beautiful?
Do you like her artwork?
I know I do.
That's why I chose to share her with you today.
Now, it's time for us to move on and get started on an art project.
Okay, artists, now that we've learned a little bit about landscapes, and we've learned a little bit about Heather Galler.
We are going to get to do some creating of our own.
I have my daughter here with me today.
- Hi guys I'm Avery.
- And she's gonna be helping me out, and demonstrating some different supplies that you can use to create a beautiful masterpiece of your own.
Some of you probably already know this, but something that makes art so special and so unique and so wonderful is that we all get to make artistic choices for ourselves and those choices affect how our artwork turns out in the end.
That's what makes art so awesome is that everybody's is a little bit different, and a little bit special just like each of us.
So, here are some of the basic supplies that you will need for our project today.
The first thing that you're gonna need is a piece of paper.
I'm going to use a piece of thick cardstock paper which is a little heavier than normal paper, because I am going to be using a special technique today where I'll be using a marker and turning it into watercolor paint.
If you don't have cardstock, that is perfectly fine.
Other options that you might choose are a piece of lined notebook paper, maybe a piece of colored construction paper, perhaps you find something that was written on on one side and you can flip it over and use the back.
Or maybe you have a notebook and you wanna flip it over and use the cardboard on the back.
So, the first thing you'll need is some kinda piece of paper to write on.
The second thing you'll need is something to draw with and Avery, is going to explain some of the options that we have and then you can choose something for yourself.
- Here is a pencil, you can use.
A permanent marker.
A black crayon.
A black colored pencil or a black pen.
- Whatever writing instrument you choose, you wanna just make sure that it's dark so don't pick something like a yellow crayon because it won't show up very well.
Then the last thing that you'll need today is something to add color to your picture at the end.
Maybe you wanna choose color pencils, or perhaps you have some markers, you could use.
Maybe you have a couple of crayons, you could use for your artwork, or maybe you have something else like some watercolor paints, again, whatever you have at home, will be perfectly fine to use today.
All right, friends, I'm gonna give you a few minutes to gather your supplies, and I'll meet you back here to do some creating.
Can't wait to see you.
(upbeat music) All right.
So, our first step today is going to be to add our horizon line where the line, where the sky meets the ground.
You have a couple of artistic choices here.
You could choose to add your horizon line down near the bottom edge of your paper, or you might choose to put it more in the center, or even up top.
You can also choose something like a curved line or you might choose a straight line it's up to you.
I'm going to use a permanent black marker, because, again, later I'll show you a technique that you can add markers and turn them into watercolor paints.
However, if you don't wanna use that technique or you don't have those supplies, then feel free to use whatever you have, as you can tell, Avery's using a black colored pencil.
So, I'm going to start at the left side of my paper, and I'm going to touch right to the edge and draw a curved line over to the right side of the paper, and that will kinda make it look like, I have a little bit of a hill and a little bit of a valley on my paper.
Avery chose to do a straight line, near the bottom part of her paper.
So, go ahead and draw your horizon line where the earth meets the sky.
Now on to step two.
Now that you have your horizon line we are going to focus on adding details to the middle ground.
Remember, we said the foreground is the front of the paper.
The background is the space furthest away from you and the middle ground is right in the middle of your picture.
You can add things like trees or houses or barns or bushes to your middle ground.
I'm going to add some trees.
So, I'll start by adding the trunks and I'm gonna start right on top of my horizon line and add some vertical lines going up.
It's okay if they're not perfectly straight because we know that trees are nature and things in nature are all a little bit unique and different.
Then I'm going to add an oval on top to kind of make it look like the top of the tree.
I'm gonna add another tree over here, this one I think I'll make a little bit smaller, to make my artwork more interesting.
So, it's nice when you have variation in your artwork and then I think I'll add another tree over here.
Again my vertical lines going up, and then an oval, or a circle type of shape at the top.
Okay.
I like how that looks so far.
I think we're gonna try an artistic trick where I'm going to layer some trees behind the trees that I already have.
Now, since these are in the middle ground and they're bigger, the trees that I make next I'm gonna make a little bit smaller, and I'm gonna make it look like they're behind these trees.
So, the way I'll do that is I'll start by adding a smaller oval.
Notice how I stopped at the edge of the tree you don't see the full oval, you only see part of the oval.
Then I'll add the trunk.
So, it's giving the illusion that this tree is in front of this tree and now I do the same thing over here.
We'll start with a smaller oval.
I'll connect it and stop right at the edge of that tree and then I'll add my trunk.
And I think I'm going to add another one over here.
So, again, my oval and making it stop at the edge of the other tree.
And adding my trunk.
Okay, now I'm going to add a building over here.
Again, you don't have to maybe you wanna make trees, all the way across.
It's up to you.
So, to make a building, I'm gonna start with a triangle shape at the top.
Then I will add on a rectangle shape or two vertical lines and I'm gonna connect that right to the horizon line, so it looks like the house is actually sitting on the ground and now to make that look three dimensional, I'm going to add a horizontal line coming out and I'm gonna go all the way to the edge of my paper.
And I'll add another one, and that kinda makes it look like a 3D building.
If you'd like to, you can add some details to your building.
Maybe you wanna add some windows.
Maybe you wanna add a door.
Again, what's fun about art is that everybody gets to make these artistic decisions and everyone's can look a little bit different.
All right, so I'm liking the way that this looks but I think I need something here.
So, I'm going to add an another little building, maybe this one will be more like a little house.
So, I'm gonna start with my triangle shape, add my two vertical lines, think I'll add a little door on there, maybe I'll go with a round, this time.
Okay, and I'm gonna make another smaller building next to that.
So, by adding things that are different sizes I'm making it look like some things might be a little bit in front of or overlapping other things.
Okay, and then I'm gonna make these look 3D.
So, I will take this point and I will connect it, so it looks like it's going behind the tree and same thing with this one and I'll do the same thing here so I have my horizontal lines to make it look like my buildings are 3D.
All right, and then I'm gonna add in one more tree over here, I'm gonna make this one a small.
Okay, so, so far I have my foreground, which is the area that's closest to us so you can see that that's the largest space for me, then I have my middle ground where I have my trees, and my buildings, and then the background is back here, which is the sky.
For the next part of our project we are going to be adding in some patterns and some designs to make our artwork really look amazing.
This is also the time that if you wanna add in a sun or a moon somewhere in your picture, you can go ahead and do that.
I'm actually going to make it look like there's a little sun peeking out right here.
So, I'm going to make half of a circle shape, and then since Heather Galler did a lot of folk art, I'm actually going to add a couple of lines around it to kinda make it look like my sun is getting bigger.
That reminds me of something that Heather Galler may have done in her artwork.
So, that's just gonna be like my little sun peeking out from my valley.
If I wanted to add rays, I could, coming out from here, but I would wanna make sure that I would stop at the trees, because I don't want my sun to look like it's in front of my trees I want it I want it to look like it's behind my trees.
If you wanna add something like a pond, you could go ahead and add a pond, or if you wanted to add a fence into your artwork, you could go ahead and add that.
Remember, what makes art so awesome is that everyone's is different and everyone's is special and everyone's is unique.
So, go ahead and make it your own.
Now, I'm gonna add some lines here, so that I can create some sections to make some patterns or repeating shapes and lines.
So, as you can see I'm making some lines on a diagonal going going across and touching all the way to the edge of my paper.
So, that I create a couple of different sections.
Notice how I didn't make them too tiny, if I make them super super small, it will make it really hard for me to add in lines and patterns.
For my background I'm gonna leave it right now because it's already pretty busy up here so I'm gonna focus on my foreground, and to decorate the foreground I'm going to use some different types of lines and make repeating patterns.
So, here's a zigzag line and I will repeat it, you know, a pattern is something that repeats itself.
Heather Galler did a lot of repetition in her art.
Now, I'm going to add in some swirls in this section.
To do that, it's almost like a letter C, but instead of leaving it open, I loop back in and curl it around.
I can even go the other direction.
So, I'm trying to fill in this section, to make it look more interesting.
All right, now I think I will do some polka dots.
Next, I'm going to add some curved lines.
Now, I think I'll do some zigzag lines but instead of going off the paper this way, I'm gonna go right along the edge of that line, to almost look like triangles.
And then I'll repeat it, right along this part of the line Next, I'm going to add some scallop lines which are like little U shapes that connect.
And then I'm gonna repeat that again, so that I'm filling up this little section.
Alright and then I think I'm going to repeat my swirls again But this time I'm going to connect two swirls together, almost like a letter S on its side.
So, you can see I'm using lots of repetition repeating shapes and line in each of these sections because that's something I noticed that Heather Galler does a lot in her artwork.
Okay now that I have added patterns and design to the foreground, I'm actually gonna take a little bit of time and decorate some of my trees.
So, some of these I might add, again, some swirly lines to make it look like there are some branches of a May-tree.
I can add patterns to the tree trunks using lines or shapes, whatever you like.
Maybe I'll add some polka dots to make it look like there's little fruit on the tree.
Oh, I like what Avery's doing, Avery has lots of patterns, she's ahead of me.
Gonna repeat some of the scallop lines on this one, again, what makes you so special is that you are creating your own artwork, you're making yours look different than mine and different than Avery's and different than anyone else's.
This one needs a little bit more branches.
Make some big polka dots on this tree.
Some of my polka dots really gonna look like they're coming off of the tree.
And then I think I'll add another circle around it.
And then I think I'll do some lines inside of it.
Alright, one more tree, oh, two more trees.
Add in some zigzag lines on this one.
I think I'll add some designs to the trunk and a swirl to finish off my trees.
Also if you wanna add any designs or patterns to your buildings, you can go ahead and do that, which will make it look more like a Heather Galler landscape, which is our inspiration artist from today.
And then I think I'm actually gonna add on a couple more rays for my sun.
Because I wanna make it look a little bit bigger so see how I'm connecting my lines but I'm skipping over the trees.
So, skip and connect, skip and connect this one will probably even come over here, this one too.
So, I'll pretend it's connecting, I'll skip over my tree.
Now, it almost looks like a rainbow back there which I kinda like, even though I thought at first it would be a sun.
We got three now.
All right, so I'm pretty happy with the way that my landscape looks.
I hope that you're happy with what you created.
I'm gonna give you a few more minutes to go ahead and fill in any more patterns or designs that you need to do and then we'll meet back here, and we'll do some coloring.
Have fun creating.
(upbeat music) Alright artists are you ready to add some color?
Great.
If you wanna follow along with me and learn a new technique, how to turn markers into watercolor paint, then these are the supplies that you will need.
You will need some markers.
A little bit of water and a paintbrush.
If you don't have those supplies or you don't wanna follow along with me, you wanna do something different.
That's perfectly fine, go ahead and gather your coloring supplies.
Also if you don't have anything to color with that's perfectly fine too, you've already created a beautiful masterpiece together and you should feel proud of yourself.
You could always save your drawing for a later date when you do have crayons or markers or colored pencils or something else to add color with.
I'll give you a moment to go gather your supplies.
See you in a minute.
(happy music) Everybody has their supplies?
Great, let's get started.
All right, so to do my technique, I'm going to start with one of my markers and I'm going to start by outlining around the edge of each little section that I drew a pattern or design in, you're going to notice that Avery is going to use colored pencils for hers and we're doing that so you could see how each of them will turn out different, but really beautiful.
So, I just outlined that little section, and now I will close up my marker and switch colors, something I really love about Heather Galler's art, besides the amazing patterns that she uses, is the bright colors that she uses.
I think her artwork is very fun and bright and it just makes me feel happy.
So, I'm going to outline, right to the edge.
Close up my marker then switch to a new color.
And I will repeat the same thing in this section.
Depending on the supplies that you're using to color, your artwork might take a little bit longer or might be finished a little bit before me.
It all depends what we're using.
If you miss a little bit, feel free to go back in with your marker and just go over it a second time.
We're all learning, there's no pressure to be perfect, just do your very best.
I think I'll repeat my green again.
I'm noticing that if I press a little bit harder and I hold my marker more inside it makes a wider line and if I hold my marker up a little bit more it makes a thinner line, for this technique that I'm using, the wider lines will work a little bit better.
Think I'll use some pink over here on the edge.
And I'll outline right to the edge of the paper.
You'll see why in a few minutes.
Now, that I've added color to the foreground, I'm going to move into my middle ground.
Using the same outlining technique, I'll start to fill in my trees.
If you noticed, Avery is using colored pencils and she's trying to stay inside the lines as best she can and she's pressing hard with her color so that she can create some of those bold beautiful colors like Heather Galler's.
(happy guitar music) Now, that I've outlined all of my trees, I'm going to fun to the buildings, and my sun or my rainbow.
I'm going to use the same technique where I'm using the side of the marker to simply outline each of my shapes.
(happy guitar music) If you have areas where there's smaller details like on the roof of this building, I'm going to just lift my marker up a little bit taller and use the tippy point of it and sort of the side that will give me a skinnier line, so that I can fill in some of those smaller spaces.
Go make this house over here yellow, I haven't used much yellow.
And then I think I'll add on a nice hot-pink roof.
That will really create contrast that pink will stand out against the yellow.
I think I will fill in some of the windows with that and the door as well.
So, I'm repeating some of the pink throughout the house.
Now, it's time for my sun.
Even though sons are usually yellow, orange and red and artwork, feel free to change up the colors, because this is not a realistic drawing.
It's a folk art style drawing.
(happy guitar music) If you're happy with the way that it looks you can keep it as is.
Or if you wanna go back and outline some more of your patterns and your designs you can do that also.
For example, maybe I wanna add a little bit more blue, and go over my scallop lines with my marker to outline them.
I'm just gonna do that in a few areas not in all of them.
(Happy guitar music) Okay, I'm happy with the way that my artwork has turned out, if you want to you can also outline your sky, I think I am going to go ahead and do that and instead of coloring in the whole background of your sky what I would suggest is just taking a marker of your choice, or a color of your choice and filling that in, if you're following along with me I'm going to use.
I think I'll use yellow.
And I'm just going to outline all around the edge of my paper.
I know usually we fill in our background but I will show you why in a few moments.
And I'm gonna go between my trees because that's also part of the background, and I'll go around my sun.
All right, now the fun part.
Avery's still coloring hers with colored pencil.
I'm gonna move on to turning mine into watercolor paint.
So, I'll pick up my paintbrush, I'm going to dip it in the water, you don't need a lot of water, a little bit will give me a job, and I'm going to start to run my paintbrush along the marker and spread it into the center.
Then I'm going to get my brush again, go over my green and start to bring some of that into the center.
This kind of creates a very light watercolor effect and depending on which markers you have some colors might be a little bit darker and more noticeable and some might be a little bit lighter.
Next, I'll move on to my purple.
So, I'll go over my purple and bring some of that marker color that's now becoming watercolor into the center to fill in this space.
And I'll continue this to fill in all of my spaces doing one section at a time.
I wouldn't wanna just dip my brush, and then run all of my colors together, because I would mix colors together, and I might get something that looks kind of like a brown color instead of each color, showing up nice and bright on its own.
Green one isn't showing up so well for me.
But that's okay.
Like I said some colors will work better than others.
(appy guitar music) Okay now that my foreground is done, I'm going to move into my middle ground, doing the same technique, dipping my paintbrush in the water, running around the outside edge of the marker and spreading some of that color in towards the center.
As you work you might notice that some of the colors start to mix together if your brush has a little bit of the color that you would use before on it, you might start to get some interesting color combinations.
You might also notice that some of the colors start to spread a little bit, that is because we're turning it from marker into paint.
Keep in mind, you don't wanna use too much water for this part because you can actually tear your paper.
A little bit of water works just fine.
Now, that I've done my trees, I'm going to move on to my building using the same technique where I'm starting on the edges where I drew with my marker and spreading the water in towards the center.
(happy guitar music) Okay, now that I've done my buildings, I'm going to move on to my sun, before moving on to my background.
Okay, I'm pretty happy with the way that that turned out.
Now, I'm going to move on to my background and try to get some of this yellow to come in to the sky.
So, we'll go around the outside edge and bring some of that marker color in towards my trees to create a nice light sky.
(happy guitar music) If there are any areas that maybe didn't show up so well you could always go over them again with your marker and repeat the same technique, for example, over here on the rooftop, I wish that there was a little more color, so I'm gonna take my marker and just add a little bit more of the marker and I also wished that I had outlined beside in the bottom of that building because, again, it didn't show up so well, so I can go back and do that now.
I think the same thing in this tree, I wished that I had added a little more color so I'm gonna go back and now, with my marker and do that.
And then I'll add a little more water and spread some of that color around.
I like how that stands out more.
And then do the same here with the orange.
Okay, I'm happy with how mine turned out and I hope that you like how yours is turning out.
Some of you might still need a little bit more time to finish so I'm gonna go ahead and give you a couple minutes to finish up your artwork, and then I will join back with you in just a few moments.
As you can see, Avery with the colored pencils is taking a little longer than mine, which is perfectly fine.
Go ahead and make something amazing.
See you soon.
(upbeat music) (happy guitar music) Well, New Jersey artists, it's time for us to head out.
I hope you've had fun creating with us today and I hope that you learned something new.
I hope that you're able to identify the foreground, the middle ground, the background, and the horizon line in a piece of landscape, art, but most importantly, I hope that you created something that you're proud of and that you had fun today.
Before I go, I wanna give a huge shout out to my daughter Kaylee for being our camera girl and I also wanna say hello to all my students, and my state liner family.
Thank you to everyone who joined us today.
Be well, and we'll see you soon.
Bye.
♪ From my house to yours ♪ From Newark to the Shore ♪ One big New Jersey fam ♪ And we're learning Live ♪ Learning live ♪ Learning live (upbeat music)


- Home and How To

Hit the road in a classic car for a tour through Great Britain with two antiques experts.
 New Episode


 New Episode


Support for PBS provided by:
NJTV Learning Live is a local public television program presented by NJ PBS